Tutorial: InFlow Inventory Agent
InFlow Inventory API Key Setup
- To begin, navigate to the InFlow Inventory website. If you do not have an account yet, proceed to create one by following the registration process.
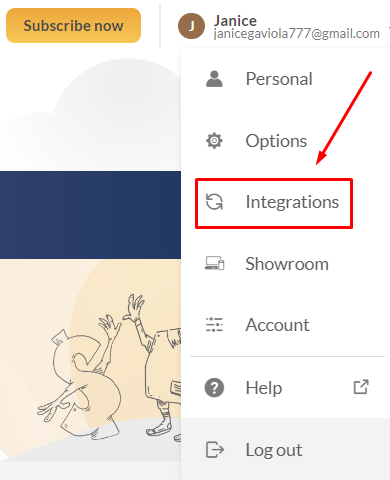
- Once logged in, locate your profile icon located in the top right corner of the webpage. Click on the profile icon to open the dropdown menu. From the dropdown menu, select “Integrations” to proceed.
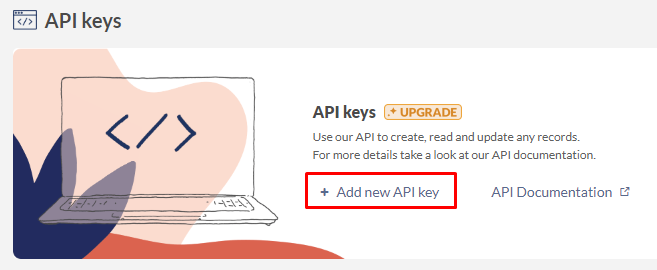
- Scroll down the page until you reach the API Keys section. Within the API Keys section, click on the
Add New API Keybutton to generate a new key.
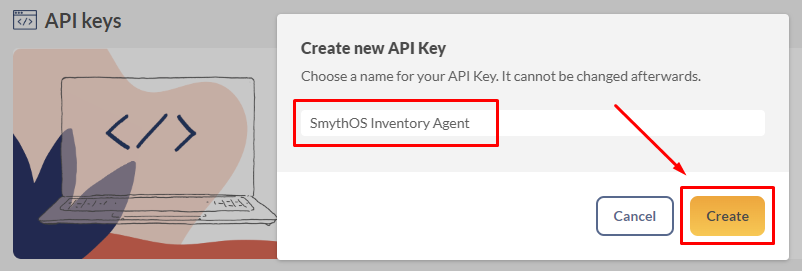
- Provide a unique name for your API Key that clearly identifies its purpose. For instance, in this case, you can name it
SmythOS Inventory Agent.
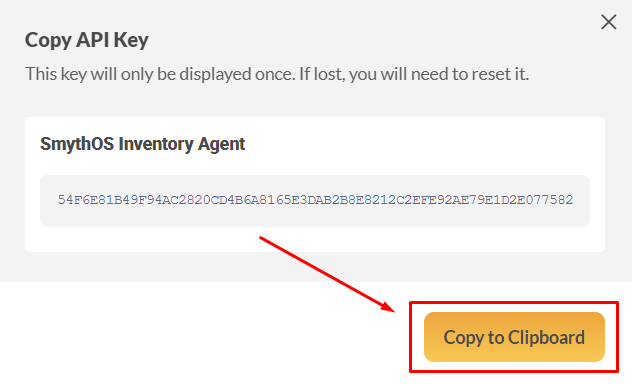
- After creating your API Key, click on the
Copy to Clipboardbutton. Paste the copied API Key into a secure location to ensure you have it readily available. Remember, you can only copy it once, and it won't be visible again after closing the dialog.- Example: InFlow API Key 54F6E81B49F94AC2820CD4B6A8165E3DAB2B8E8212C2EFE92AE79E1D2E077582
- Don't forget to also copy the Company ID as well.
- Example: InFlow Company ID eb70e172-6074-4880-89fd-6057a6817dca

Upload Test Data to InFlow
For testing purposes, it's essential to have some mock information in your InFlow account. If you've already populated your InFlow account with relevant data, feel free to skip this section.
Upload Customer List to InFlow
If you have not yet uploaded your customer list, you can proceed by following the steps below. InFlow can import spreadsheet data if it's saved as a CSV file. If your spreadsheet is not in CSV format yet, you can use Microsoft Excel or Google Sheets and save it as a CSV.
If your customer list is already stored in your InFlow Account, you can skip this step.
- Navigate to the left sidebar of your InFlow account and click on
customer list.
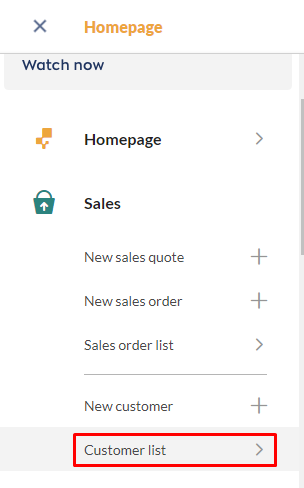
- Click
Import Customers.
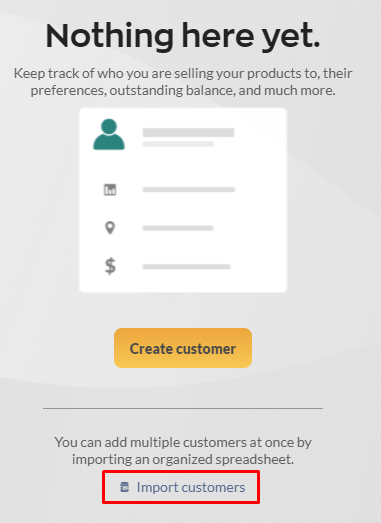
- You can drag and drop your CSV file or click to select a file.
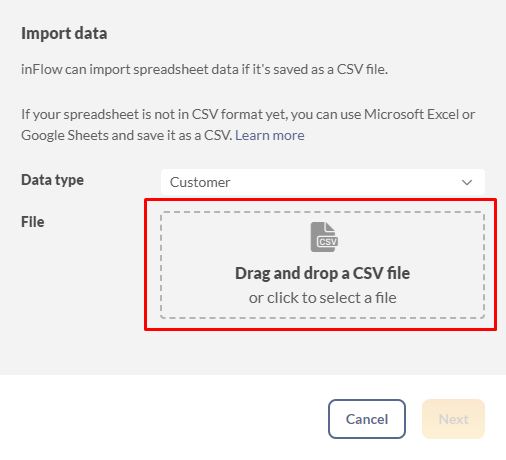
- Once your file is ready, click
nextto proceed.
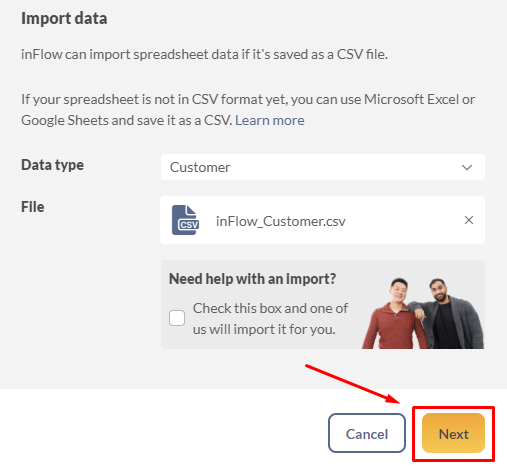
- Then, click
Import.
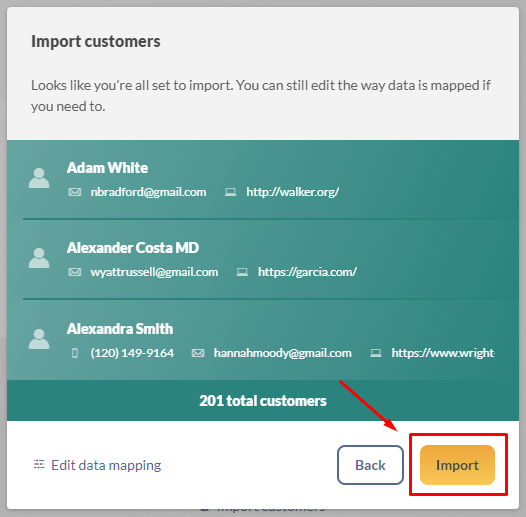
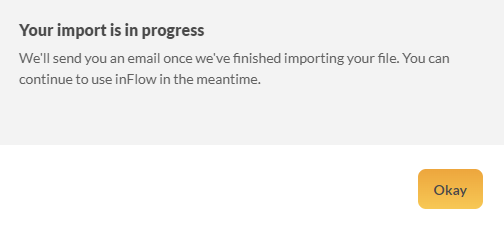
- Once the import process is successful, InFlow will notify you via email.
Upload Vendor List to InFlow
If you have not yet uploaded your Vendor list, you can proceed by following the steps below. InFlow can import spreadsheet data if it's saved as a CSV file. If your spreadsheet is not in CSV format yet, you can use Microsoft Excel or Google Sheets and save it as a CSV. If your product list is already stored in your InFlow Account, you can skip this step.
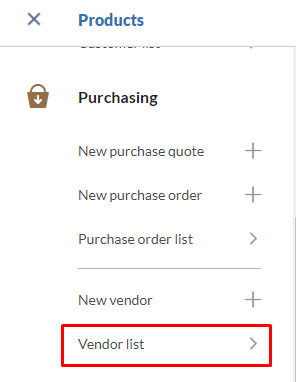
- Navigate to the left side bar of your InFlow account and click on
Vendor List.
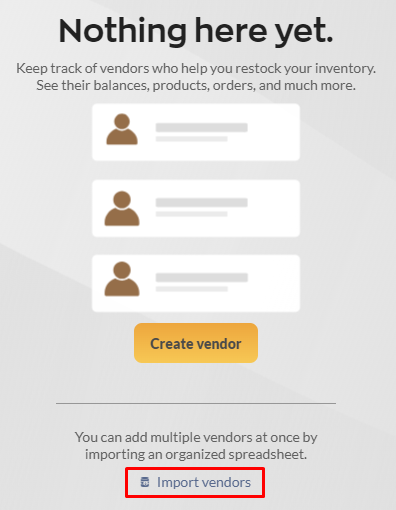
- Click
Import Vendors.
- You can drag and drop your CSV file or click to select a file.
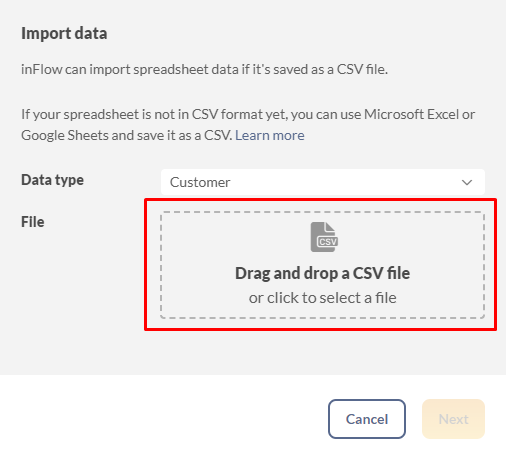
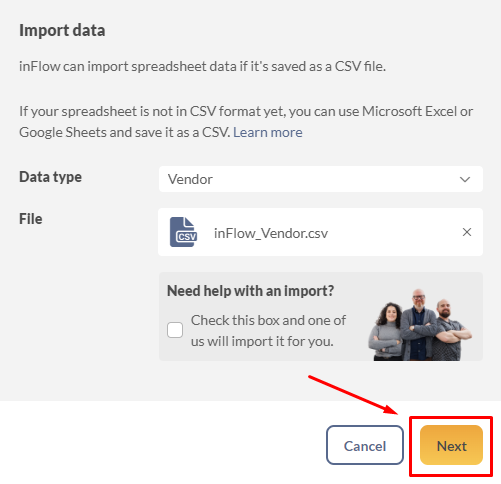
- Once your file is ready, click
nextto proceed.
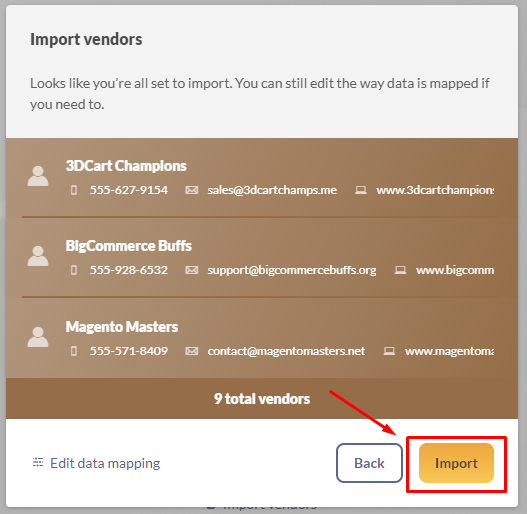
- Then, click
Import.
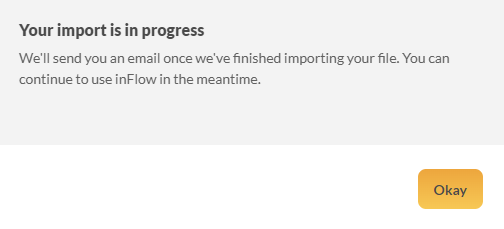
- Once the import process is successful, InFlow will notify you via email.
Upload Product List to InFlow
If you have not yet uploaded your Product list, you can proceed by following the steps below. InFlow can import spreadsheet data if it's saved as a CSV file. If your spreadsheet is not in CSV format yet, you can use Microsoft Excel or Google Sheets and save it as a CSV. If your product list is already stored in your InFlow Account, you can skip this step.
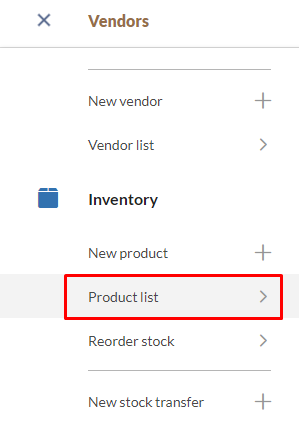
- Navigate to the left sidebar of your InFlow account and click on
Product List.
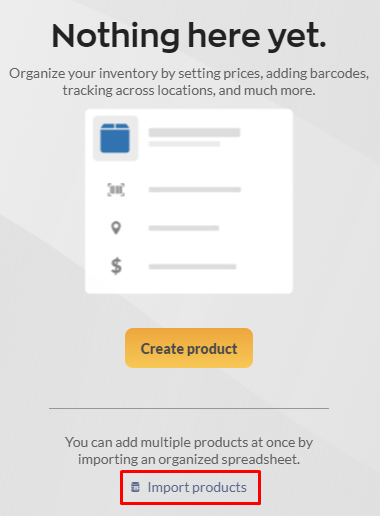
- Click
Import Products.
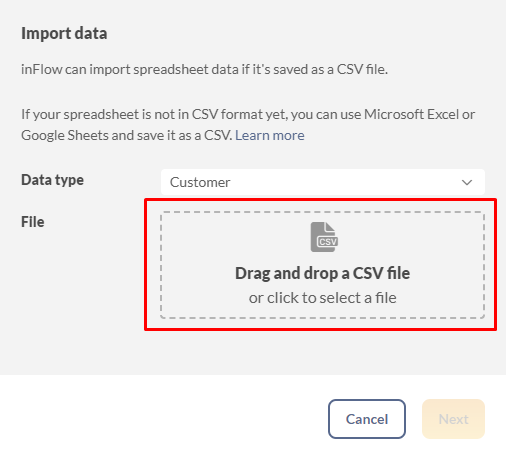
- You can drag and drop your CSV file or click to select a file.
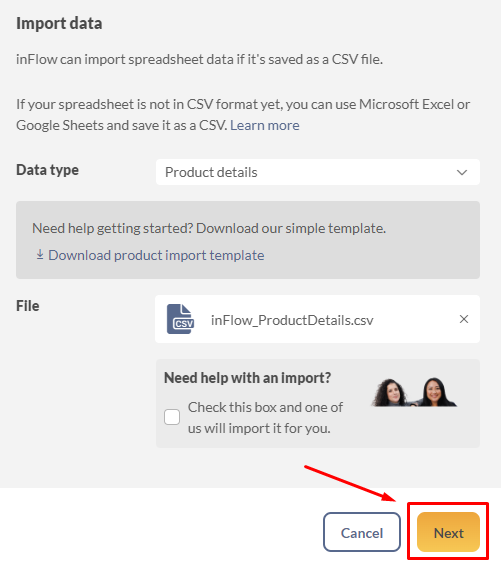
- Once your file is ready, click
nextto proceed.
- Then, click
Import.
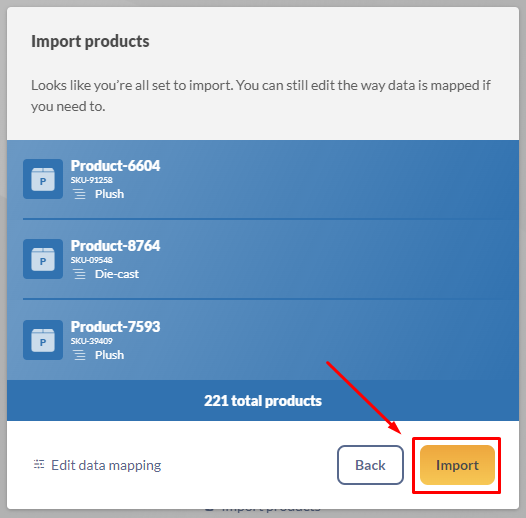
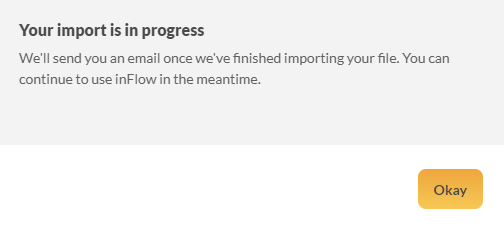
- Once the import process is successful, InFlow will notify you via email.
InFlow Inventory Template Setup
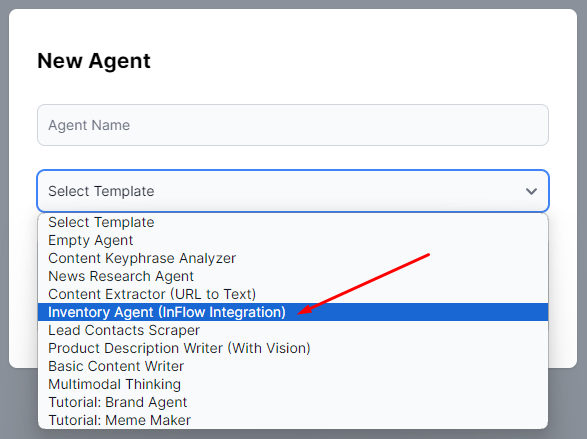
- Go to your SmythOS Dashboard and click on the Create Agent button.

- The template for the Inventory Agent is readily available, simply select it from the drop-down menu and wait for it to initialize.
Adding CompanyID to LLM Component
- Locate the
LLM Promptcomponent. Replace the placeholder with the InFlow Company ID generated from your InFlow Account.- Example: eb70e172-6074-4880-89fd-6057a6817dca
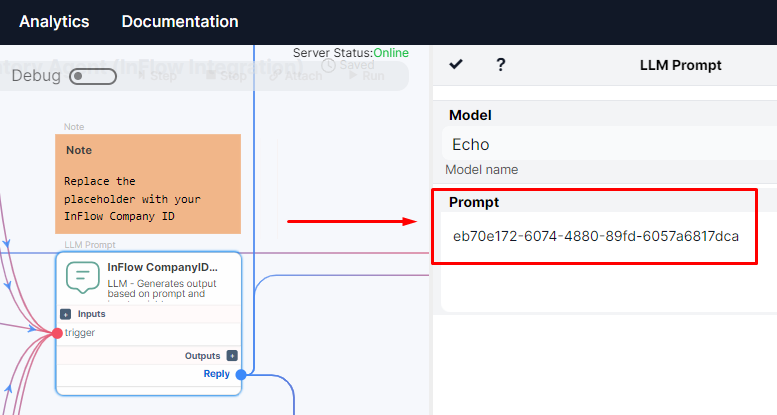
- Don't forget to click the check mark icon to save your configuration.
Adding API Key to the Vault
To know more about the Vault feature, please visit the following link Vault Documentation.
Your API Key will be needed on your API Call components.
- Navigate to the Vault section on your dashboard

- Click the
Add Keybutton to add your InFlow API Key.
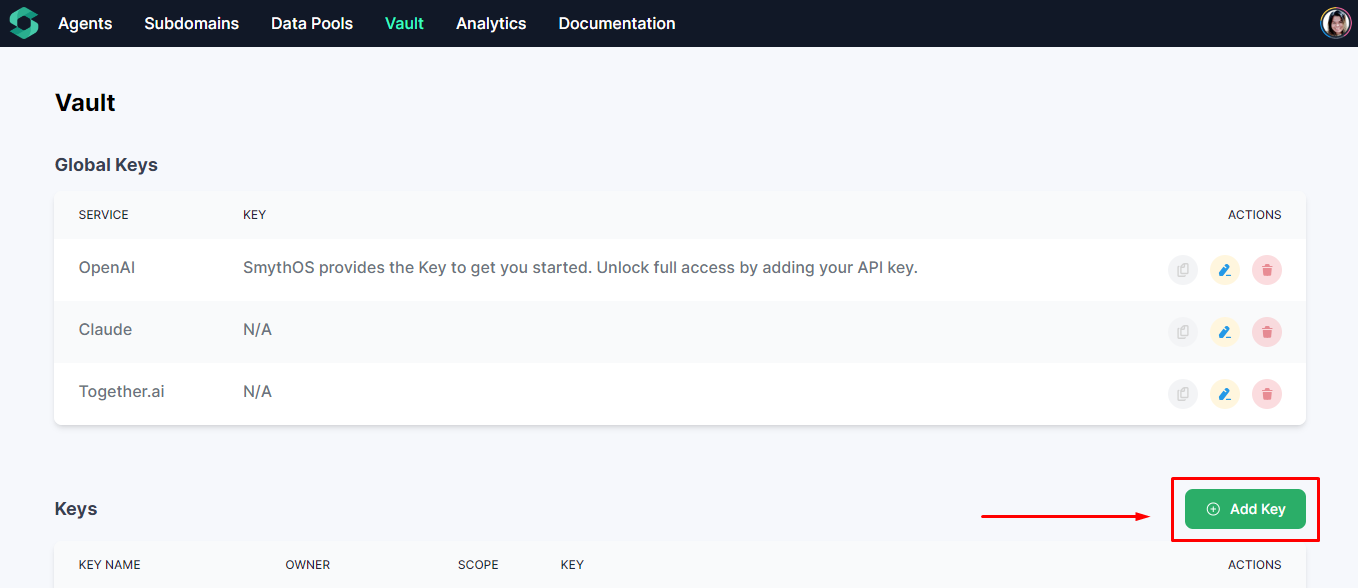
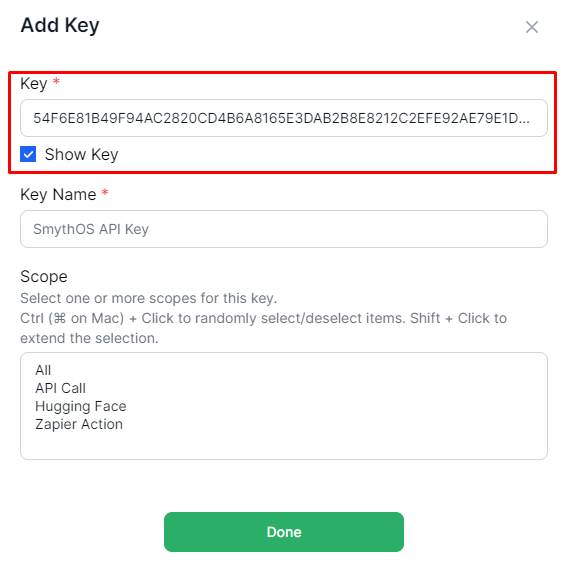
- Input the InFlow API Key generated from your InFlow account.
- Example: 54F6E81B49F94AC2820CD4B6A8165E3DAB2B8E8212C2EFE92AE79E1D2E077582
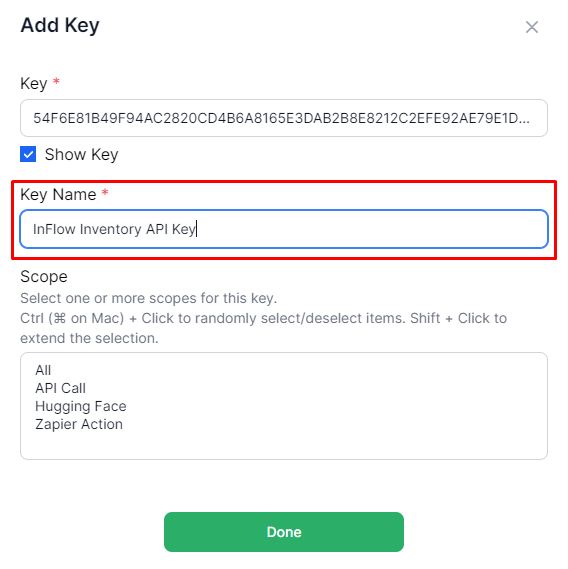
- Choose a unique Key name.
- Example: InFlow Inventory API Key
- Choose
API Callfor the Scope.
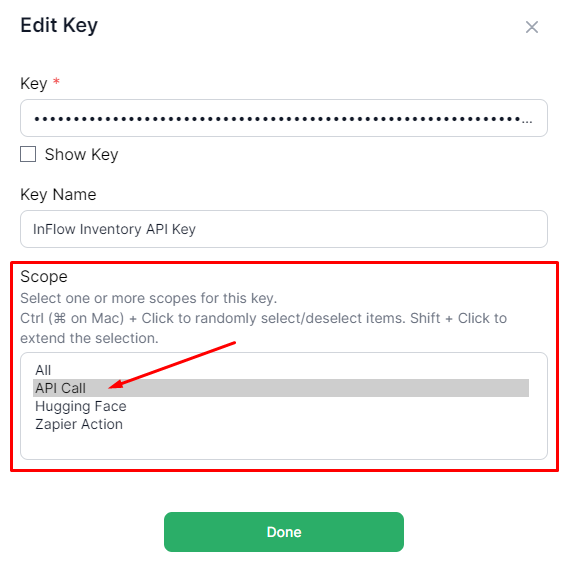
- Click
Doneto save your API Key. Your InFlow API Key has been successfully added to your Vault and is now ready for use.

Adding API Key to API Call Component
To know more about the
API Call Componentplease refer to the API Call Component Documentation.
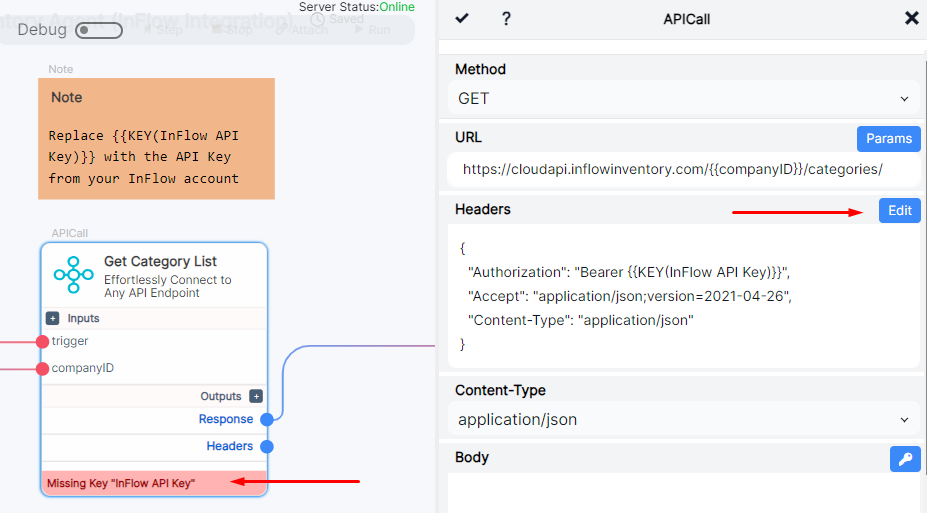
- Look for the API Call component with a missing InFlow API Key. Click on the
Editbutton in the Headers section to input your InFlow API Key.
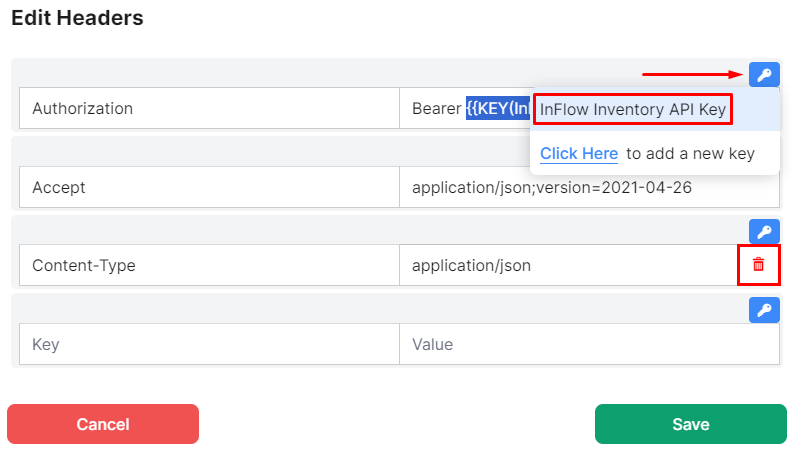
- Highlight the bearer, then click on the key icon to select the InFlow API Key saved in your Vault, then click the
Savebutton.
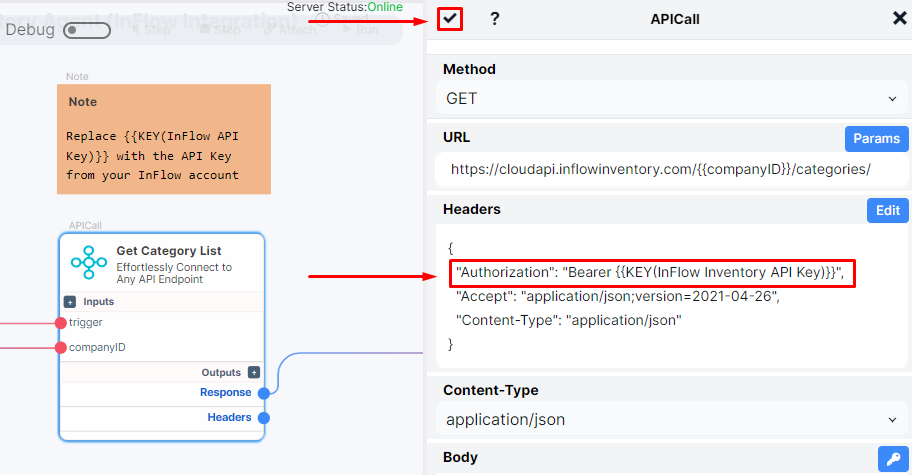
- If you look in the Headers section, your InFlow API key has been successfully loaded. Remember to save your configuration by clicking the check mark icon.
- When you successfully configure your API Call component, the error message will disappear.
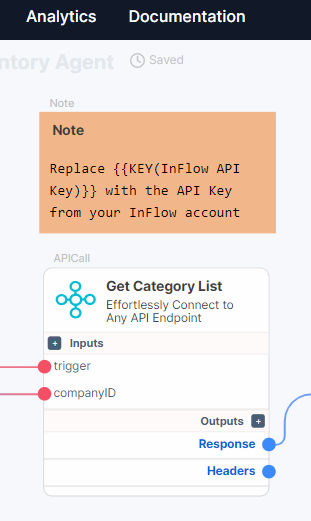
- Repeat this process for any remaining API call components with missing InFlow API Keys.
Test Your Agent
Now that you’ve successfully configured your Agent, let’s test the agent with the following requests.
Get Category List
- Click on the Embodiment icon.
- Then, click the chat icon.

- Ask the agent to get a category list.
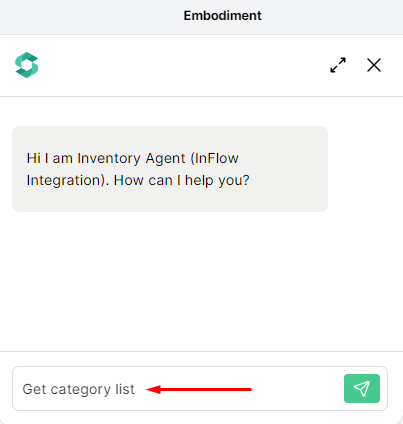
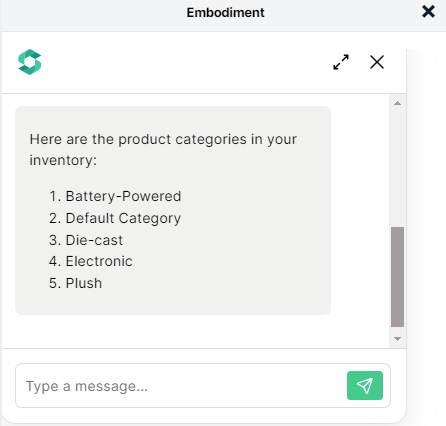
- The agent will now furnish you with the product categories in your InFlow inventory.
Get Customer List
- Ask the agent to retrieve the list of customers.
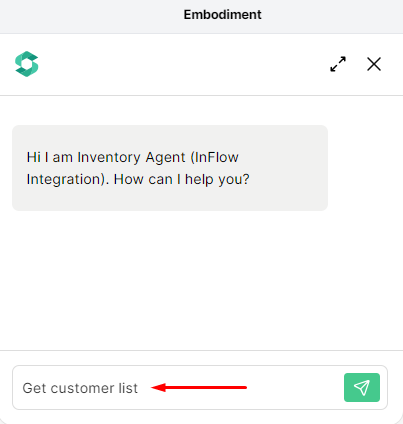
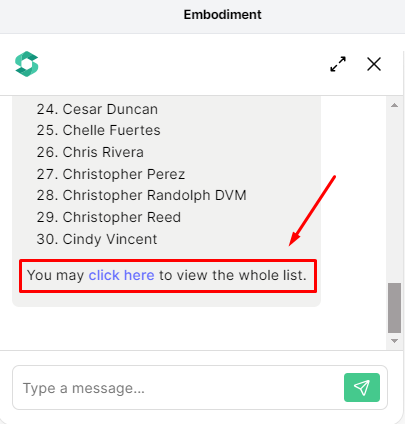
- The agent will now provide the customer list you requested. The agent can retrieve a default of 30 customers, if you want more lists just ask the agent to show more.
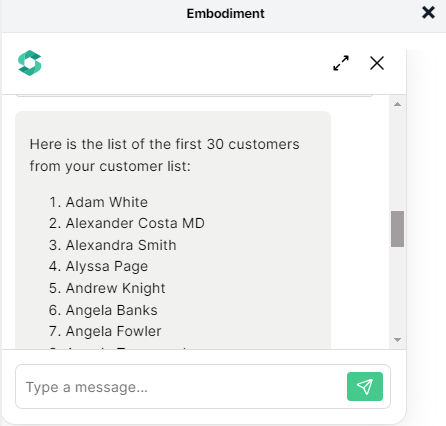
- You can also view the full list of the customers with the link provided by the Agent.
Get Customer Details
- Ask the agent to get some customer details.
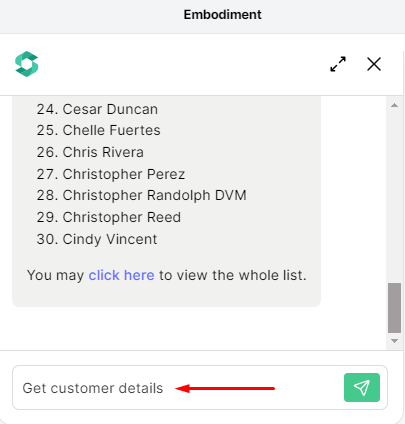
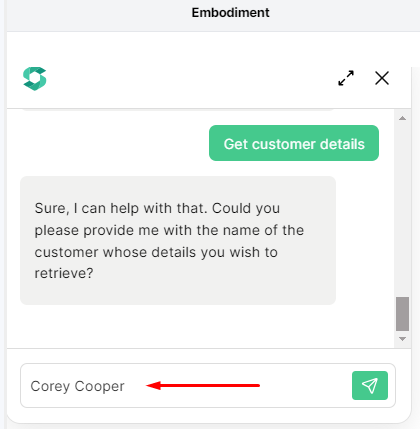
- The agent will now prompt you to provide the name of the customer for whom you would like to obtain some details.
- Example: Chelle Fuertes
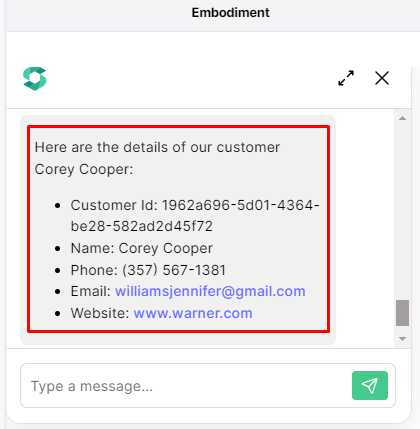
- The Agent will provide details specifically about Chelle Fuertes. If you require information about another customer, feel free to continue asking.
Add new products to the inventory
- Instruct the agent that you wish to add a product to the inventory.
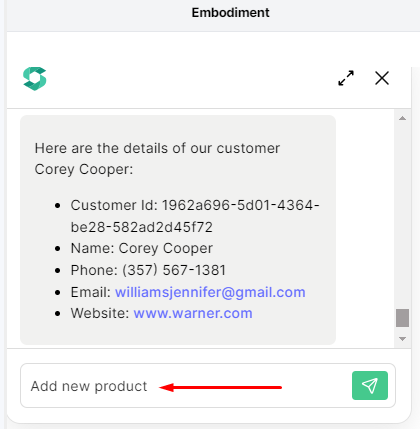
- The Agent will ask you to provide the following details.
Product Name: SKU: Item Type: StockedProduct, NonstockedProduct, Service. Ensure to select the correct item type, as this cannot be changed once it’s set. Origin Country: Provide a 2-character country code representing the country of origin of the product. Example: Tropical Delight Shirt, TD2023, StockedProduct, PH
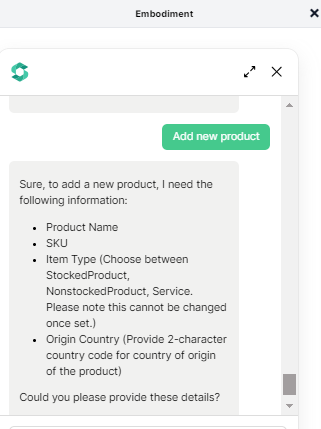
- After providing the details of your newly added product, the agent will confirm that the Tropical Delight Shirt has been successfully added to your InFlow inventory.
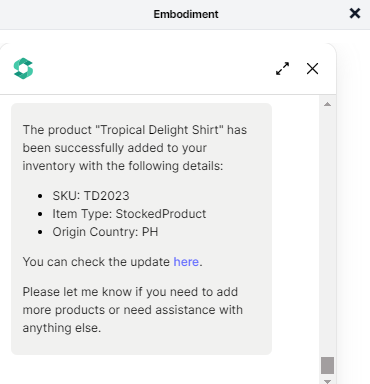
- To access the newly added product, simply click on the link provided by the agent. This will redirect you to your InFlow account.

Get Product List
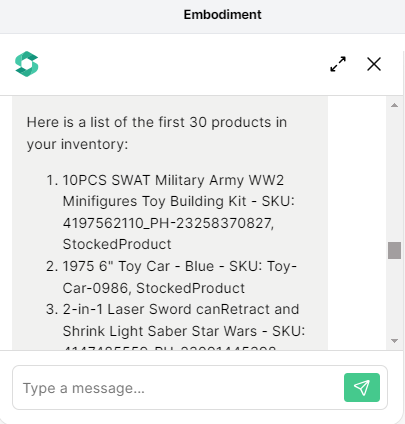
- Ask the agent to get the product list.
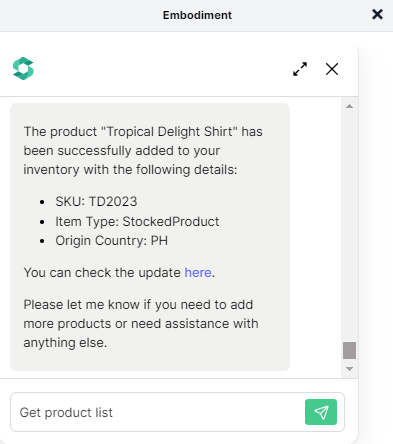
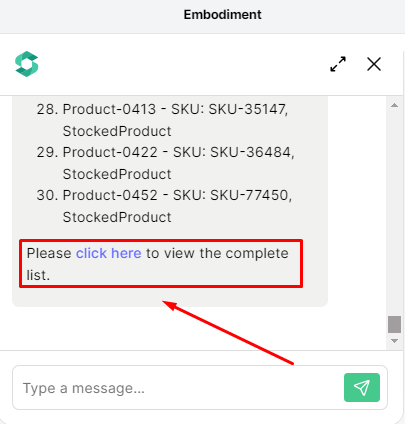
- The agent will provide the requested product list for a maximum of 30 products per inquiry.
- You can also view the entire list by clicking on the link provided by your agent.
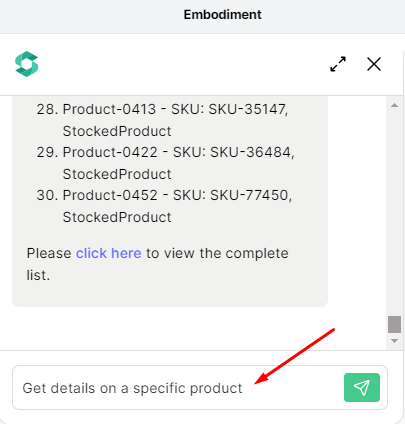
Get details on a specific product
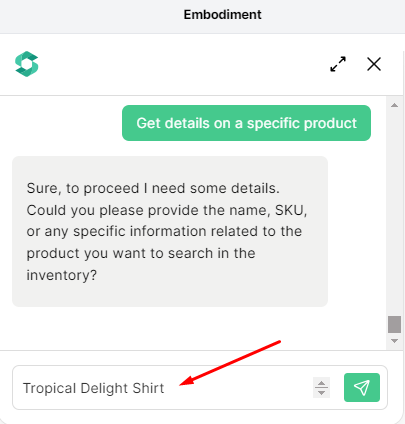
- Ask the agent to get some details on a specific product.
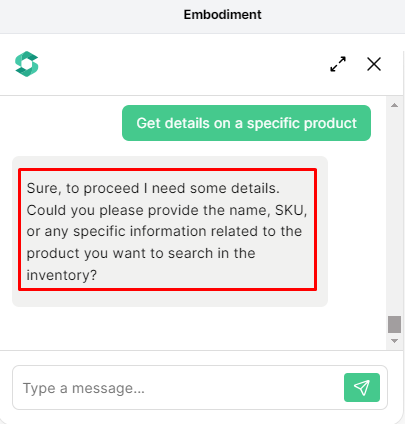
- The agent will request you to provide either a product name, SKU, or any identifiable information before proceeding.
Example: Tropical Delight Shirt
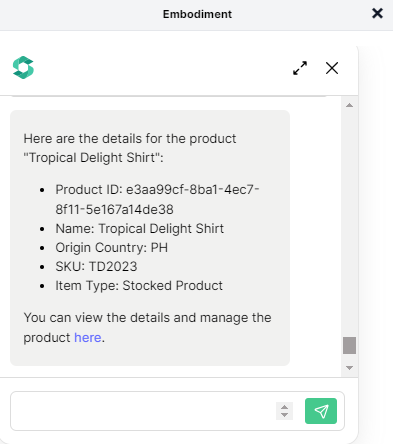
- The agent will provide the details of the specific product you asked. You can also access the product details through the link provided by the agent.
Congratulations! Let us know if you have any questions.