Tutorial: Asana Task Manager Agent
This agent helps teams organize, track, and manage work. Users can seamlessly connect and synchronize their projects and tasks within custom workflows, enhancing productivity and collaboration.
Asana Credentials
To enable integration with Asana, you’ll need to acquire a Client ID and Client Secret. Follow these steps to set up the authentication and establish a connection.
- Go to https://asana.com/ and login. If you do not have an account, proceed to create one by following the registration process.
- Go to your Asana Dashboard and navigate to your profile settings.
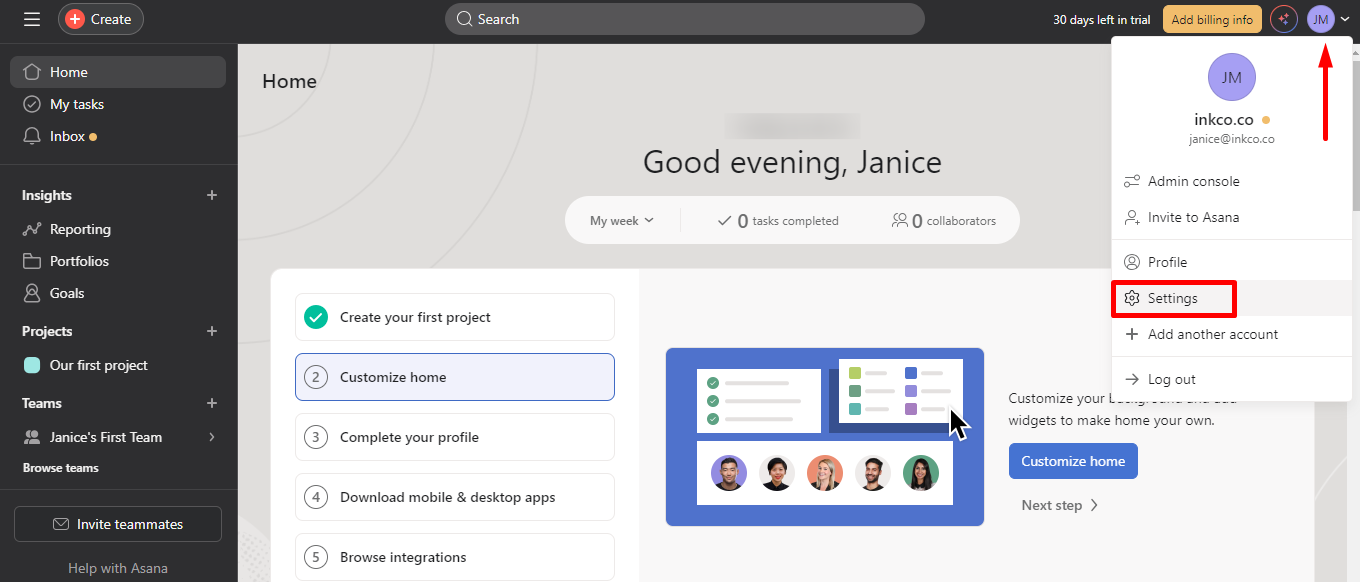
- Navigate to
Appsand clickManage Developer Apps.
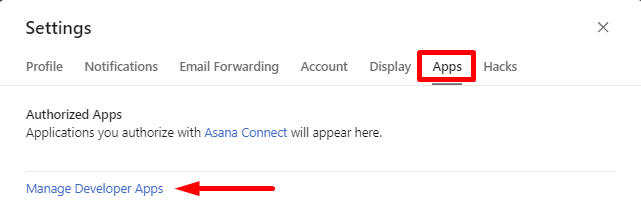
- Click
Create New App.
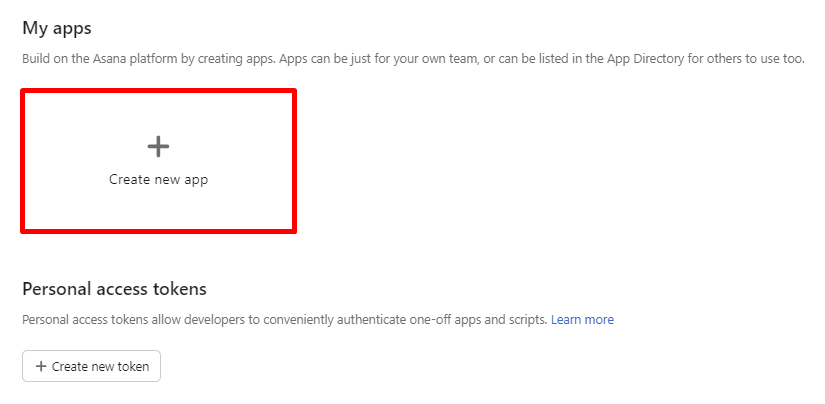
- Name your app, check the box for
Automate work in Asana, and agree to Asana's API terms by checking the corresponding box. Then, click theCreate Appbutton.
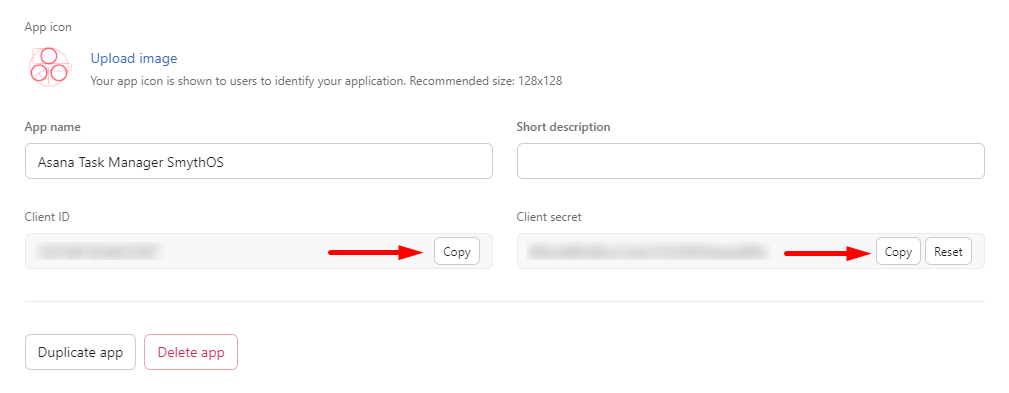
- Your Client ID & Client Secret are now automatically generated. Store your credentials in a secure location, or you can add them to your vault. Click here to learn more about adding your API keys to the vault.
- Navigate to the left sidebar and click
OAuthand clickAdd Redirect URL.
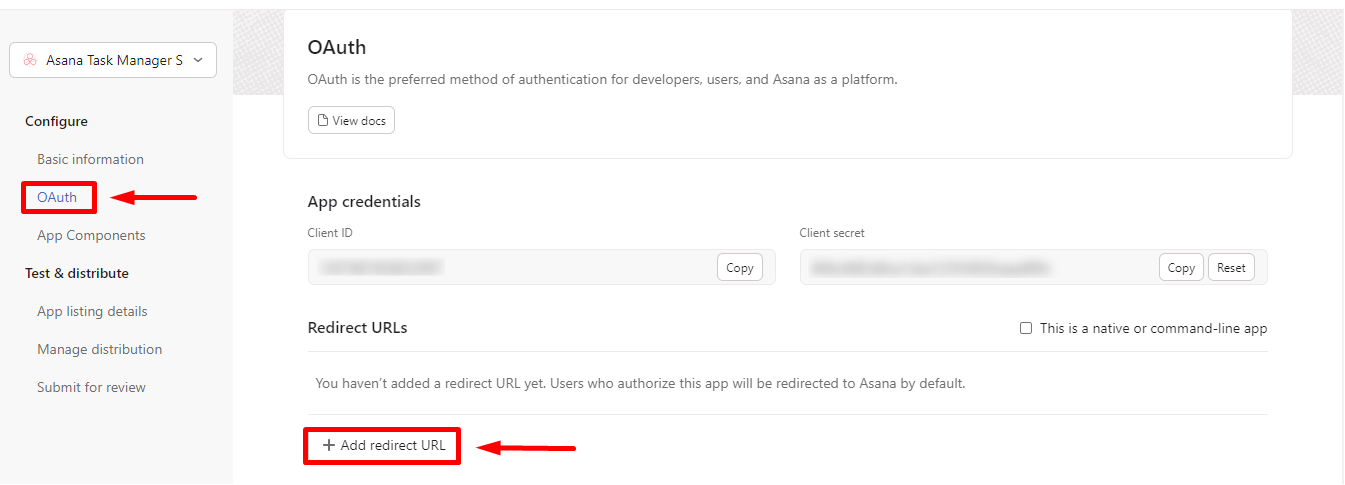
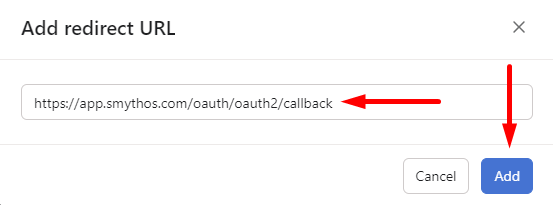
- Add this link: https://app.smythos.com/oauth/oauth2/callback to allow proper authentication callbacks. Then, click the
Addbutton to save your configuration.
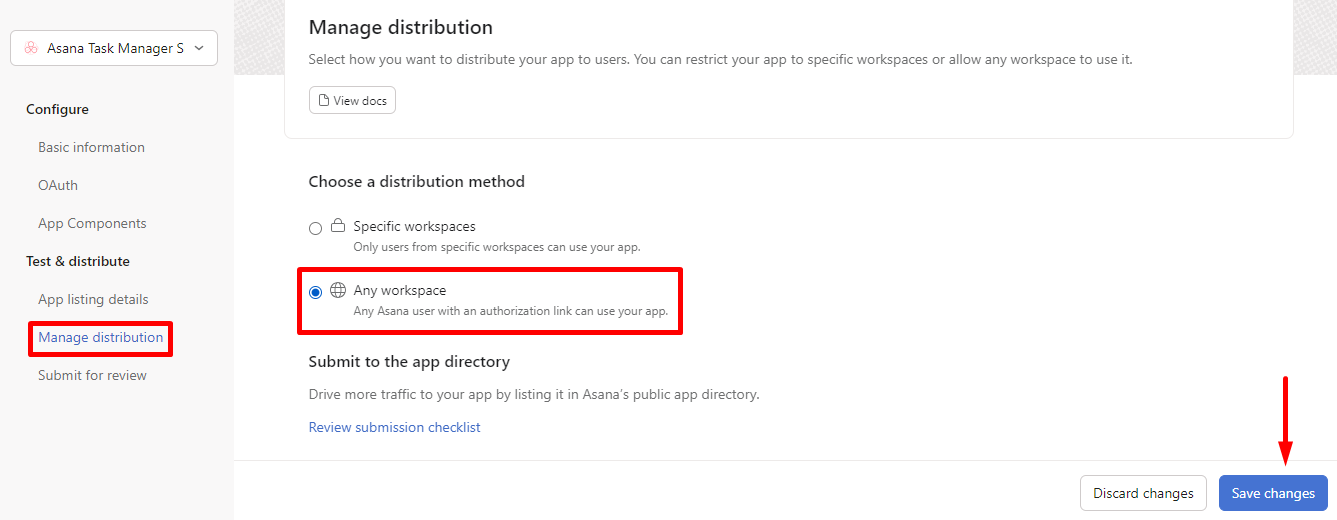
- Navigate to the left sidebar and click
Manage Distribution, then choose a distribution method. In this instance, let’s chooseAny Workspaceand click theSavebutton to save the changes.
Agent Setup
- In SmythOS, navigate to the templates tab.
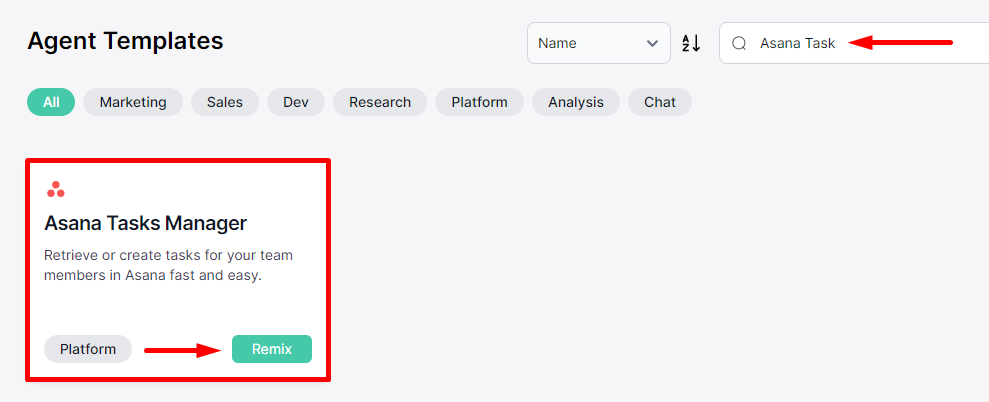
- You can scroll down to find the
Asana Task Manageragent or simply search for it in the Search tab, then click theRemixbutton.
- Allow the template to initialize and configure.
Agent Variables Setup
Individual users in Asana also have their own Global ID.
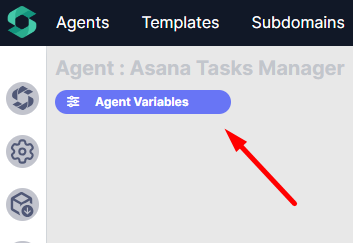
- Within the builder, click the
Agent Variablesbutton. These are the values that can be used across any component.
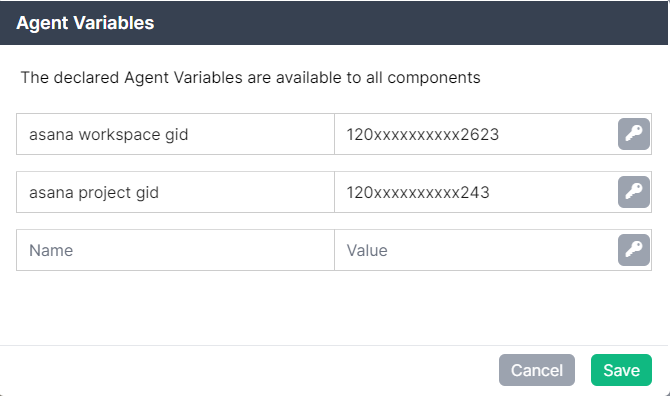
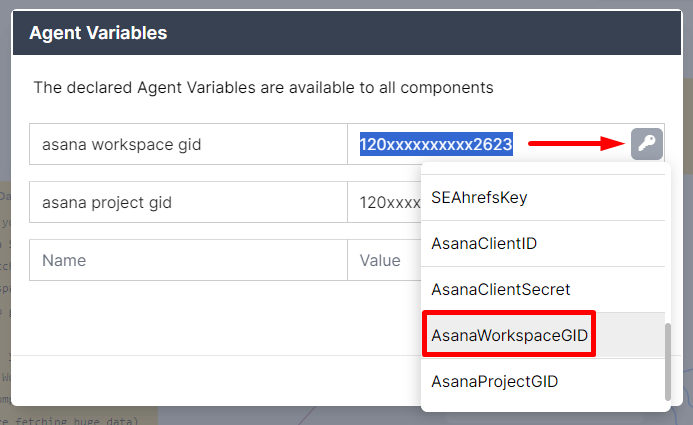
- We have two variables here, the
Asana Worskpace Global IDandAsana Project Globad ID. We need these IDs in order to use the agent.
Go to https://app.asana.com/api/1.0/workspaces to get your Asana Workspace Global ID. Copy your Global ID number and store it in a secure location, or you can add it to your SmythOS vault. Click here to learn more about adding your keys to the vault.
Go to https://app.asana.com/api/ 1.0/projects to get your Asana Project Global ID. Use "Ctrl+F" to find the project that you want to use, e.g., SmythOS. Copy your Global ID number and store in a secure location, or you can add them to your SmythOS vault. Click here to learn more about adding your keys to the vault.
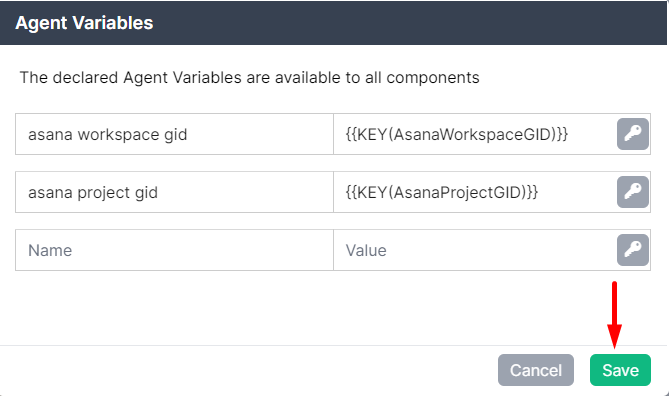
- Now, let’s input the IDs. Click the key icon and select your stored Asana Workspace Global ID from your vault.
- Next, click the key icon and select your stored Asana Project Global ID from your vault.

- Then, click
Saveto save your configuration.
Get Users in a Workspace Setup
- Go here https://developers.asana.com/reference/getusersforworkspace and copy the GET URL.
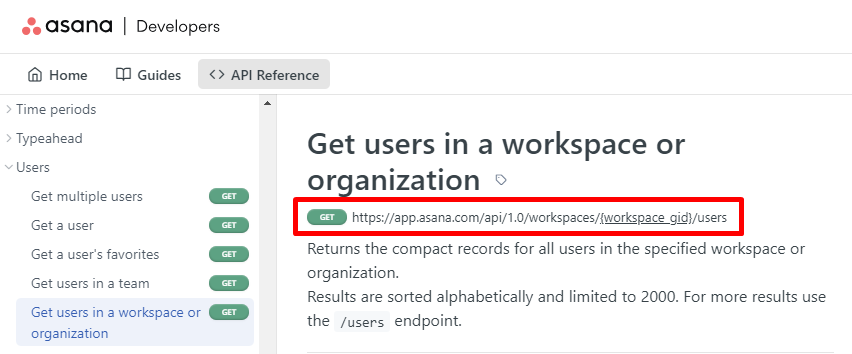
- Paste the URL into your browser and replace the area in the brackets with your Workspace Global ID. https://app.asana.com/api/1.0/workspaces/{workspace_gid}/users. This will provide you with a list of all users, which you can then save as an .xml file.
Note: Files accepted in SmythOS data space include .xml, .pdf, .doc, .docx, .txt, .html, or .htm formats.
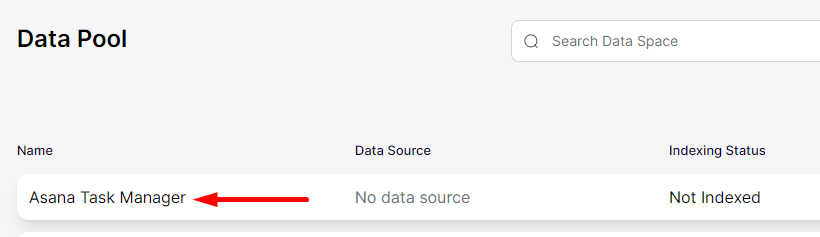
Data Pool Setup
Now, let's add your XML file to your Data Space.
- In SmythOS, navigate to the
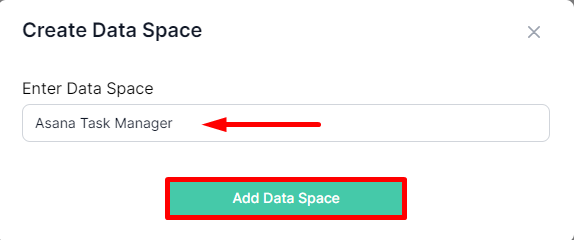
Data Pooltab and clickAdd Data Space.

- Enter your Data Space name and click the
Add Data Spacebutton.
- Click on the Data Space you have created.
- Then, click
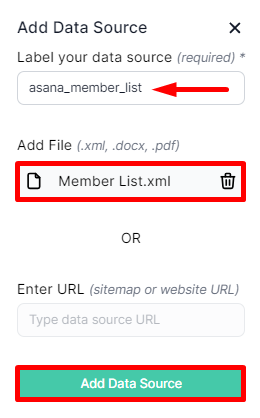
Add Source.

- Label your data source for easy identification, then upload your XML file or drag and drop it. Next, click the
Add Data Sourcebutton.
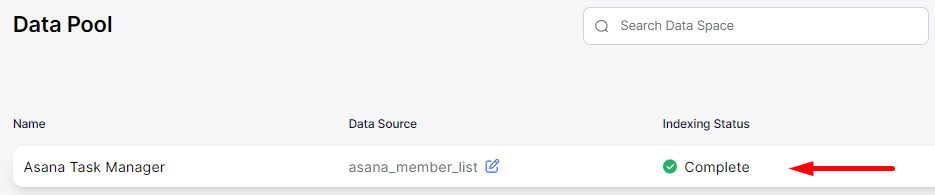
- Then, wait for your data source to be fully indexed.
Data Lookup Component Setup
In the builder, locate the Data Lookup component. Click the gear icon to open the settings, then select the list you want to use. Then, don’t forget to click the check icon to save your configuration.
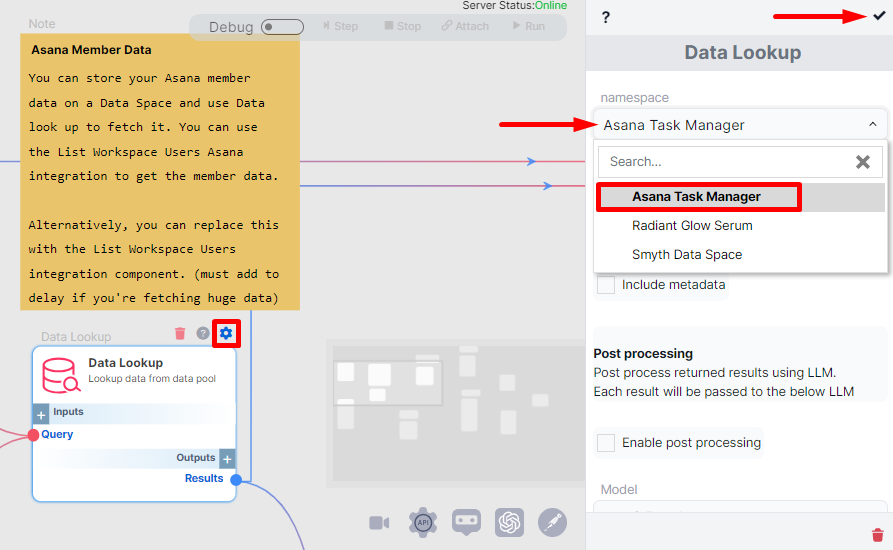
Note: You can store your Asana member data on a Data Space and use Data look up to fetch it. You can use the List Workspace Users Asana integration to get the member data. Alternatively, you can replace this with the List Workspace Users integration component. (must add to delay if you're fetching huge data).
Asana Components Setup
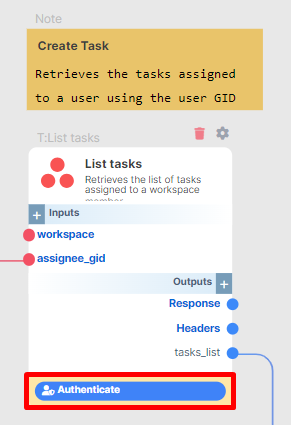
Perform the following actions on the Asana List Task and Asana Create Task components.
- In the builder, locate the Asana component. Click the gear icon to open the settings.
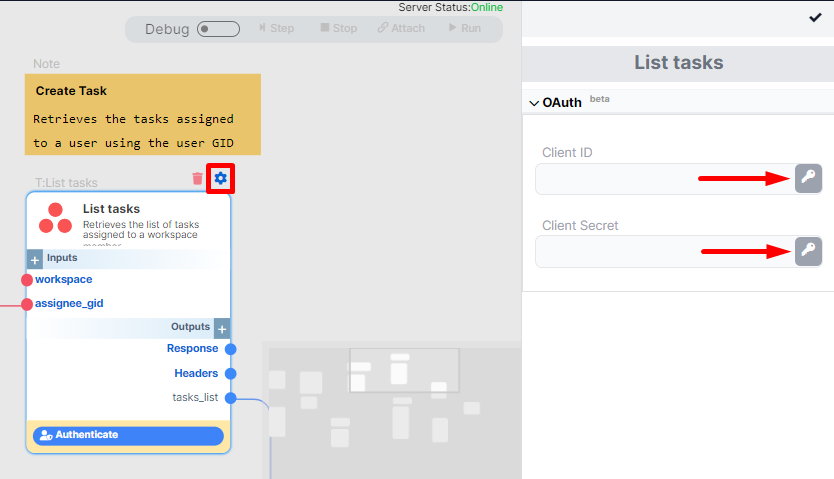
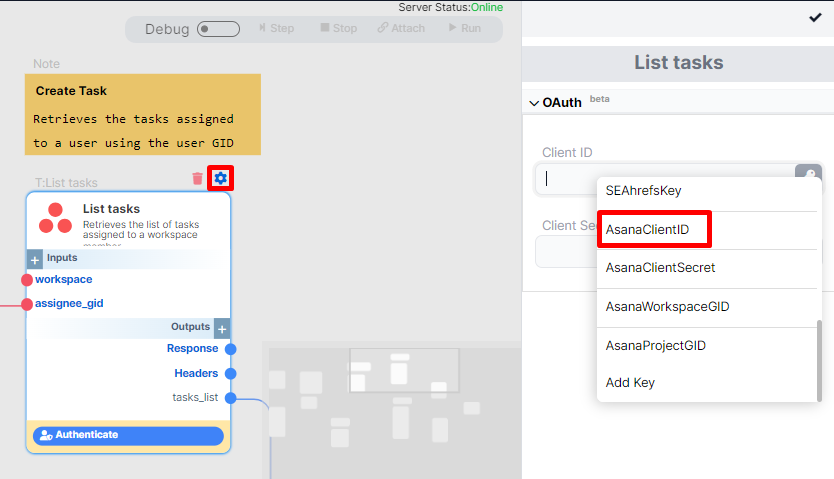
- In the Client ID field, click the key icon and select your stored Asana ClientID key from your vault.
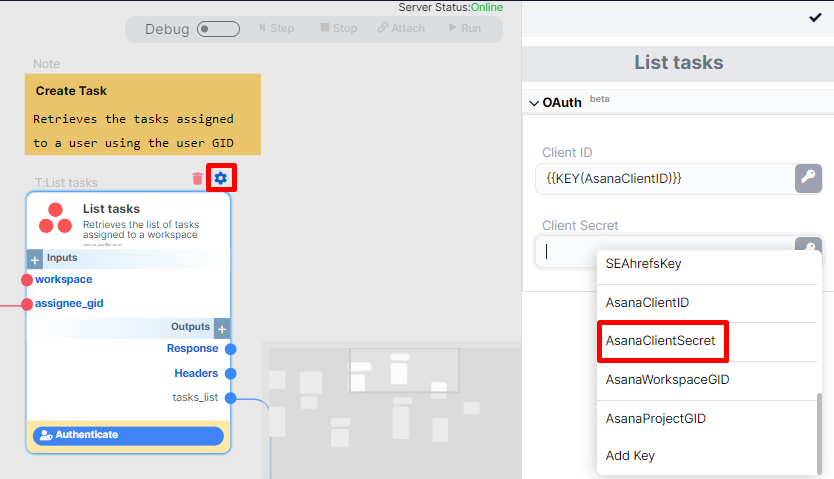
- In the Client Secret field, click the key icon and select your stored Asana ClientSecret key from your vault.
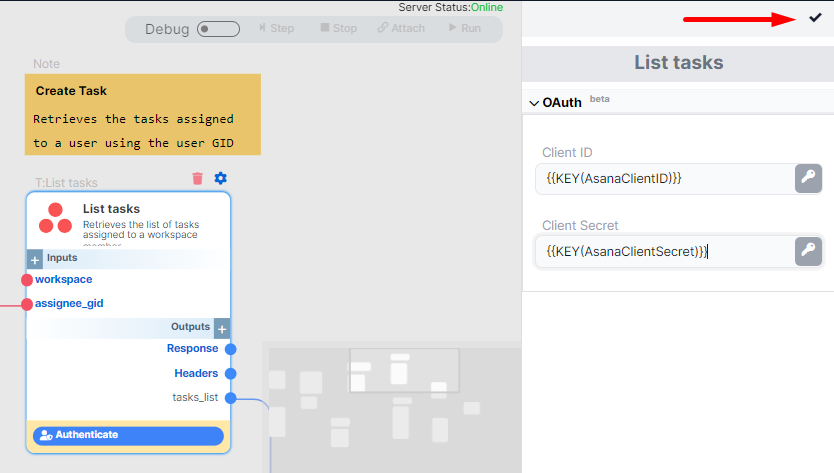
- Then, don’t forget to click the check icon to save your configuration.
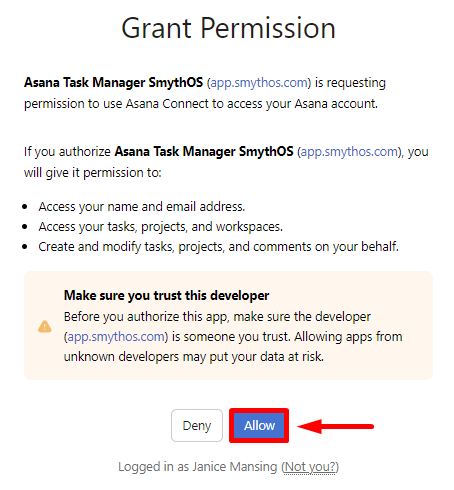
- After configuration, click the Authenticate button to grant Asana permission.
- Then, click
Allow.
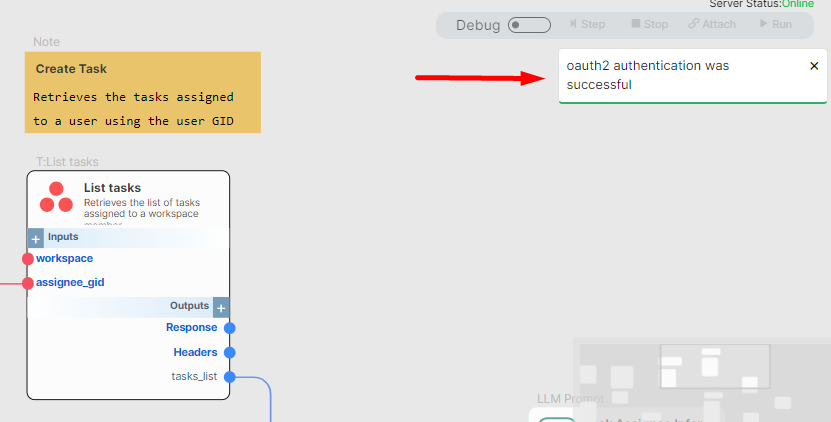
- In the builder, you will be notified that your OAuth authentication was successful.
- Repeat the process with the other Asana component.
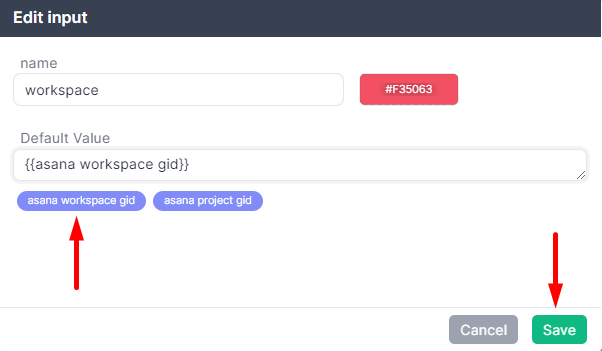
- Navigate to the
List Tasks Asana componentand click the edit icon in the workspace section.
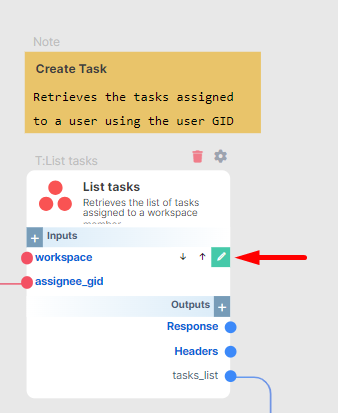
- Next, select
asana workspace gidas the default value and click save.
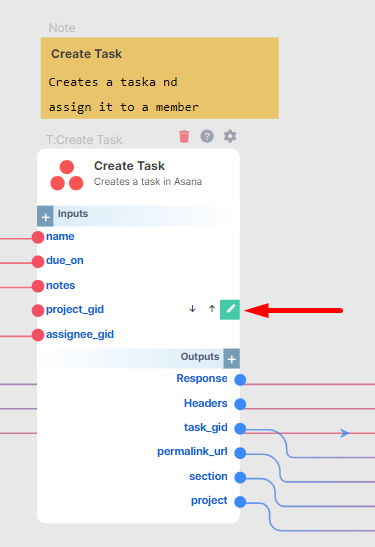
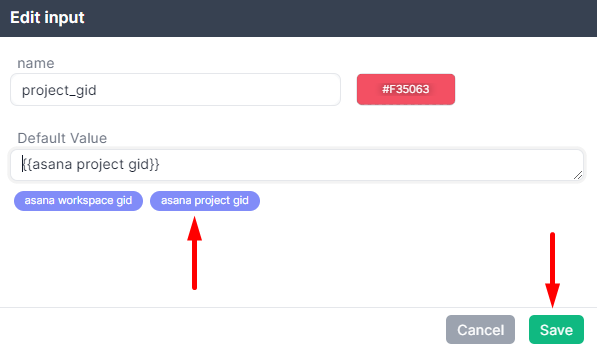
- Navigate to the
Create Task Asana componentand click the edit icon in the project_gid section.
- Next, select
asana project gidas the default value and click save.
- You're all set and ready to run the workflow in Asana.