YouTube to SEO Content Maker Agent
The YouTube to SEO Content Maker Agent is designed to transform a YouTube video's transcript into high-quality, SEO-optimized written content with minimal input.
You provide a YouTube video ID, and the agent will:
- Fetch the full transcript from the video
- Use the transcript as a source to write a new piece of content
- Generate structured, ready-to-publish content that can be optimized for SEO
Video Tutorial: The create_content endpoint accepts YouTube video IDs, which are the characters found after ?v= in the video URL (e.g., in https://www.youtube.com/watch?v=4FT5RYuifwE, the ID is 4FT5RYuifwE).
Use Cases
-
Repurposing Content Quickly turn your existing video library into a steady stream of blog posts to drive organic traffic.
-
SEO and Topic Authority Expand your website's content footprint by covering topics discussed in detail in your videos, boosting your site's topical authority.
-
Content Workflow Automation Automate the first draft of written content, allowing writers to focus on editing, optimization, and promotion.
Testing the Agent
Step 1: Subscribe to the YouTube Transcriptor API
This agent requires an external API to fetch the video transcripts.
- Go to RapidAPI and create an account.
- Navigate to the Youtube Transcriptor API.
- Select a subscription plan (Basic is free for 20 requests/month) and click
Subscribe.
Step 2: Access the Agent and Configure Credentials
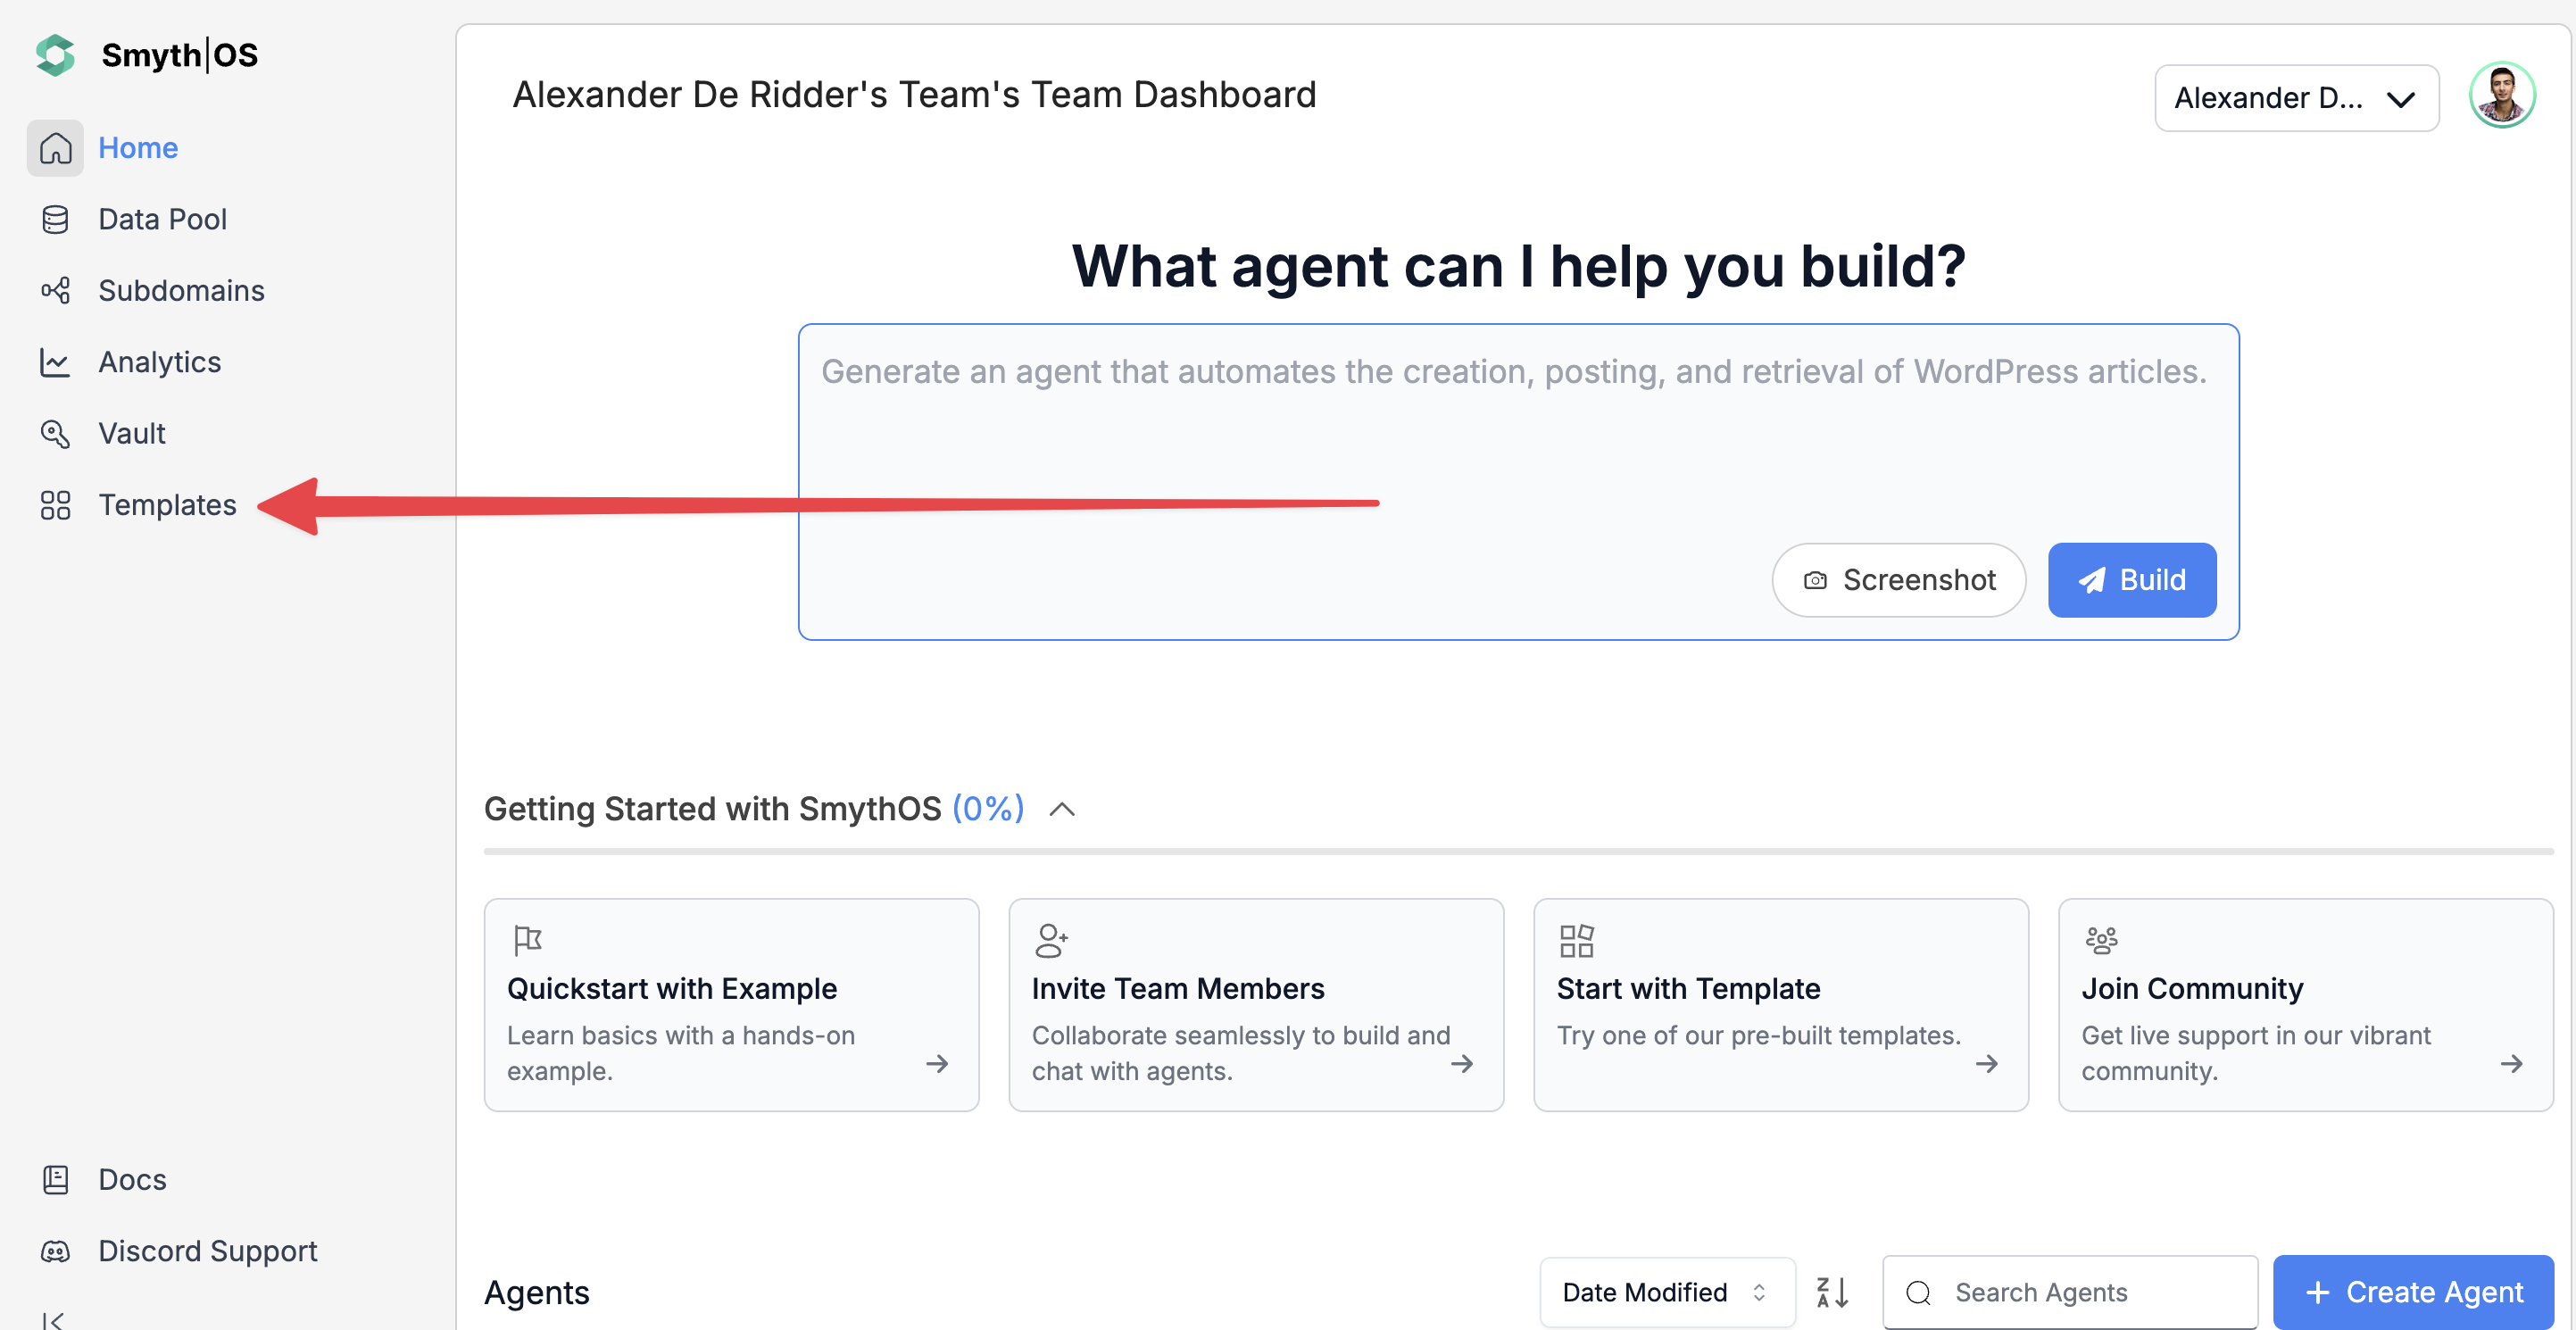
- Go to the Templates section in the sidebar.
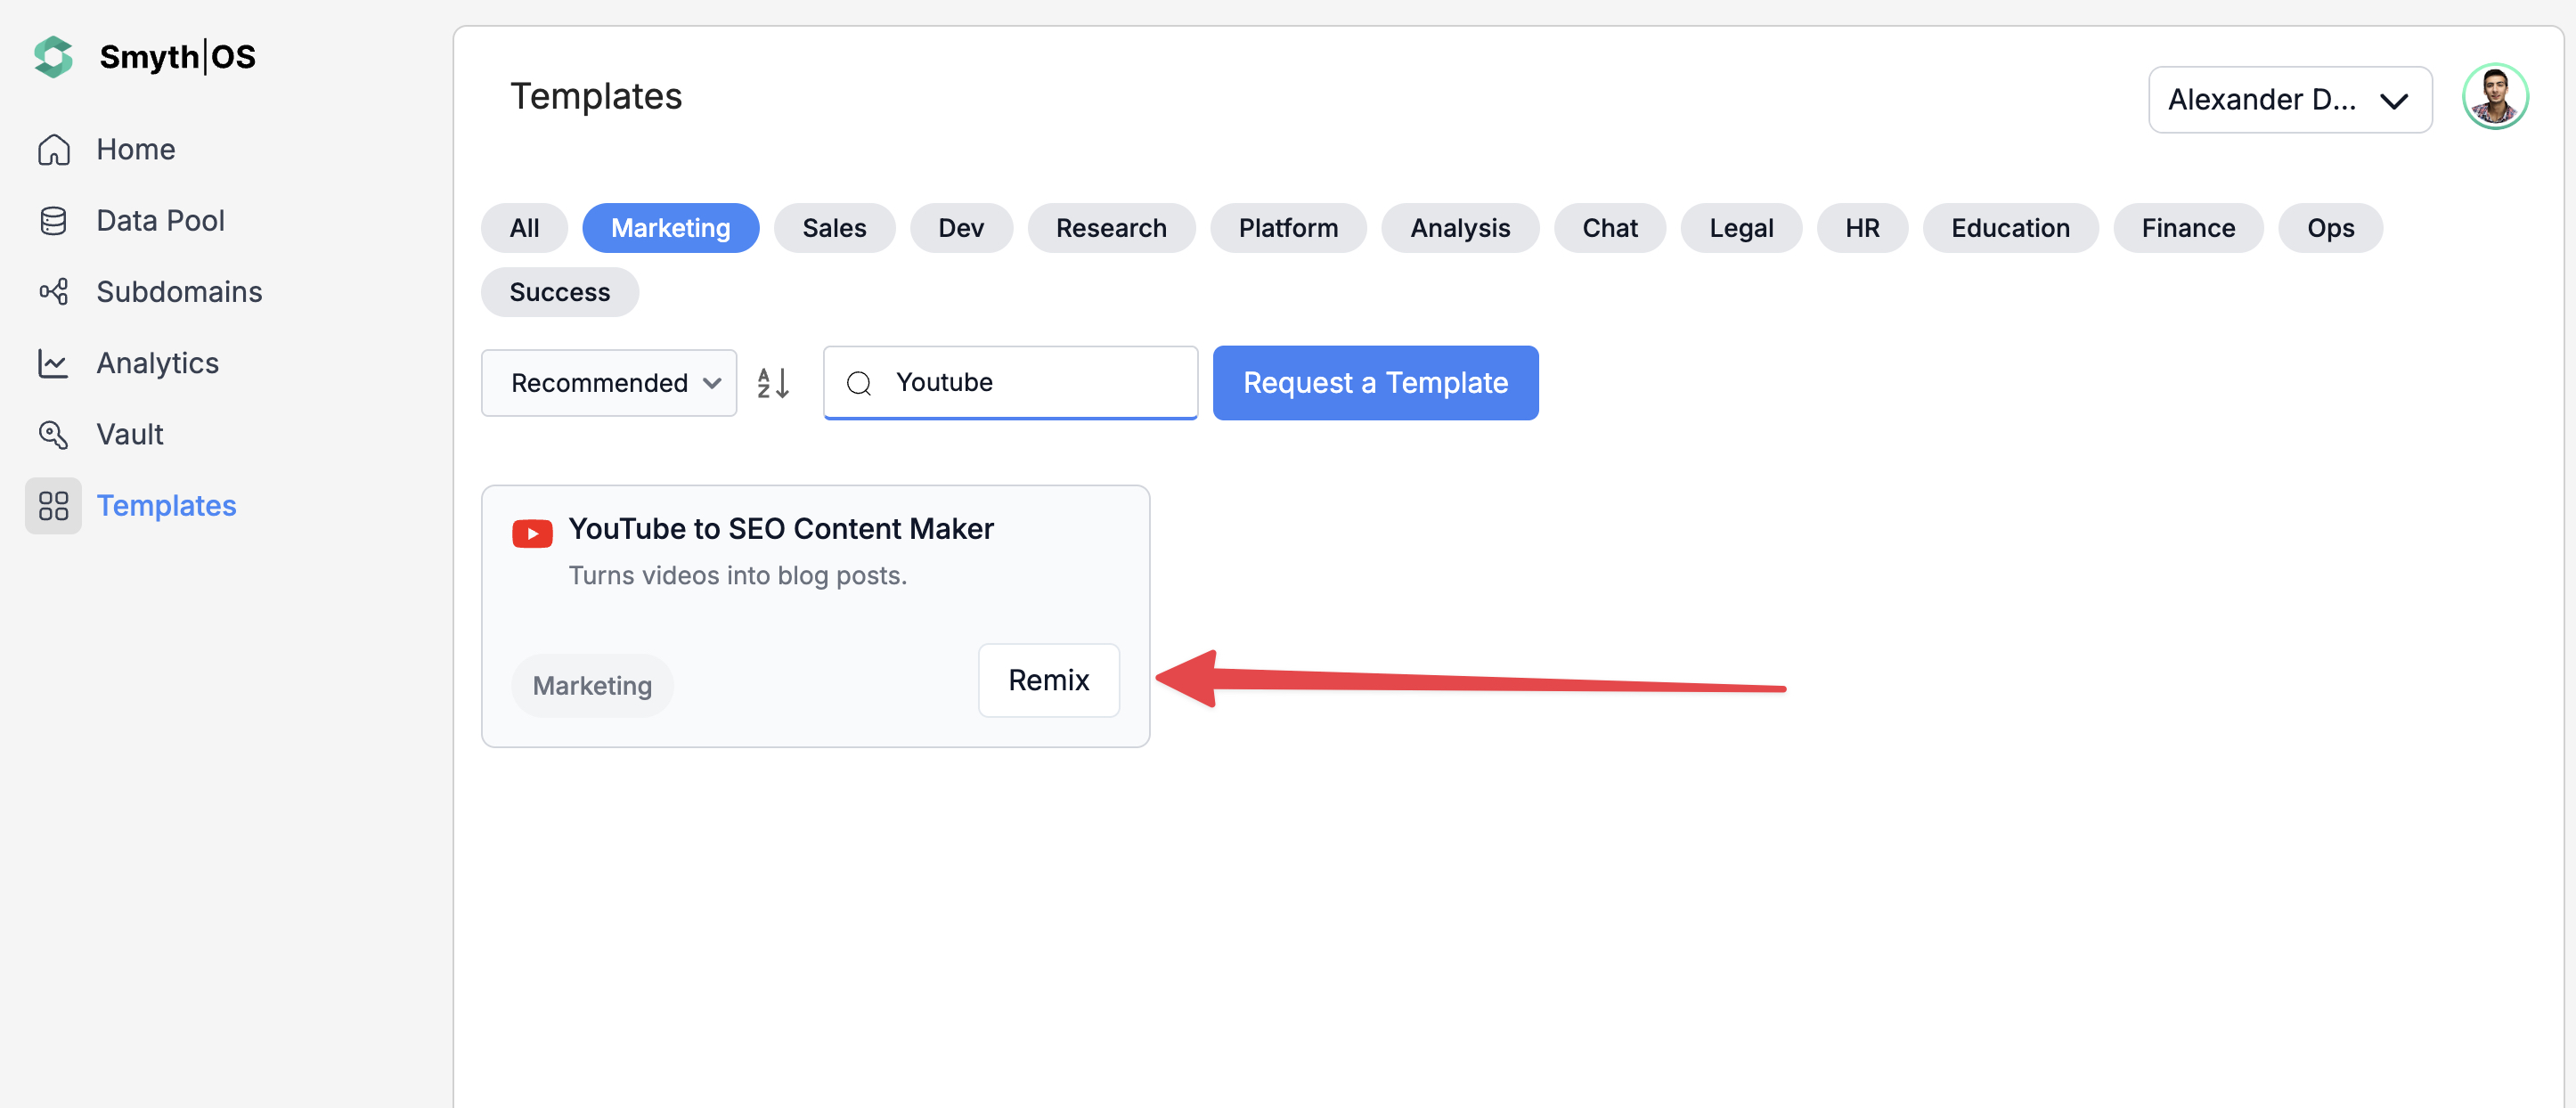
- Search for YouTube to SEO Content Maker Agent.
- Click Remix to open the workflow in Agent Studio.
Connect to RapidAPI
This agent uses the RapidAPI platform for accessing YouTube transcripts. Follow our guide on Connecting to RapidAPI to set up your API key within the agent's workflow.
Step 3: Run the Agent
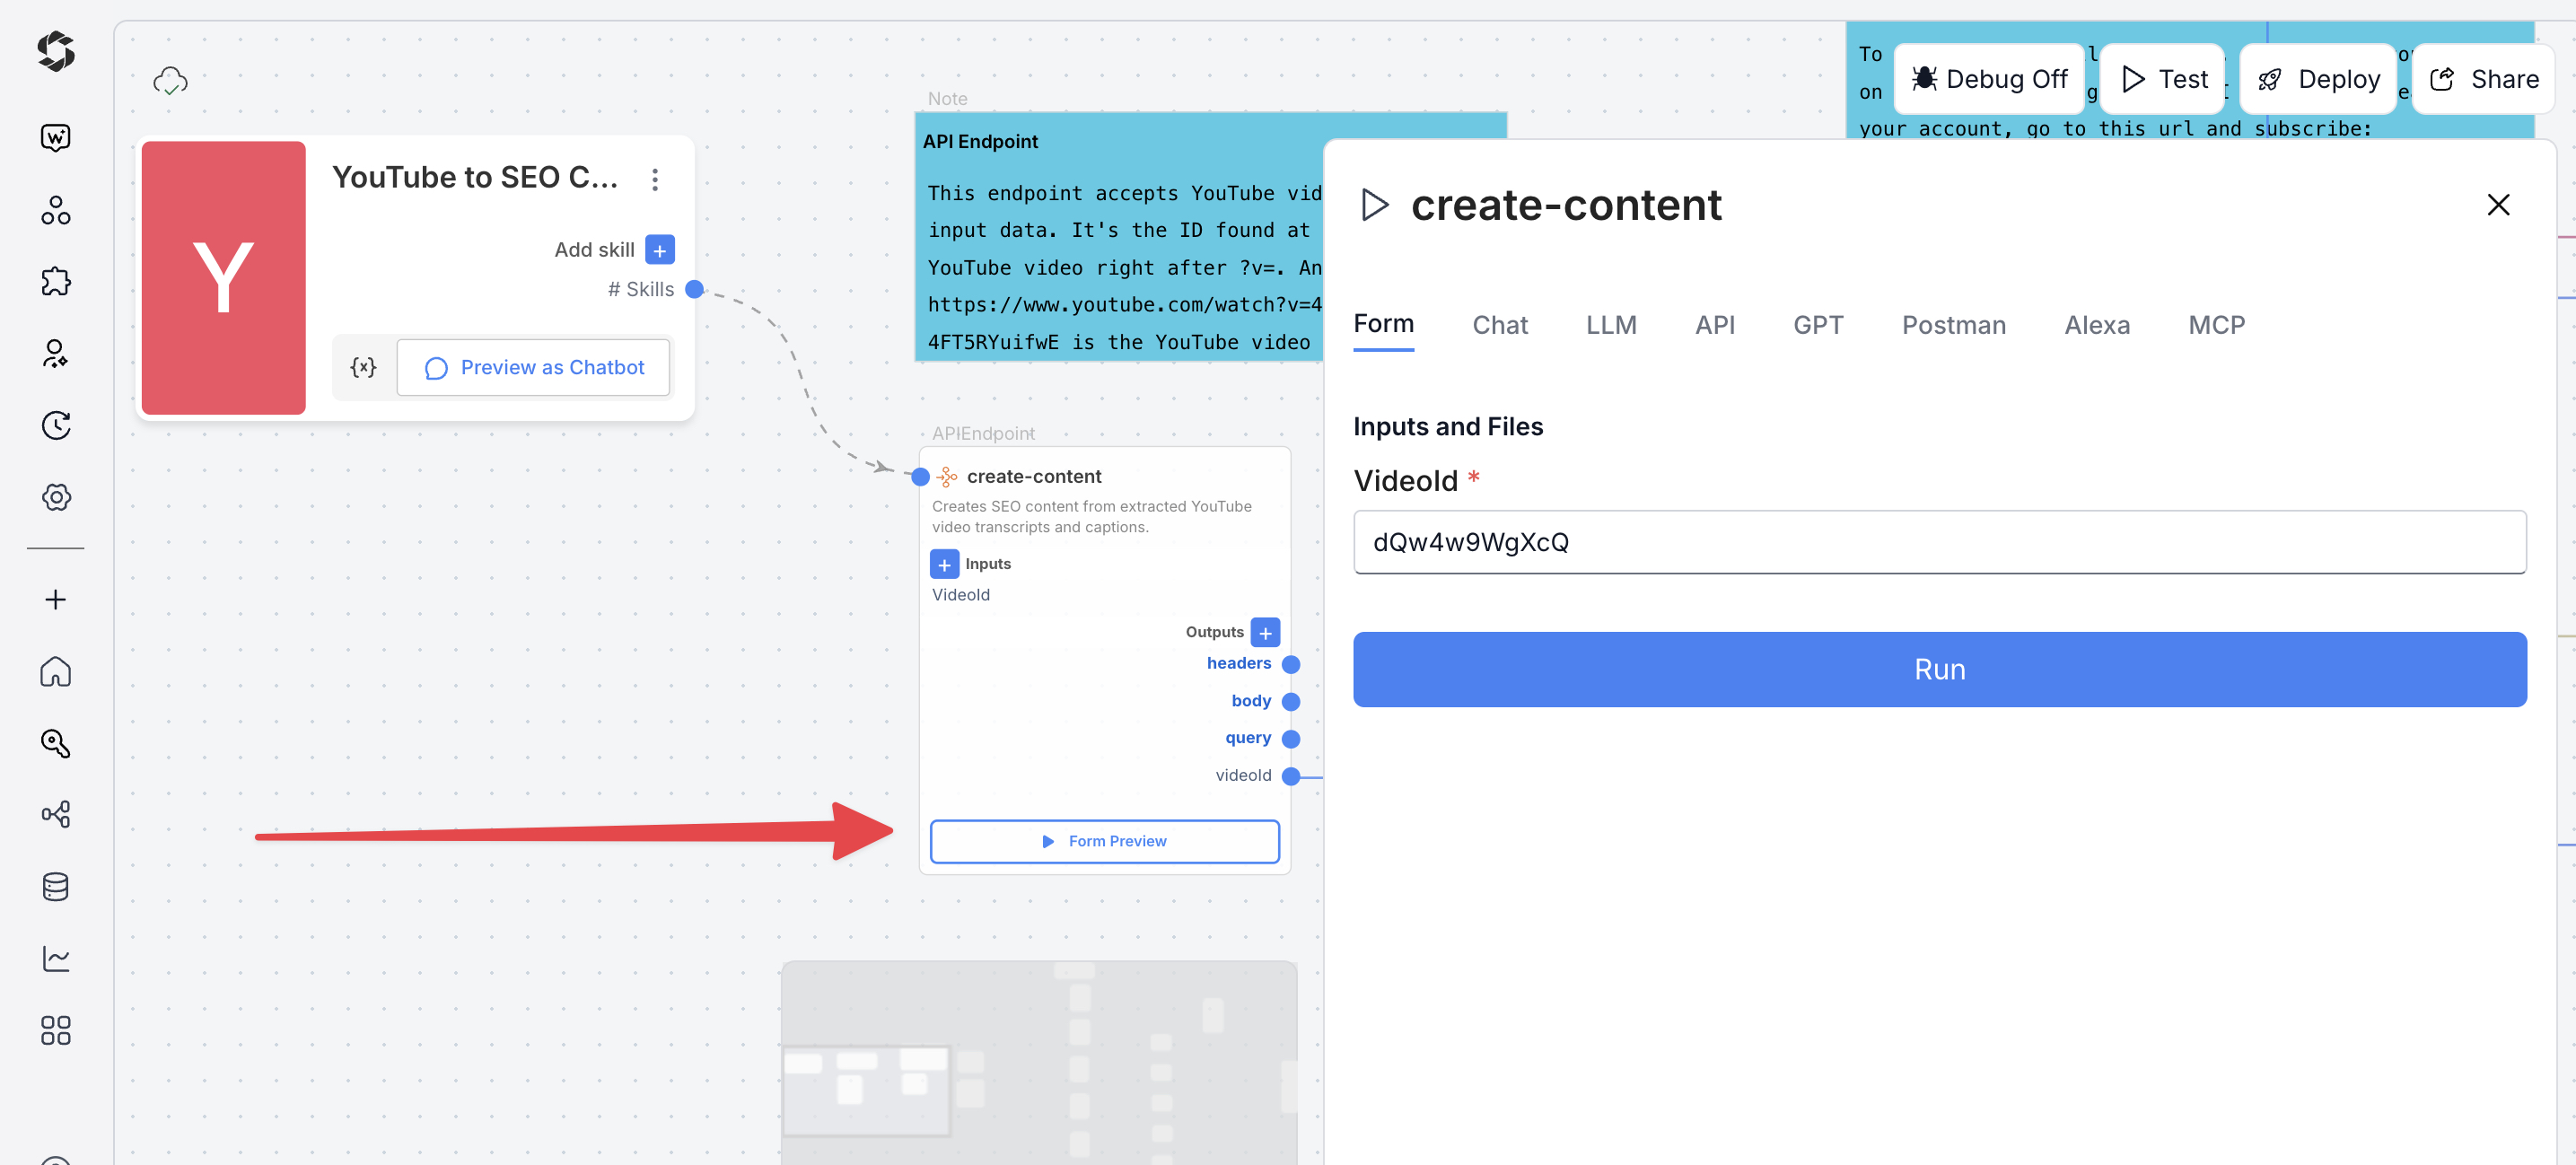
- Click Test (top-right) and switch to Form Preview.
- Fill in the input fields.
- Enter a valid YouTube Video ID (e.g.,
4FT5RYuifwE). - Click Run to generate the SEO content report.
Deploying the Agent
Step 1: Start Deployment
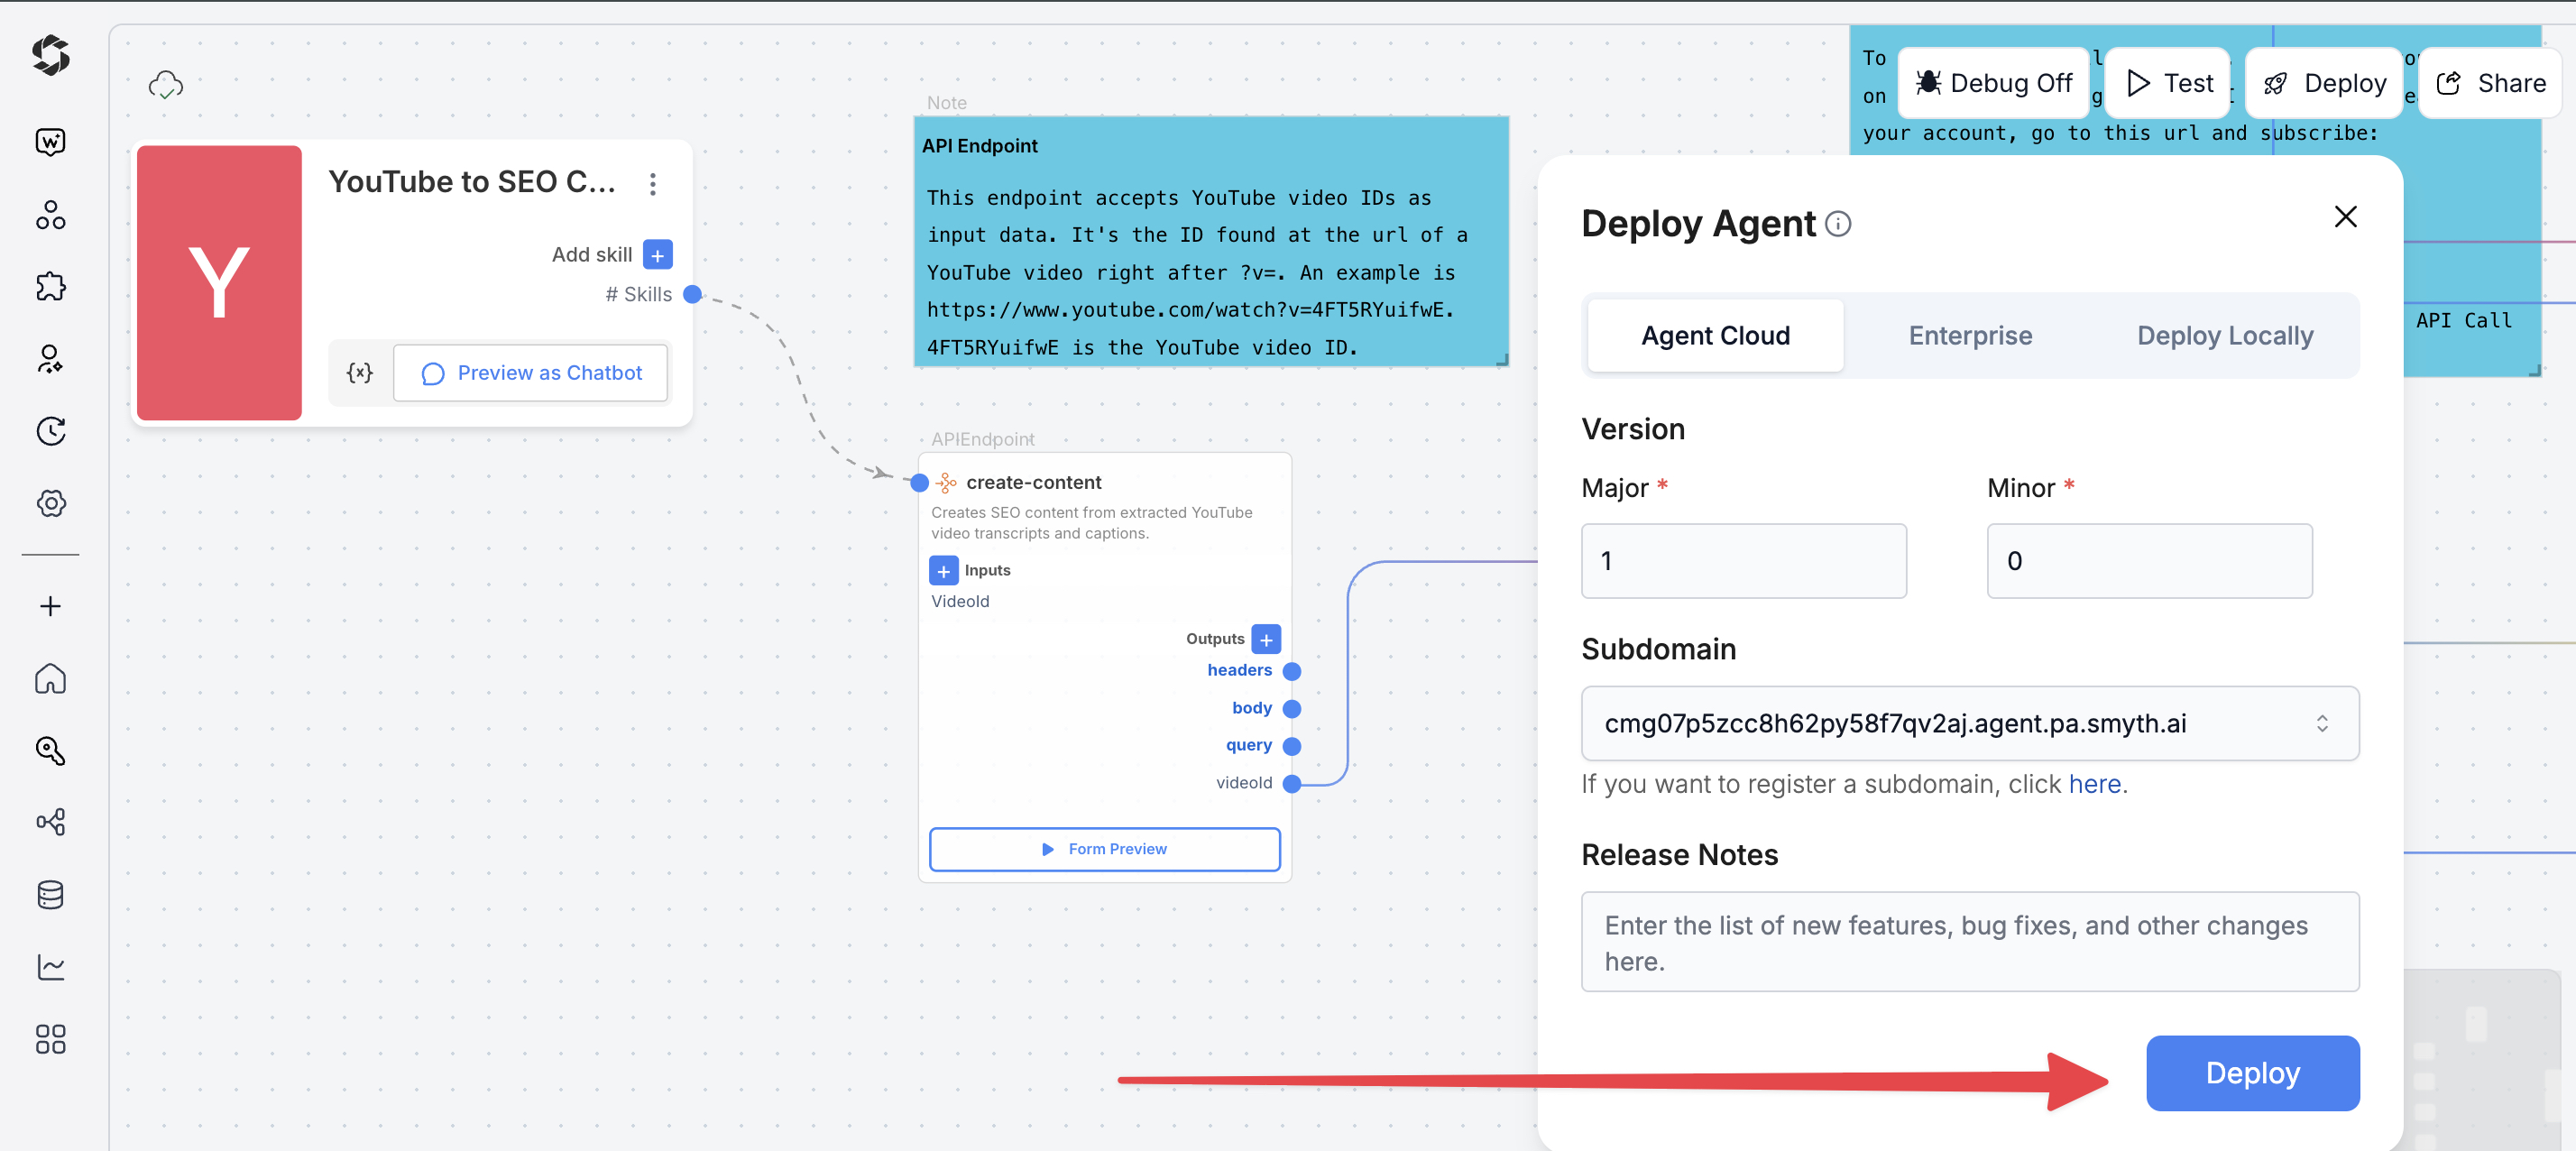
- Click Deploy (top-right corner of Agent Studio)
- Pick your environment:
- Agent Cloud (default, fully managed)
- Enterprise (self-managed, secure)
- Local Runtime (for development and offline use)
Step 2: Choose Your Deployment Type
Pick how users will interact with your agent.
- Custom GPT – Add instructions, behaviors, or tools
- Chatbot – Deploy as a chat interface
- LLM – Connect to large language models with API keys
- API – Call your agent programmatically
- MCP – Use Model Context Protocol for structured workflows
- Alexa – Launch as a voice assistant skill
You can find detailed guides to them by reading the Deploy Your Agent As... page.
Customization Tips
- Content Format – Adjust the final prompt to generate content as a blog post, social media captions, email newsletter, or an FAQ section.
- AI Models – Use GPT-5 for the highest quality, nuanced articles, or GPT-5-mini for faster drafting.
- Style and Tone – Explicitly define the desired tone (e.g., professional, casual, technical) in the content generation prompt.
- Transcript Length – Introduce a step to summarize long transcripts before generating the final content, ensuring the output is focused.
- Language – Add a translation step if you need to generate content in multiple languages from a single English video.