LinkedIn Post Generator Agent
The LinkedIn Post Generator Agent helps you create professional, on-brand posts effortlessly. It combines real-time search, scraping, and multiple AI stages (using GPT-5 and GPT-5-mini) to:
- Gather fresh content from the web
- Summarize and draft LinkedIn posts
- Review and refine drafts
- Keep your writing style and tone consistent
- Deliver ready-to-publish posts with source links
Why use this agent?
Use Cases
-
Boost LinkedIn engagement
Create regular, on-brand posts that highlight industry trends, company news, and educational content. -
Scale content creation
Generate quality LinkedIn posts for multiple clients with unique voices, all while keeping relevance and consistency.
Pro tip
Testing the Agent
Step 1: Access the Agent

- Go to the Templates section in the sidebar
- Open the Marketing tab
- Find LinkedIn Post Generator and click Remix
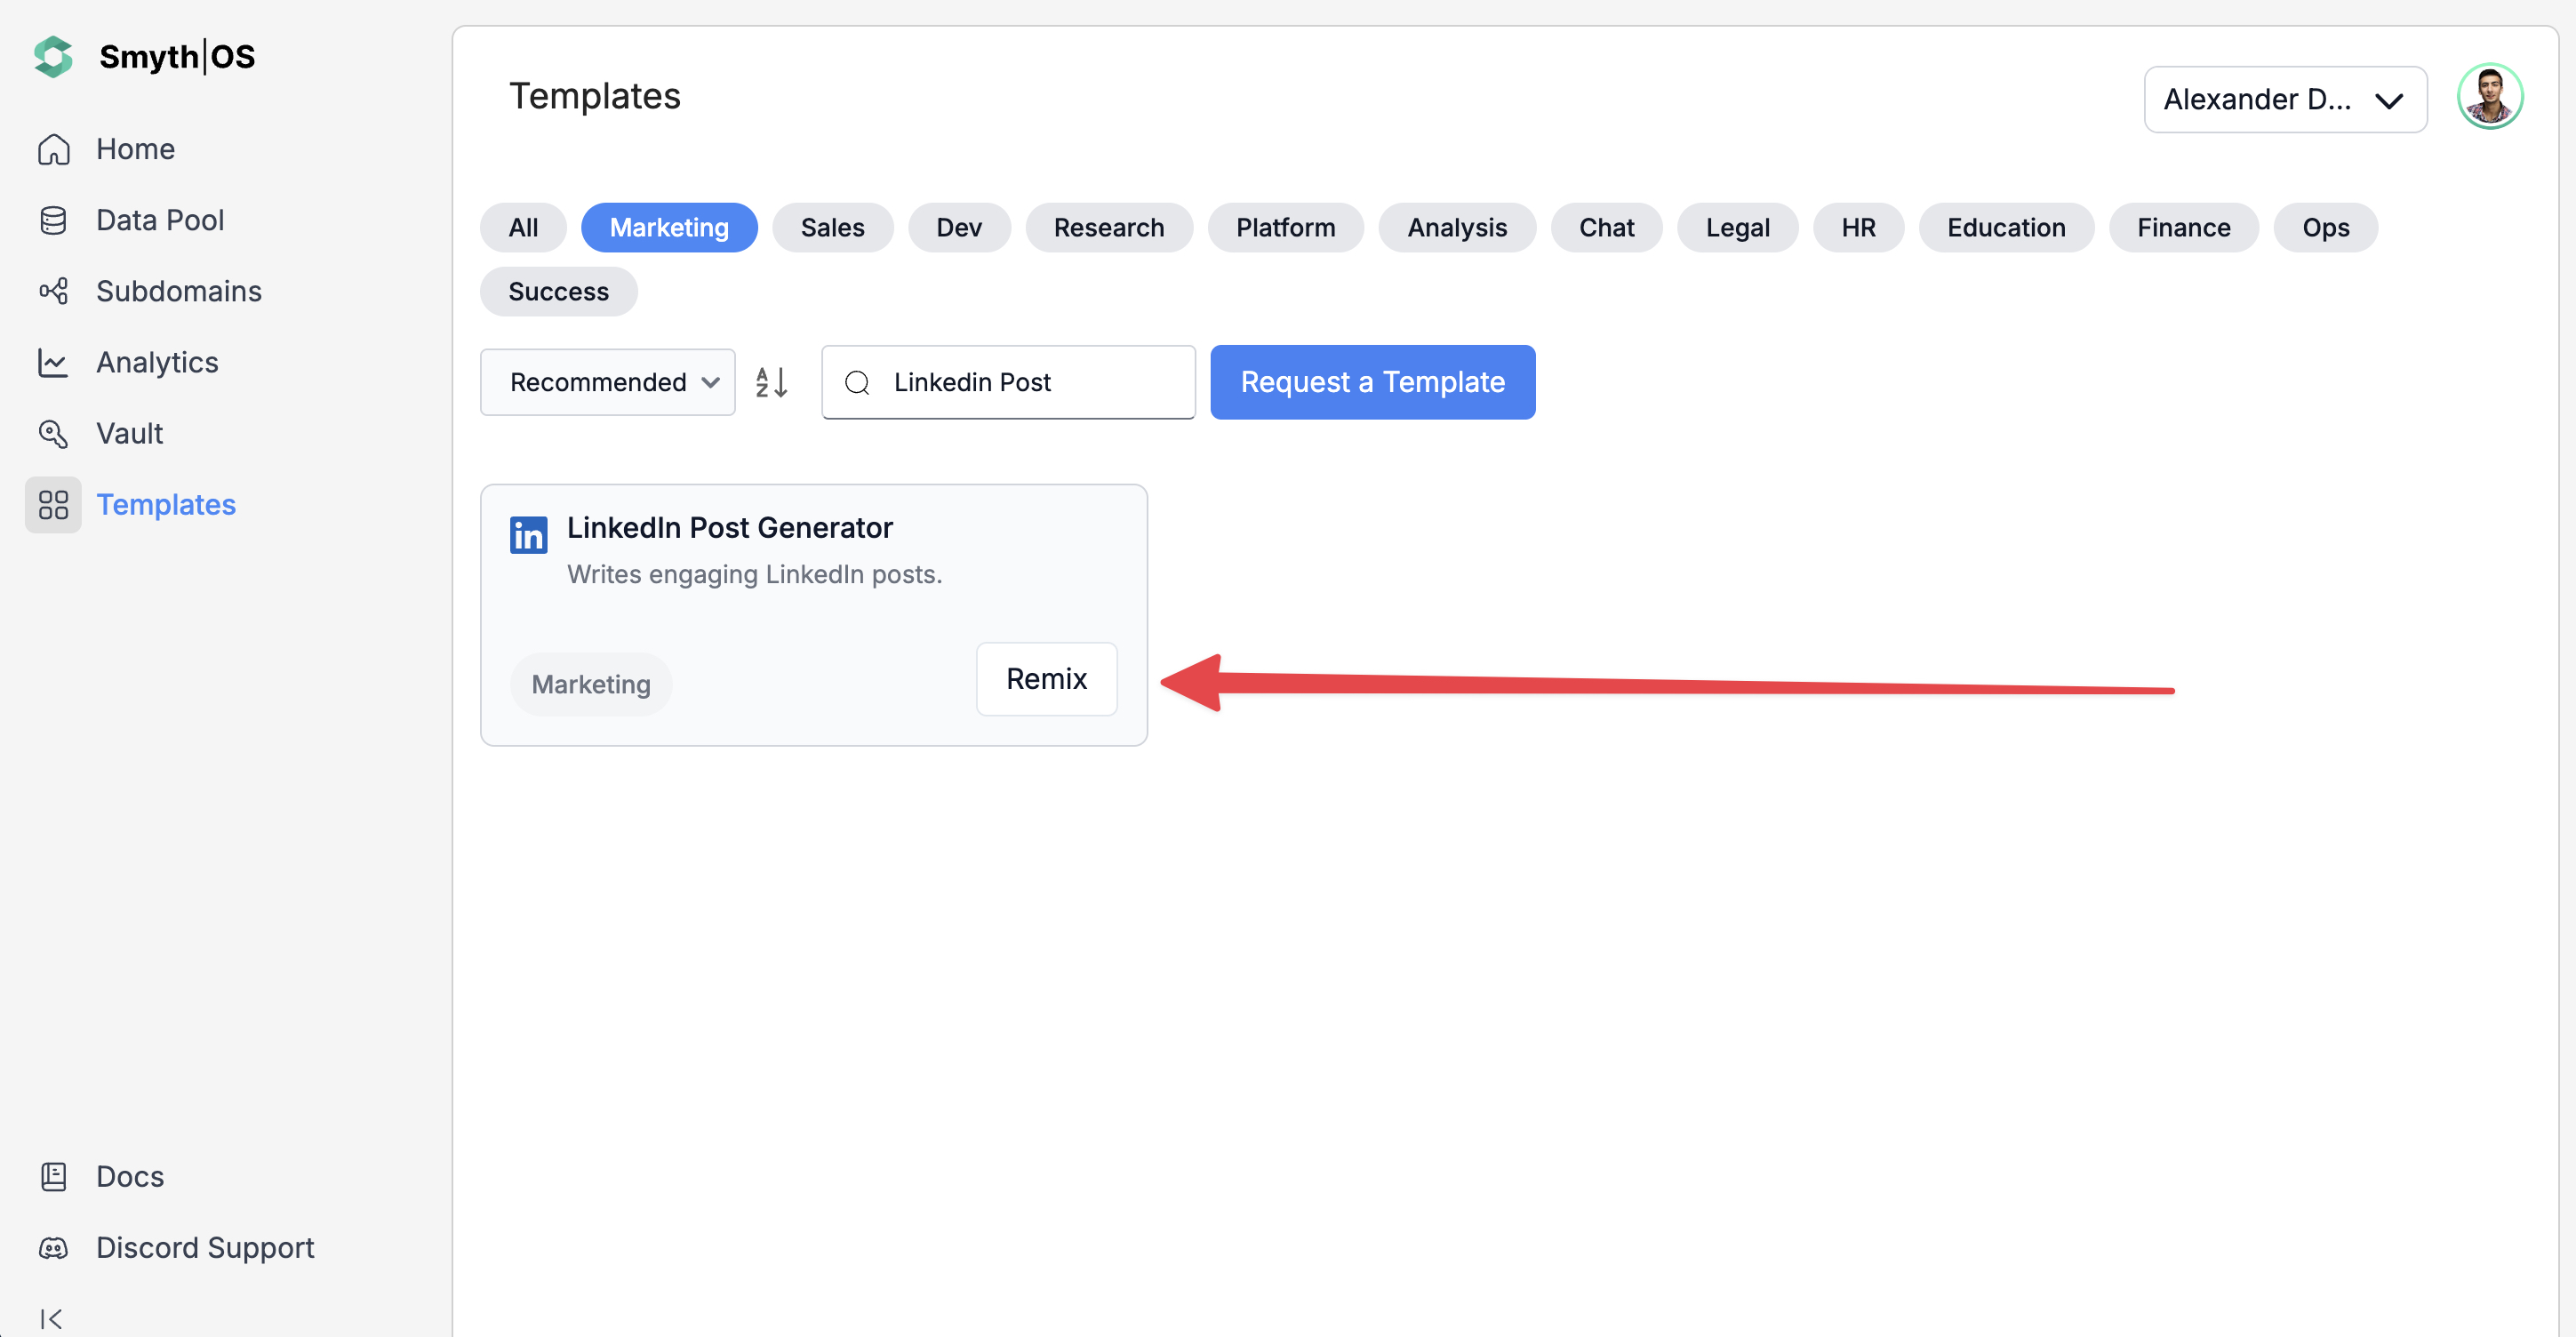
- The full workflow will open in the Agent Studio
Step 2: Run the Agent
You can test the agent in two ways:
Option 1: From the top toolbar
- Click Test (top-right)
- Switch to Form Preview
- Fill in the input fields (e.g., topic, style, tone)
- Click Run to see results
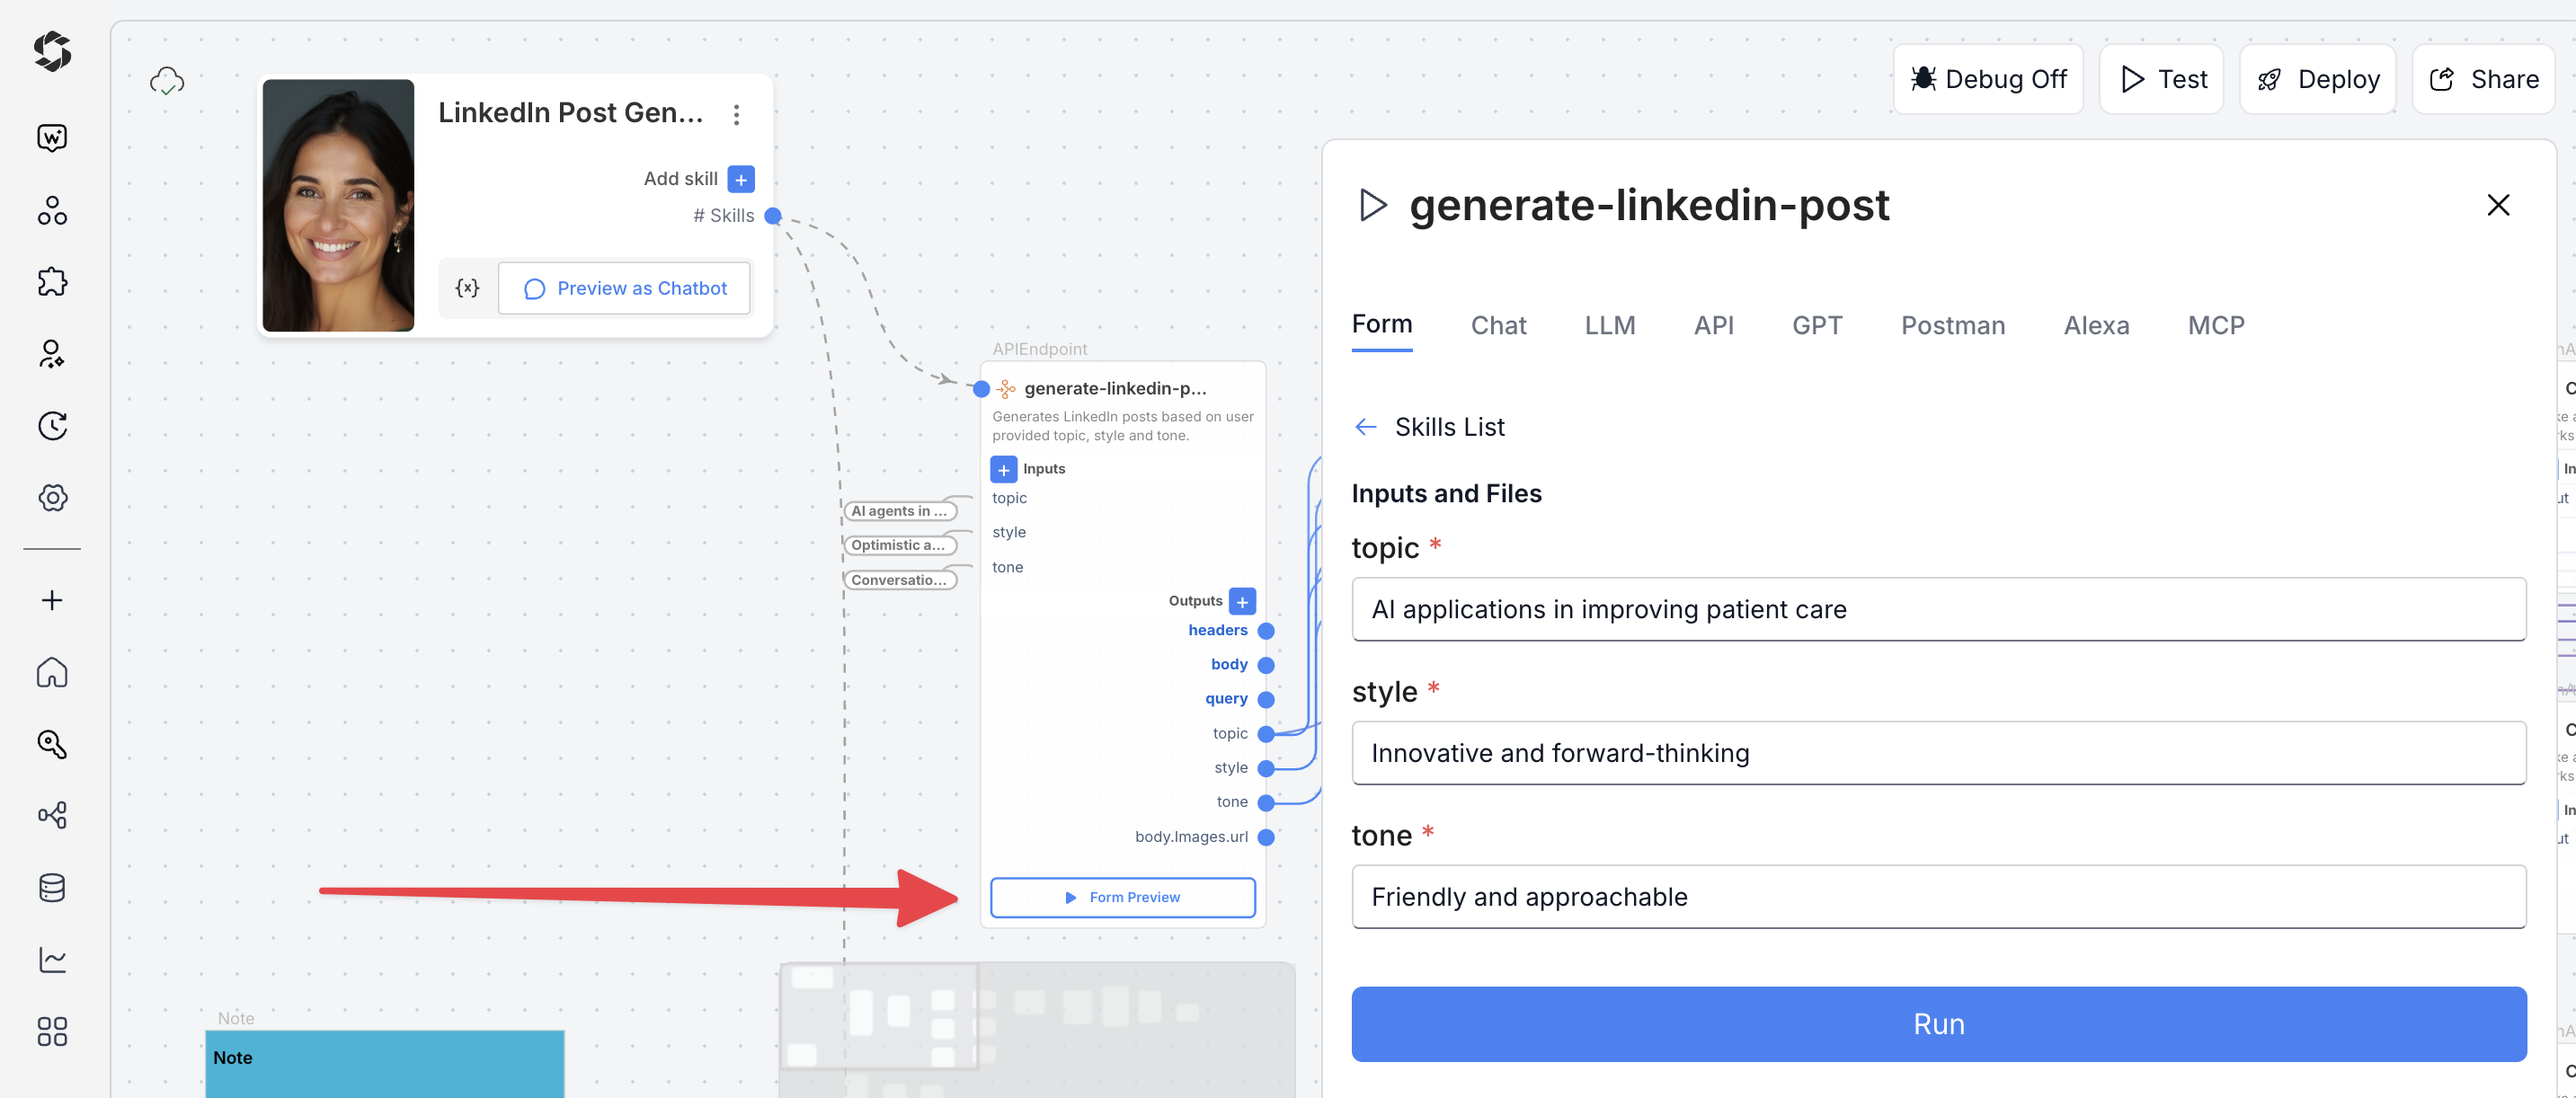
Option 2: Form Preview from the canvas
- Click the Form Preview button on the
generate-linkedin-postblock - Enter input details, for example:
- Topic: AI in healthcare transforming patient care
- Style: professional
- Tone: informative
- Click Run to test the workflow
Deploying the Agent
Step 1: Start the Deployment
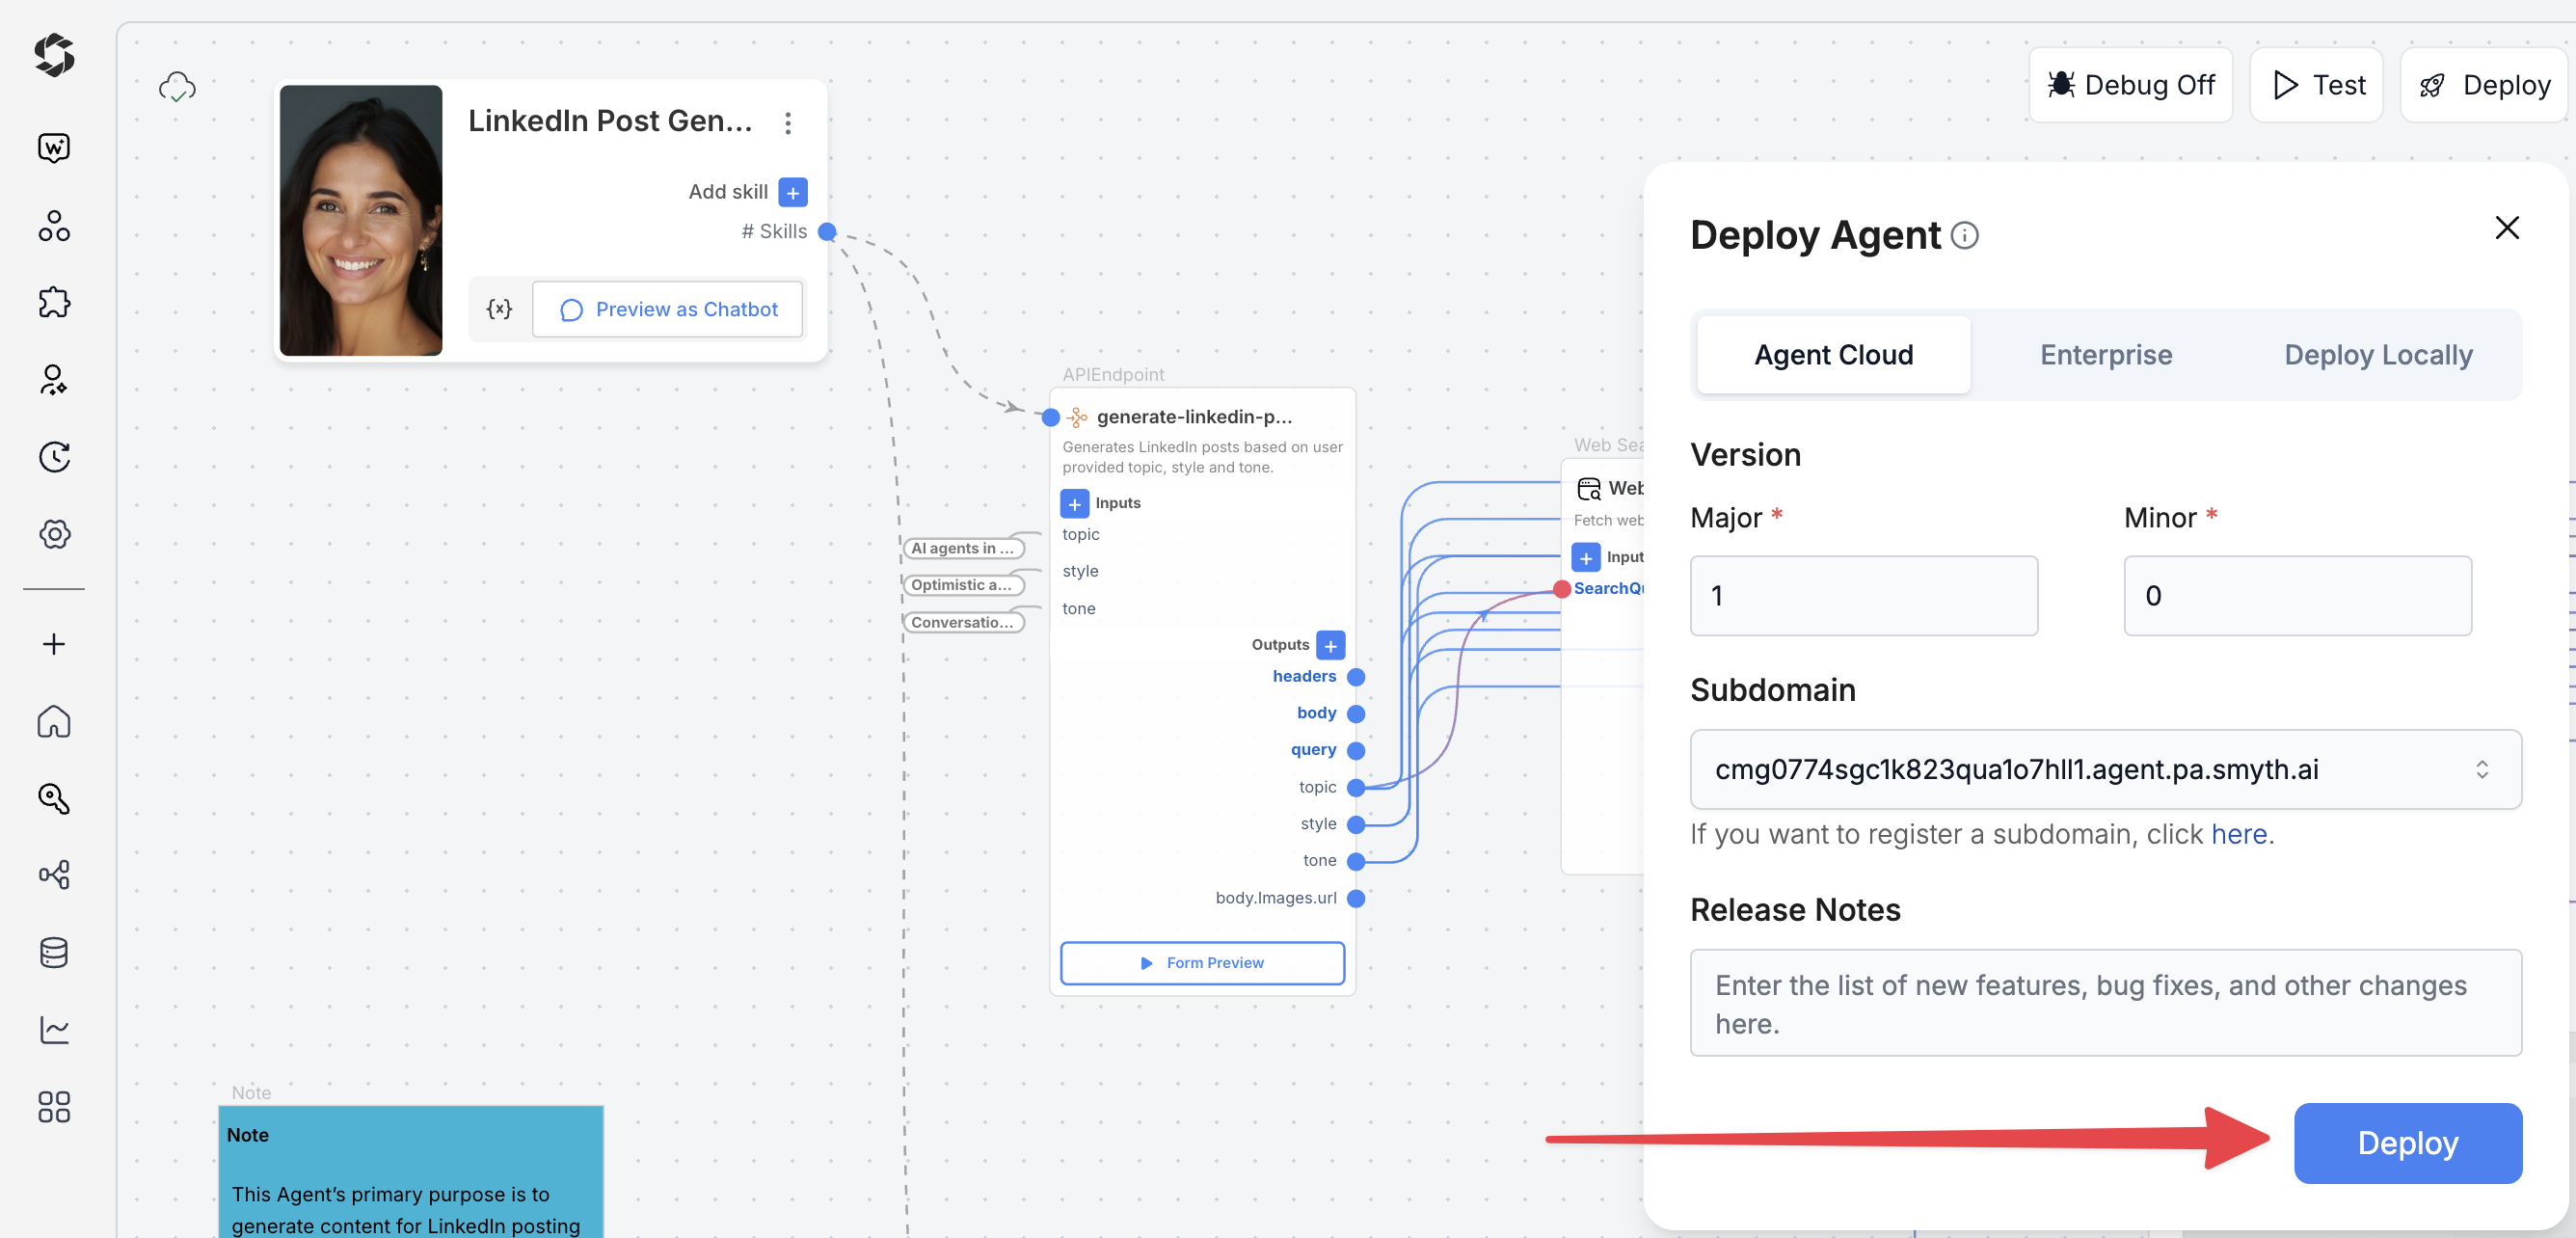
- Click Deploy (top-right corner of Agent Studio)
- Pick your environment:
- Agent Cloud (default, fully managed)
- Enterprise (self-managed, secure)
- Local Runtime (for development and offline use)
Step 2: Choose Your Deployment Type
Pick how users will interact with your agent.
- Custom GPT – Add instructions, behaviors, or tools
- Chatbot – Deploy as a chat interface
- LLM – Connect to large language models with API keys
- API – Call your agent programmatically
- MCP – Use Model Context Protocol for structured workflows
- Alexa – Launch as a voice assistant skill
You can find detailed guides to them by reading the Deploy Your Agent As...* page.
Best option
Customization Tips
Example customization
- Search settings – Adjust
sourcesLimitandtimeRangefor fresher or broader results - Content processing – Switch WebScrape output from text to markdown
- AI models – Use GPT-5 for quality, GPT-5-mini for speed
- Temperature –
- 0.3–0.5 for consistent, structured posts
- 0.8–1.0 for creative, varied posts
- Prompts – Add industry terms or specific formatting needs
- Extra inputs – Include target audience, post length, or hashtags
- Review criteria – Customize reviewer prompts to fit brand or compliance rules