Content Extractor Agent
The Content Extractor Agent allows you to rapidly extract and organize text content from any website, transforming unstructured web pages into clean, organized Markdown format.
You provide a URL, and the agent will:
- Scrape the target URL for all visible text content
- Automatically clean up HTML, ads, and navigation elements
- Convert the extracted content into a structured Markdown output
- Optionally process multiple URLs in a single batch
Use Cases
-
Research & Analysis Researchers, journalists, and analysts can quickly extract and compile text content from multiple websites for market research, competitive analysis, or academic studies. The clean markdown format makes it easy to organize and analyze large volumes of web content without manual copying and formatting.
-
Content Curation & Repurposing Content marketers and bloggers can gather text from industry websites, news articles, or competitor pages to inform their own content creation. The extracted content serves as source material for creating original articles, newsletters, or social media posts while ensuring proper research and citation.
-
Documentation & Archiving Businesses and organizations can preserve important web content before it changes or disappears. The agent helps create text backups of policies, announcements, product descriptions, or knowledge base articles for internal documentation and compliance purposes.
Testing the Agent
Step 1: Access the Agent
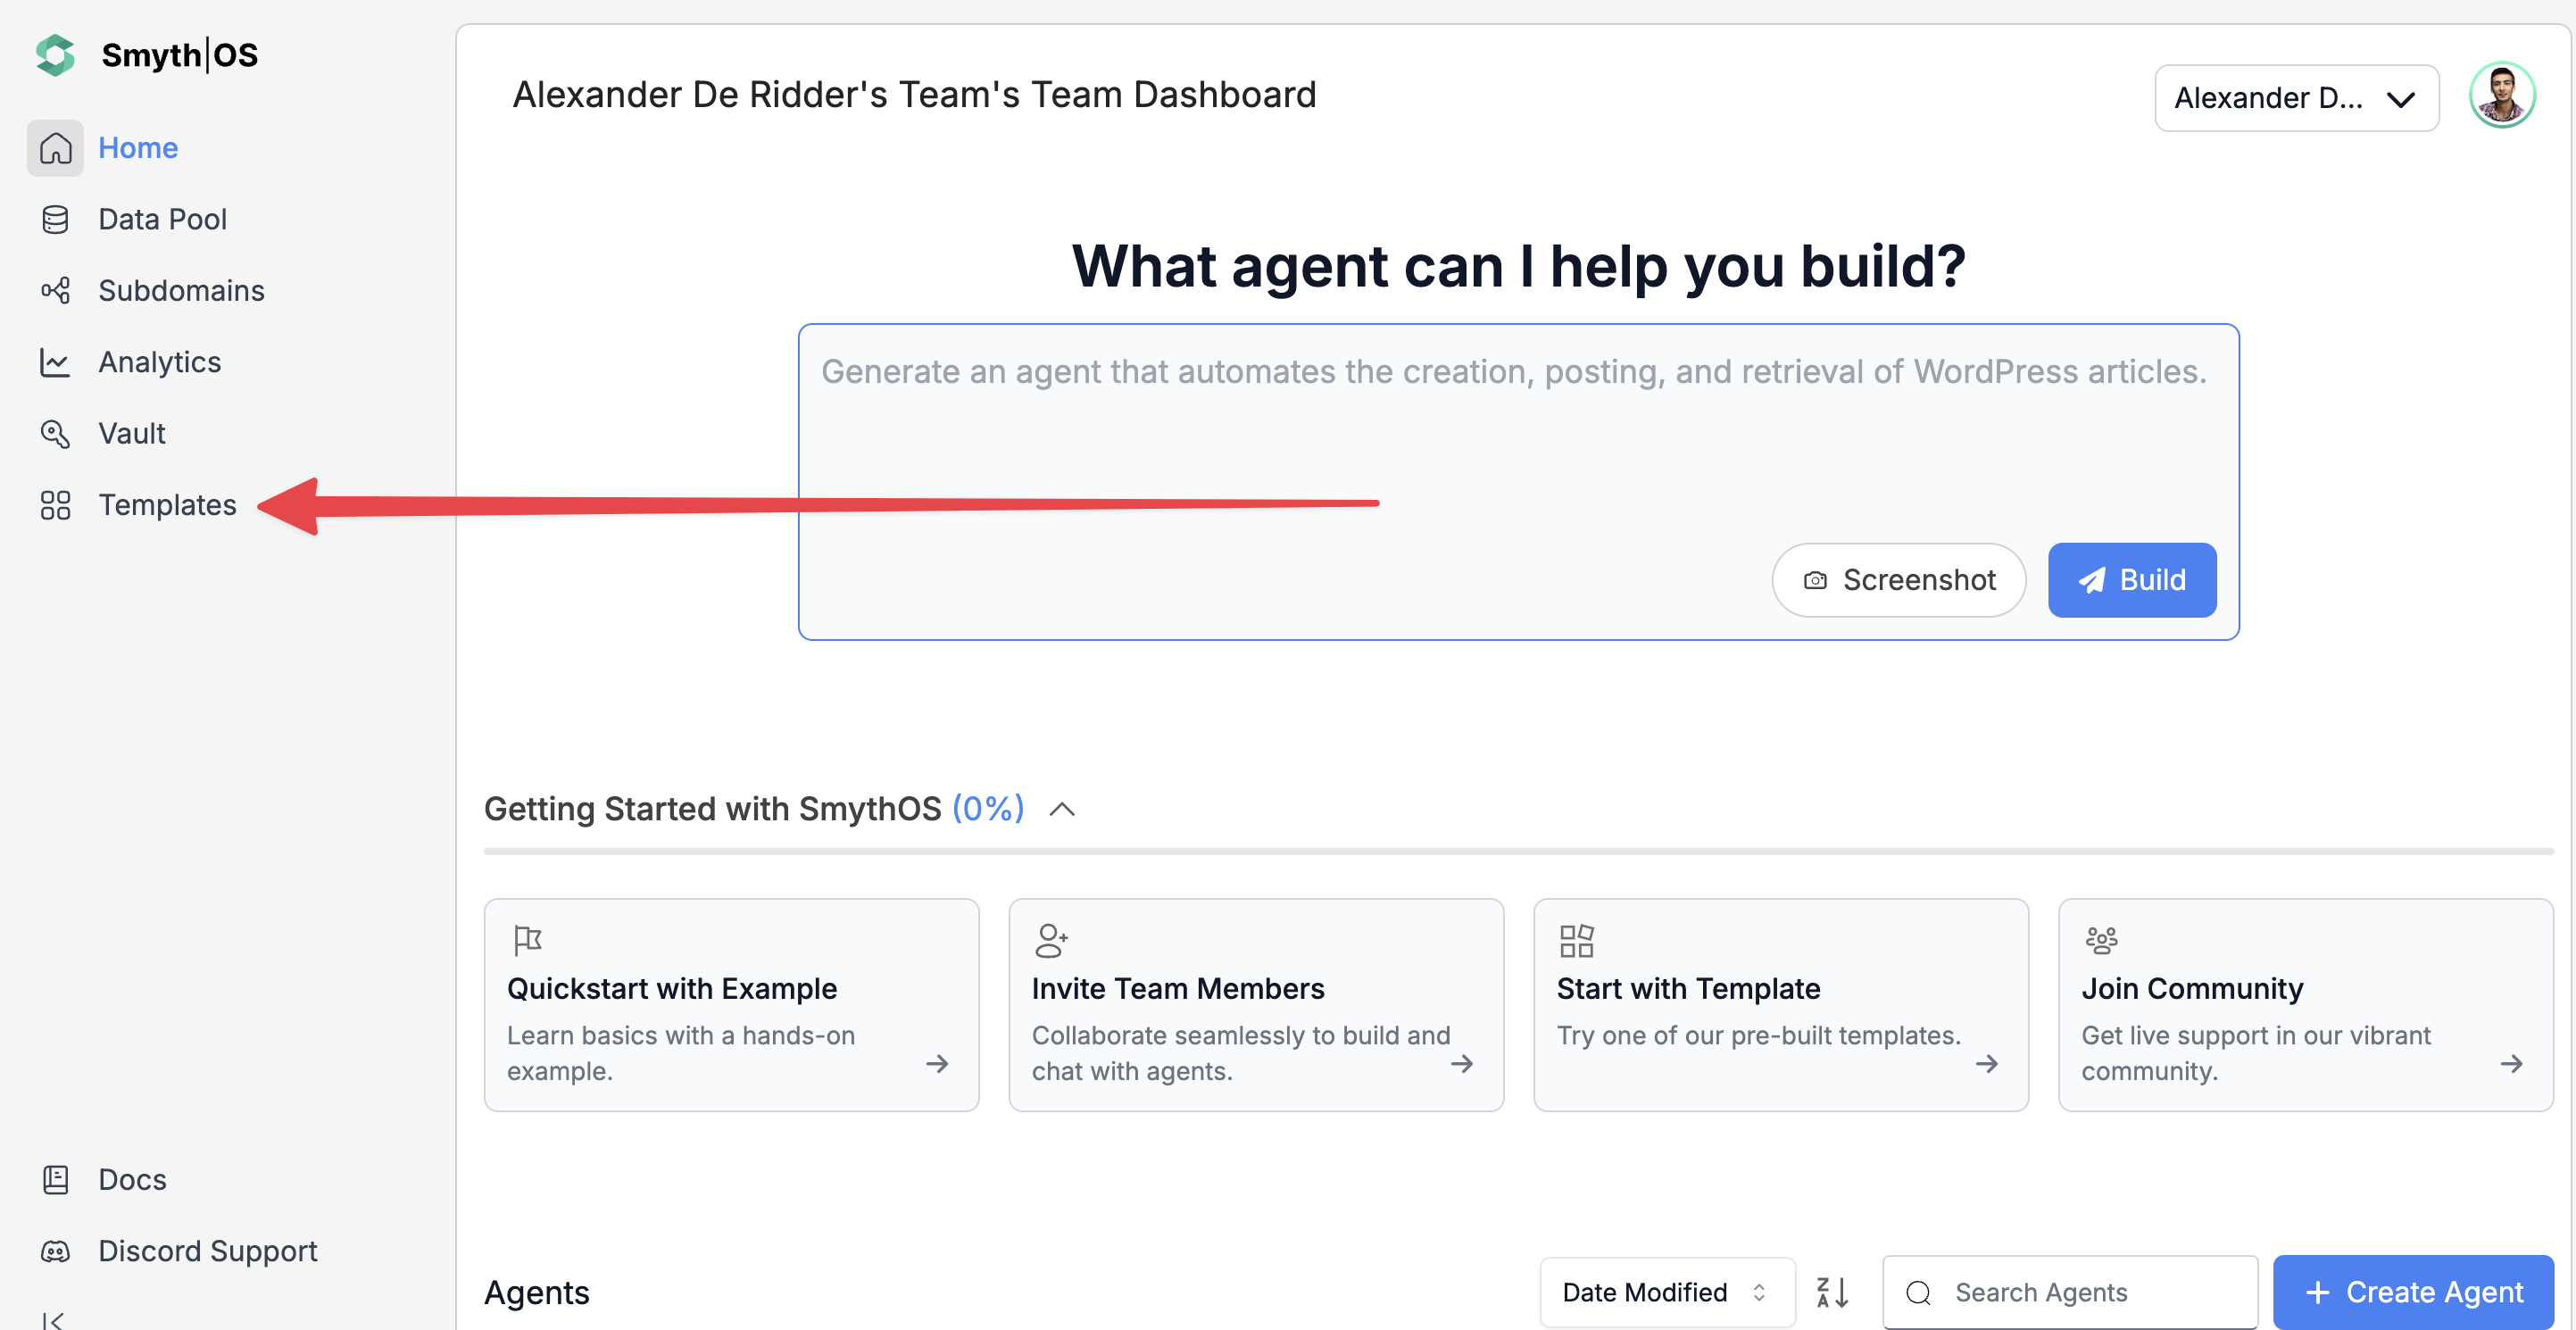
- Go to the Templates section in the sidebar
- Navigate to the Marketing Tab
- Find the Content Extractor Agent and click Remix
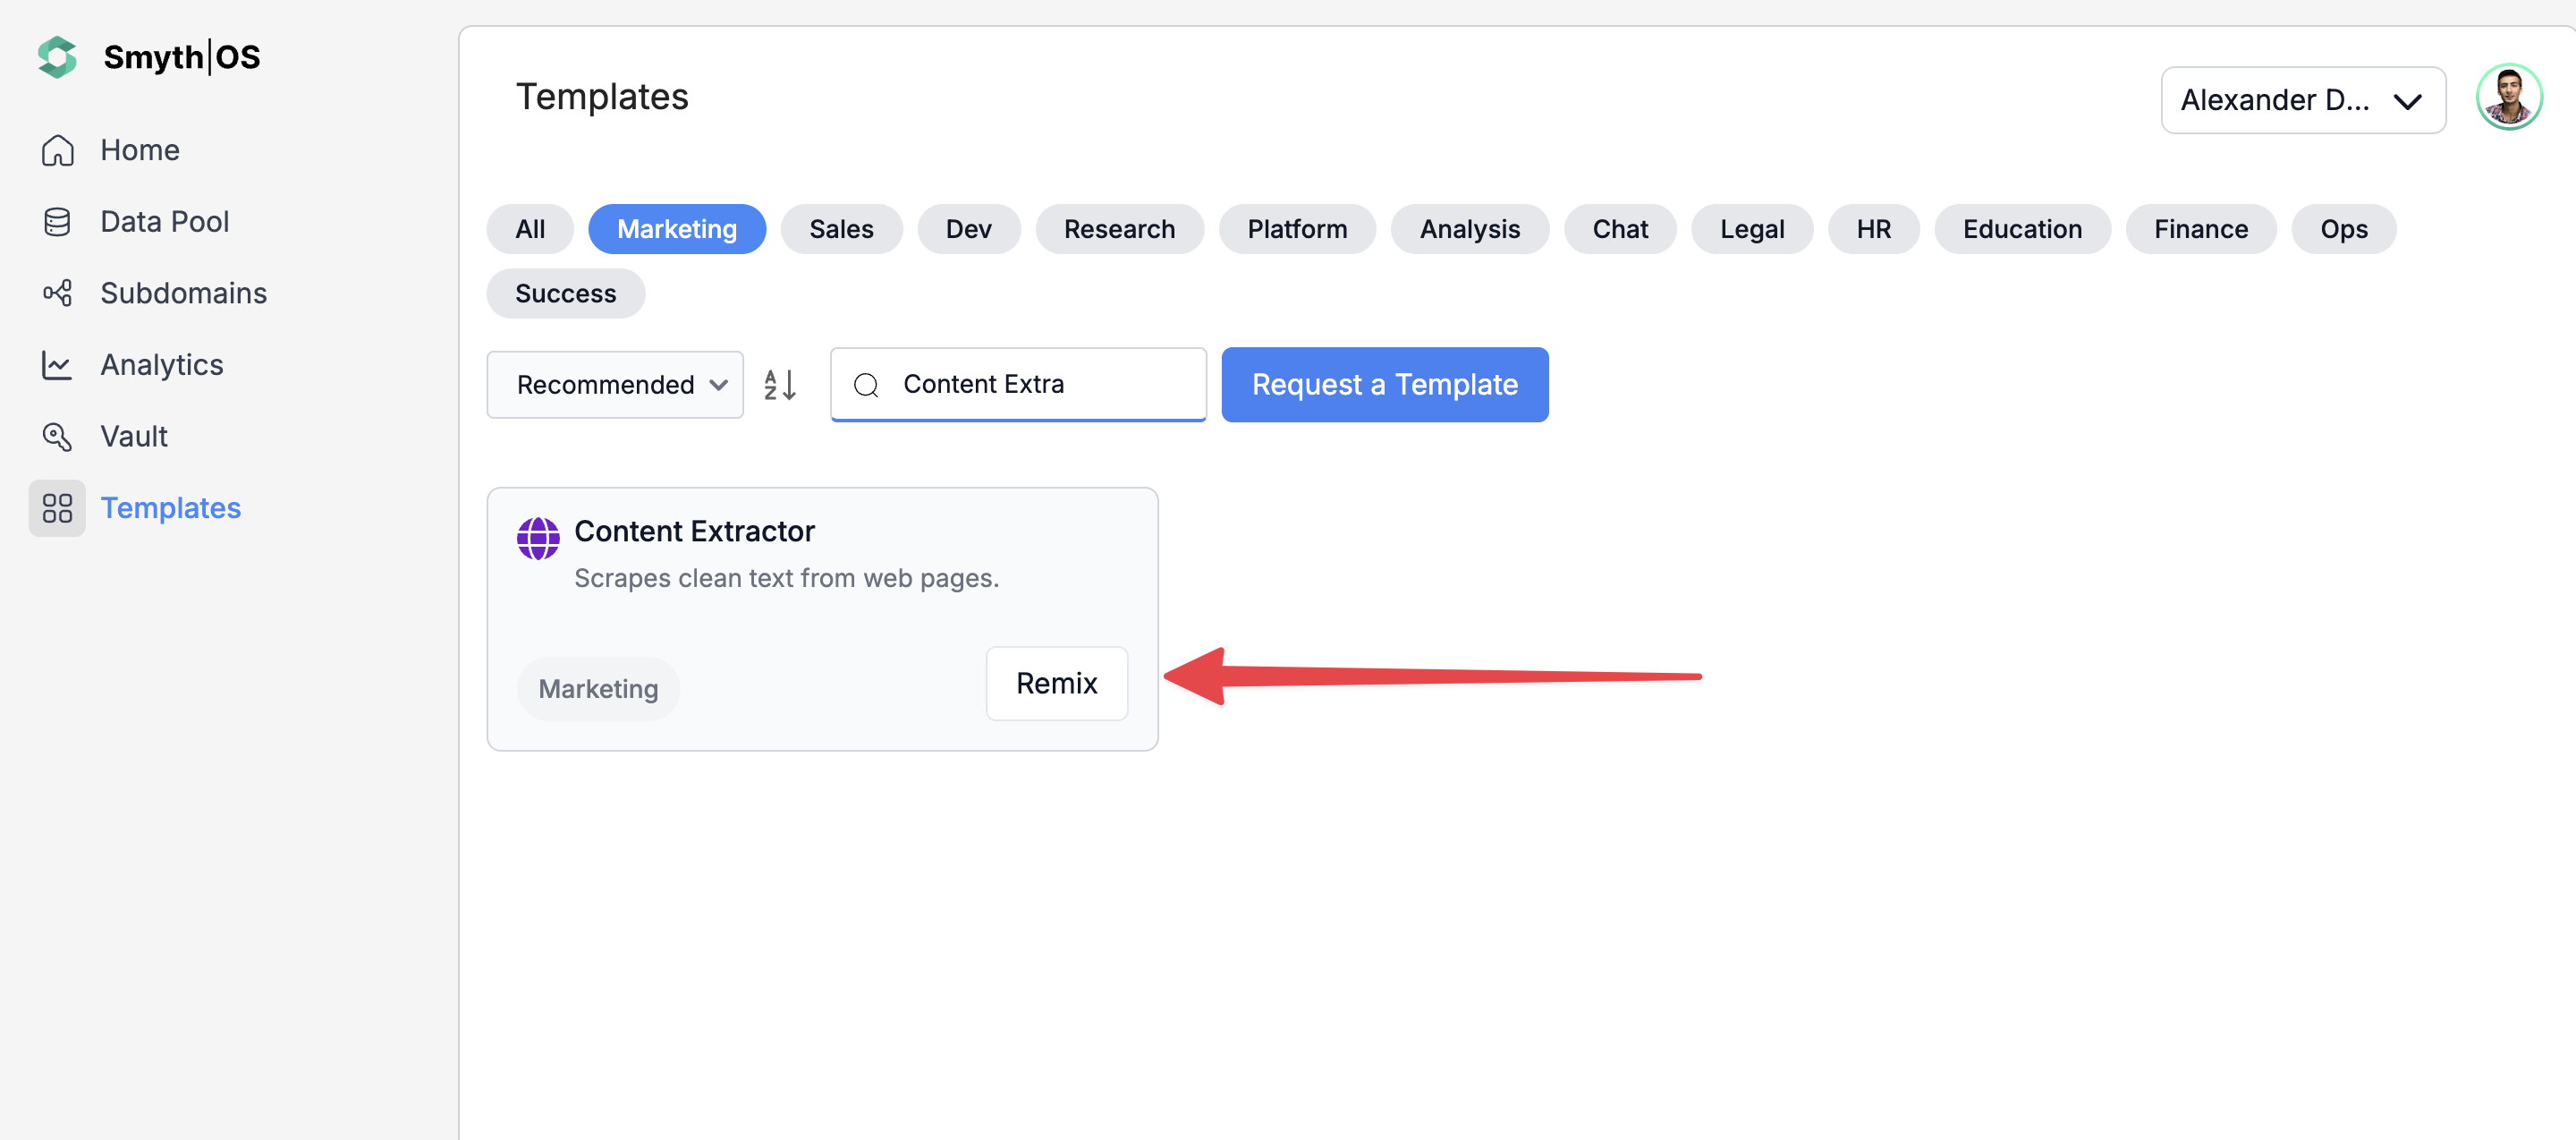
- The full workflow will open in Agent Studio
Step 2: Run the Agent
You can test the agent in two ways:
Option 1: From the top toolbar
- Click Test (top-right)
- Switch to Form Preview
- Fill in the input fields
- Click Run to execute
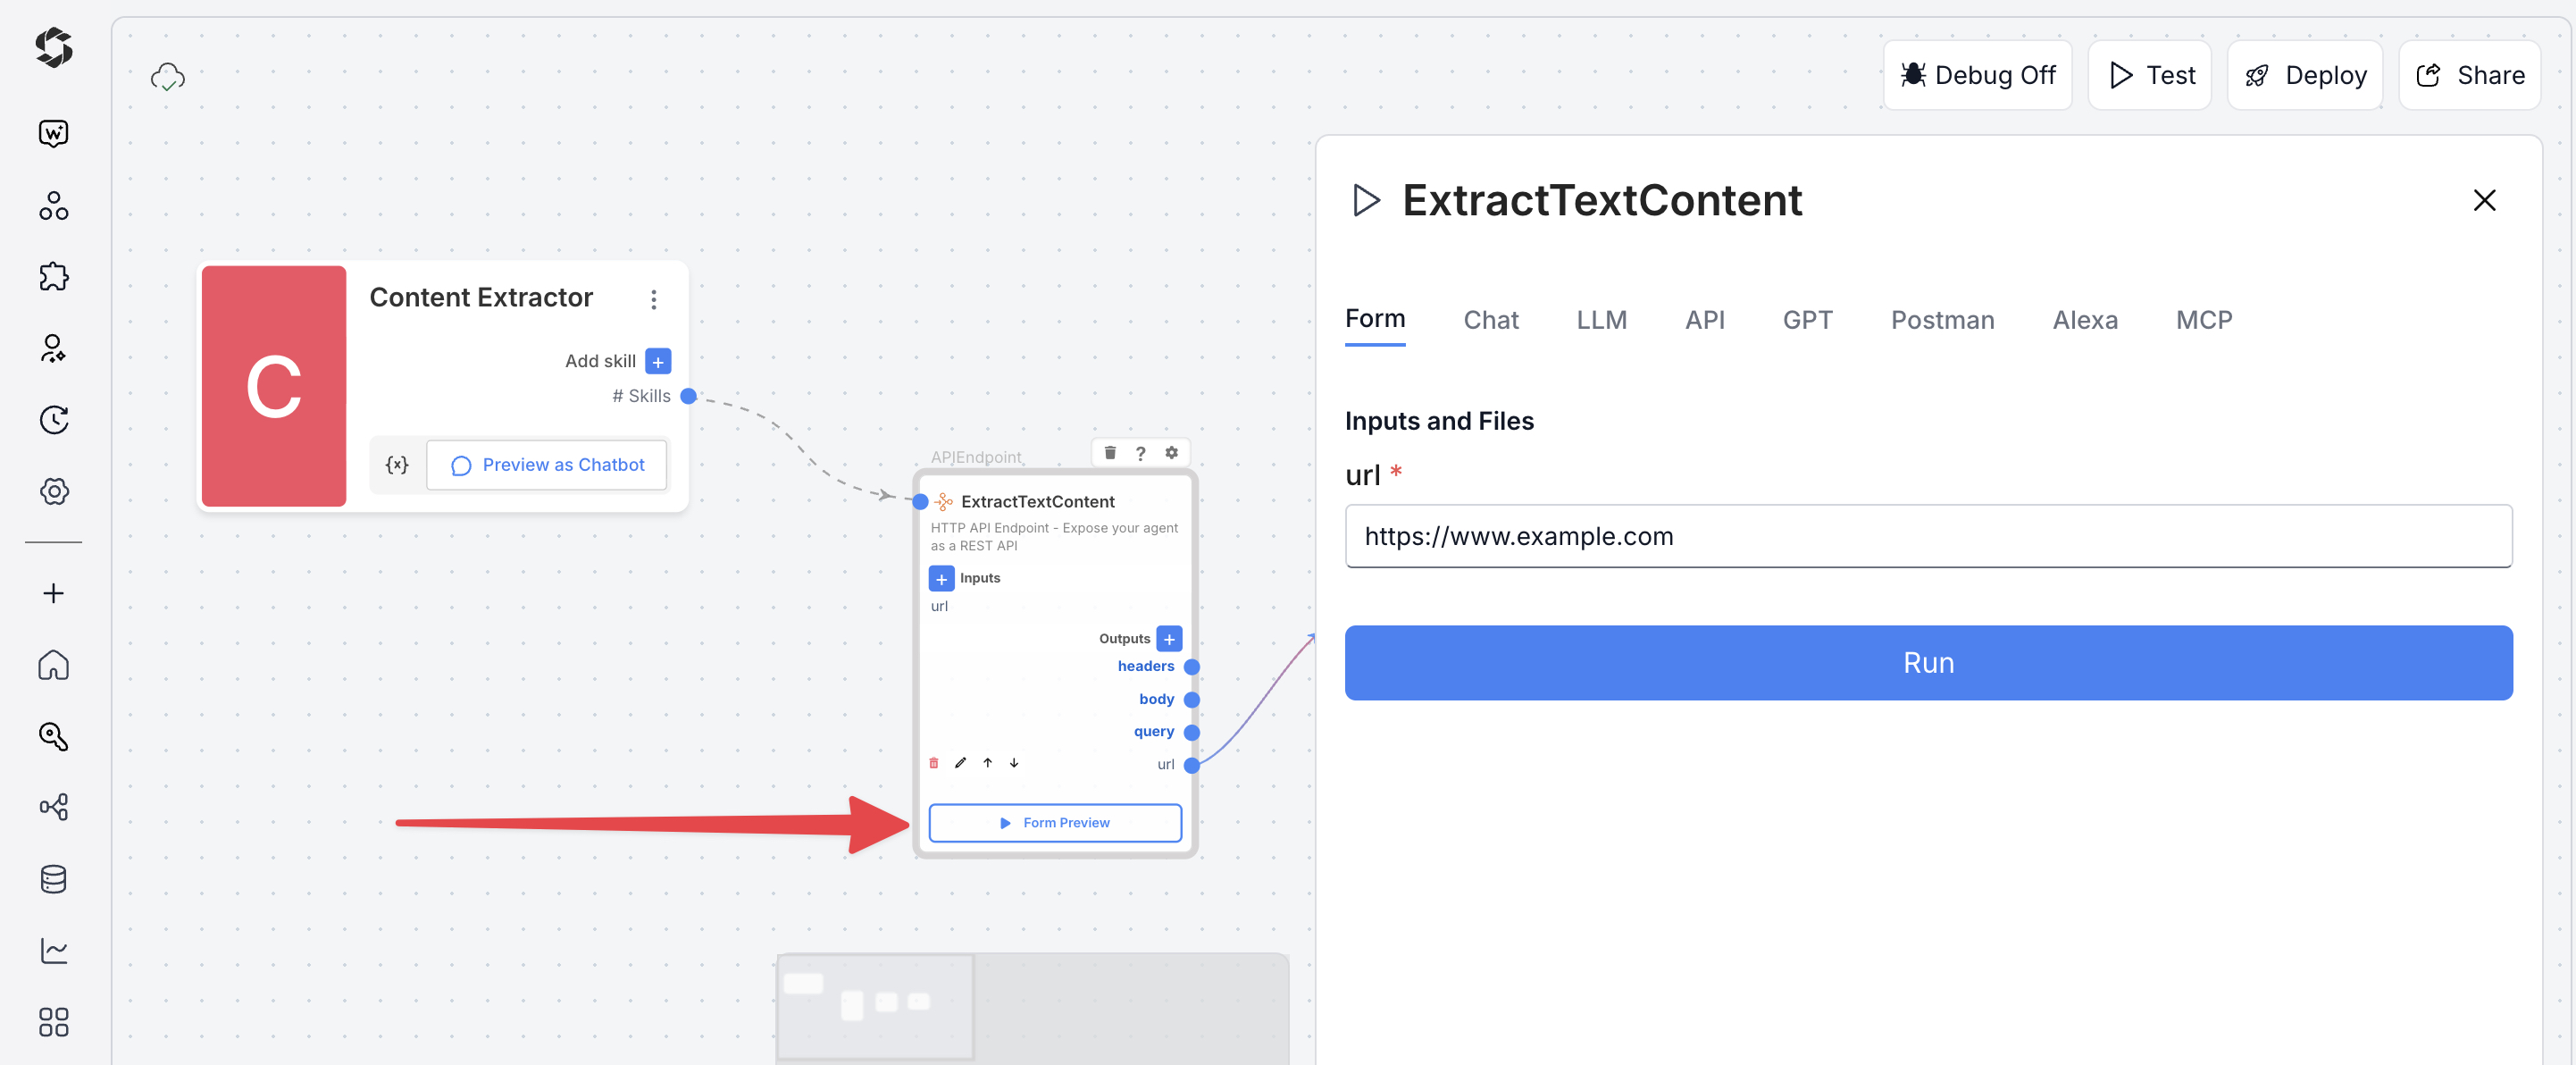
Option 2: Form Preview from the Canvas
- Click the Form Preview button on the APIEndpoint block labeled
ExtractTextContent - Enter the input field details. For example:
url:https://www.smythos.com
- Click Run to test and view the results.
Deploying the Agent
Step 1: Start Deployment
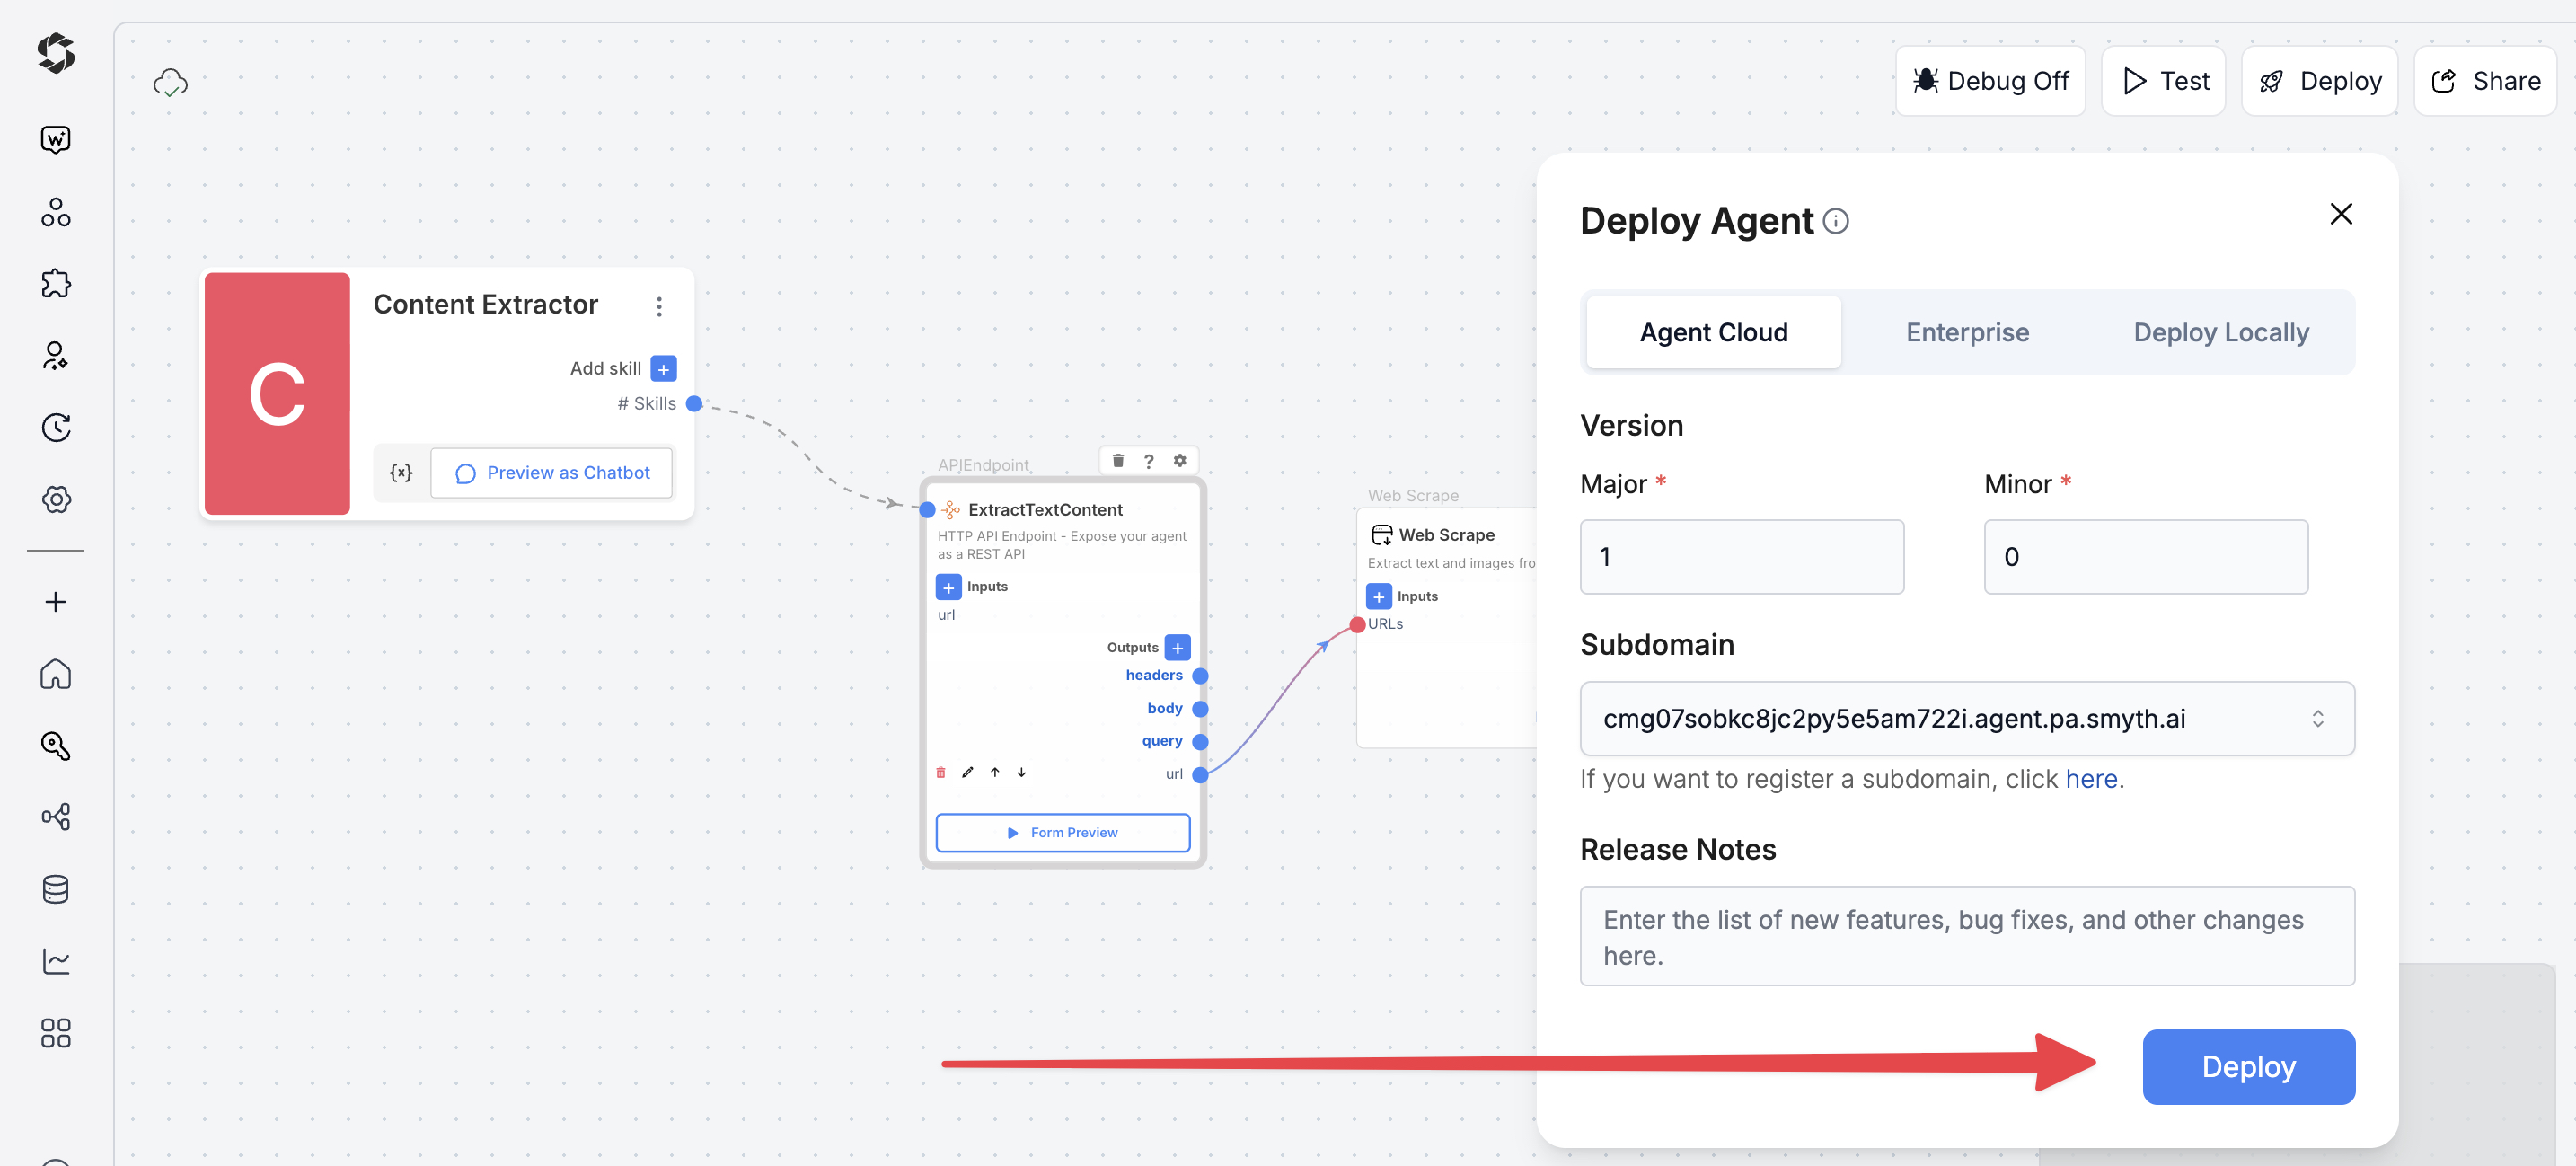
- Click Deploy (top-right corner of Agent Studio)
- Pick your environment:
- Agent Cloud (SmythOS-hosted, recommended)
- Enterprise (self-managed, secure)
- Local Runtime (for development and offline use)
Step 2: Choose Your Deployment Type
Pick how users will interact with your agent.
- Custom GPT – Add instructions, behaviors, or tools
- Chatbot – Deploy as a chat interface
- LLM – Connect to large language models with API keys
- API – Call your agent programmatically
- MCP – Use Model Context Protocol for structured workflows
- Alexa – Launch as a voice assistant skill
You can find detailed guides to them by reading the Deploy Your Agent As... page.
Customization Tips
- Web Scraping Settings – Enable or disable
antiScrapingProtection,javascriptRendering, andautoScrollbased on target websites - Output Format – Change WebScrape format from
markdowntoraw,markdown:no_images, ormarkdown:no_links - Error Handling – Add custom outputs to WebScrape component to access
FailedURLsfor better error reporting - Content Processing – Add
GenAILLMcomponent to summarize or clean extracted content before output - Multiple URLs – Modify input to accept URL arrays for batch processing multiple pages at once
- Authentication – Add headers to WebScrape for accessing protected content with login credentials
- Content Filtering – Insert
Classifiercomponent to categorize extracted content by type or topic - API Output Format – Switch from
fulltominimalorrawformat based on integration needs - Rate Limiting – Add
FSleepcomponent between requests when processing multiple URLs - Custom Parsing – Add
Codecomponent to extract specific elements like emails, phone numbers, or dates