GitHub Content Manager Agent
The GitHub Content Manager Agent is designed to help you manage your GitHub repository content directly through SmythOS, eliminating the need for manual file handling or complex API scripts.
The agent's capabilities include:
- Retrieving all repository content or specific file content (e.g.,
README.md) - Decoding base64 file content for human readability
- Creating new files and committing them to the repository
- Updating existing file content with a new commit
Use Cases
-
Automated Documentation Updates Automatically push content generated by other agents (like SEO articles or release notes) into your repository's documentation files (e.g.,
README.md). -
Version Control and Auditing Programmatically log and commit changes from a business application directly to a GitHub repository, ensuring a verifiable version history.
-
Developer Productivity Enable non-developers (e.g., technical writers, product managers) to manage simple file changes without cloning the repo or using the command line.
Testing the Agent
Step 1: Access the Agent
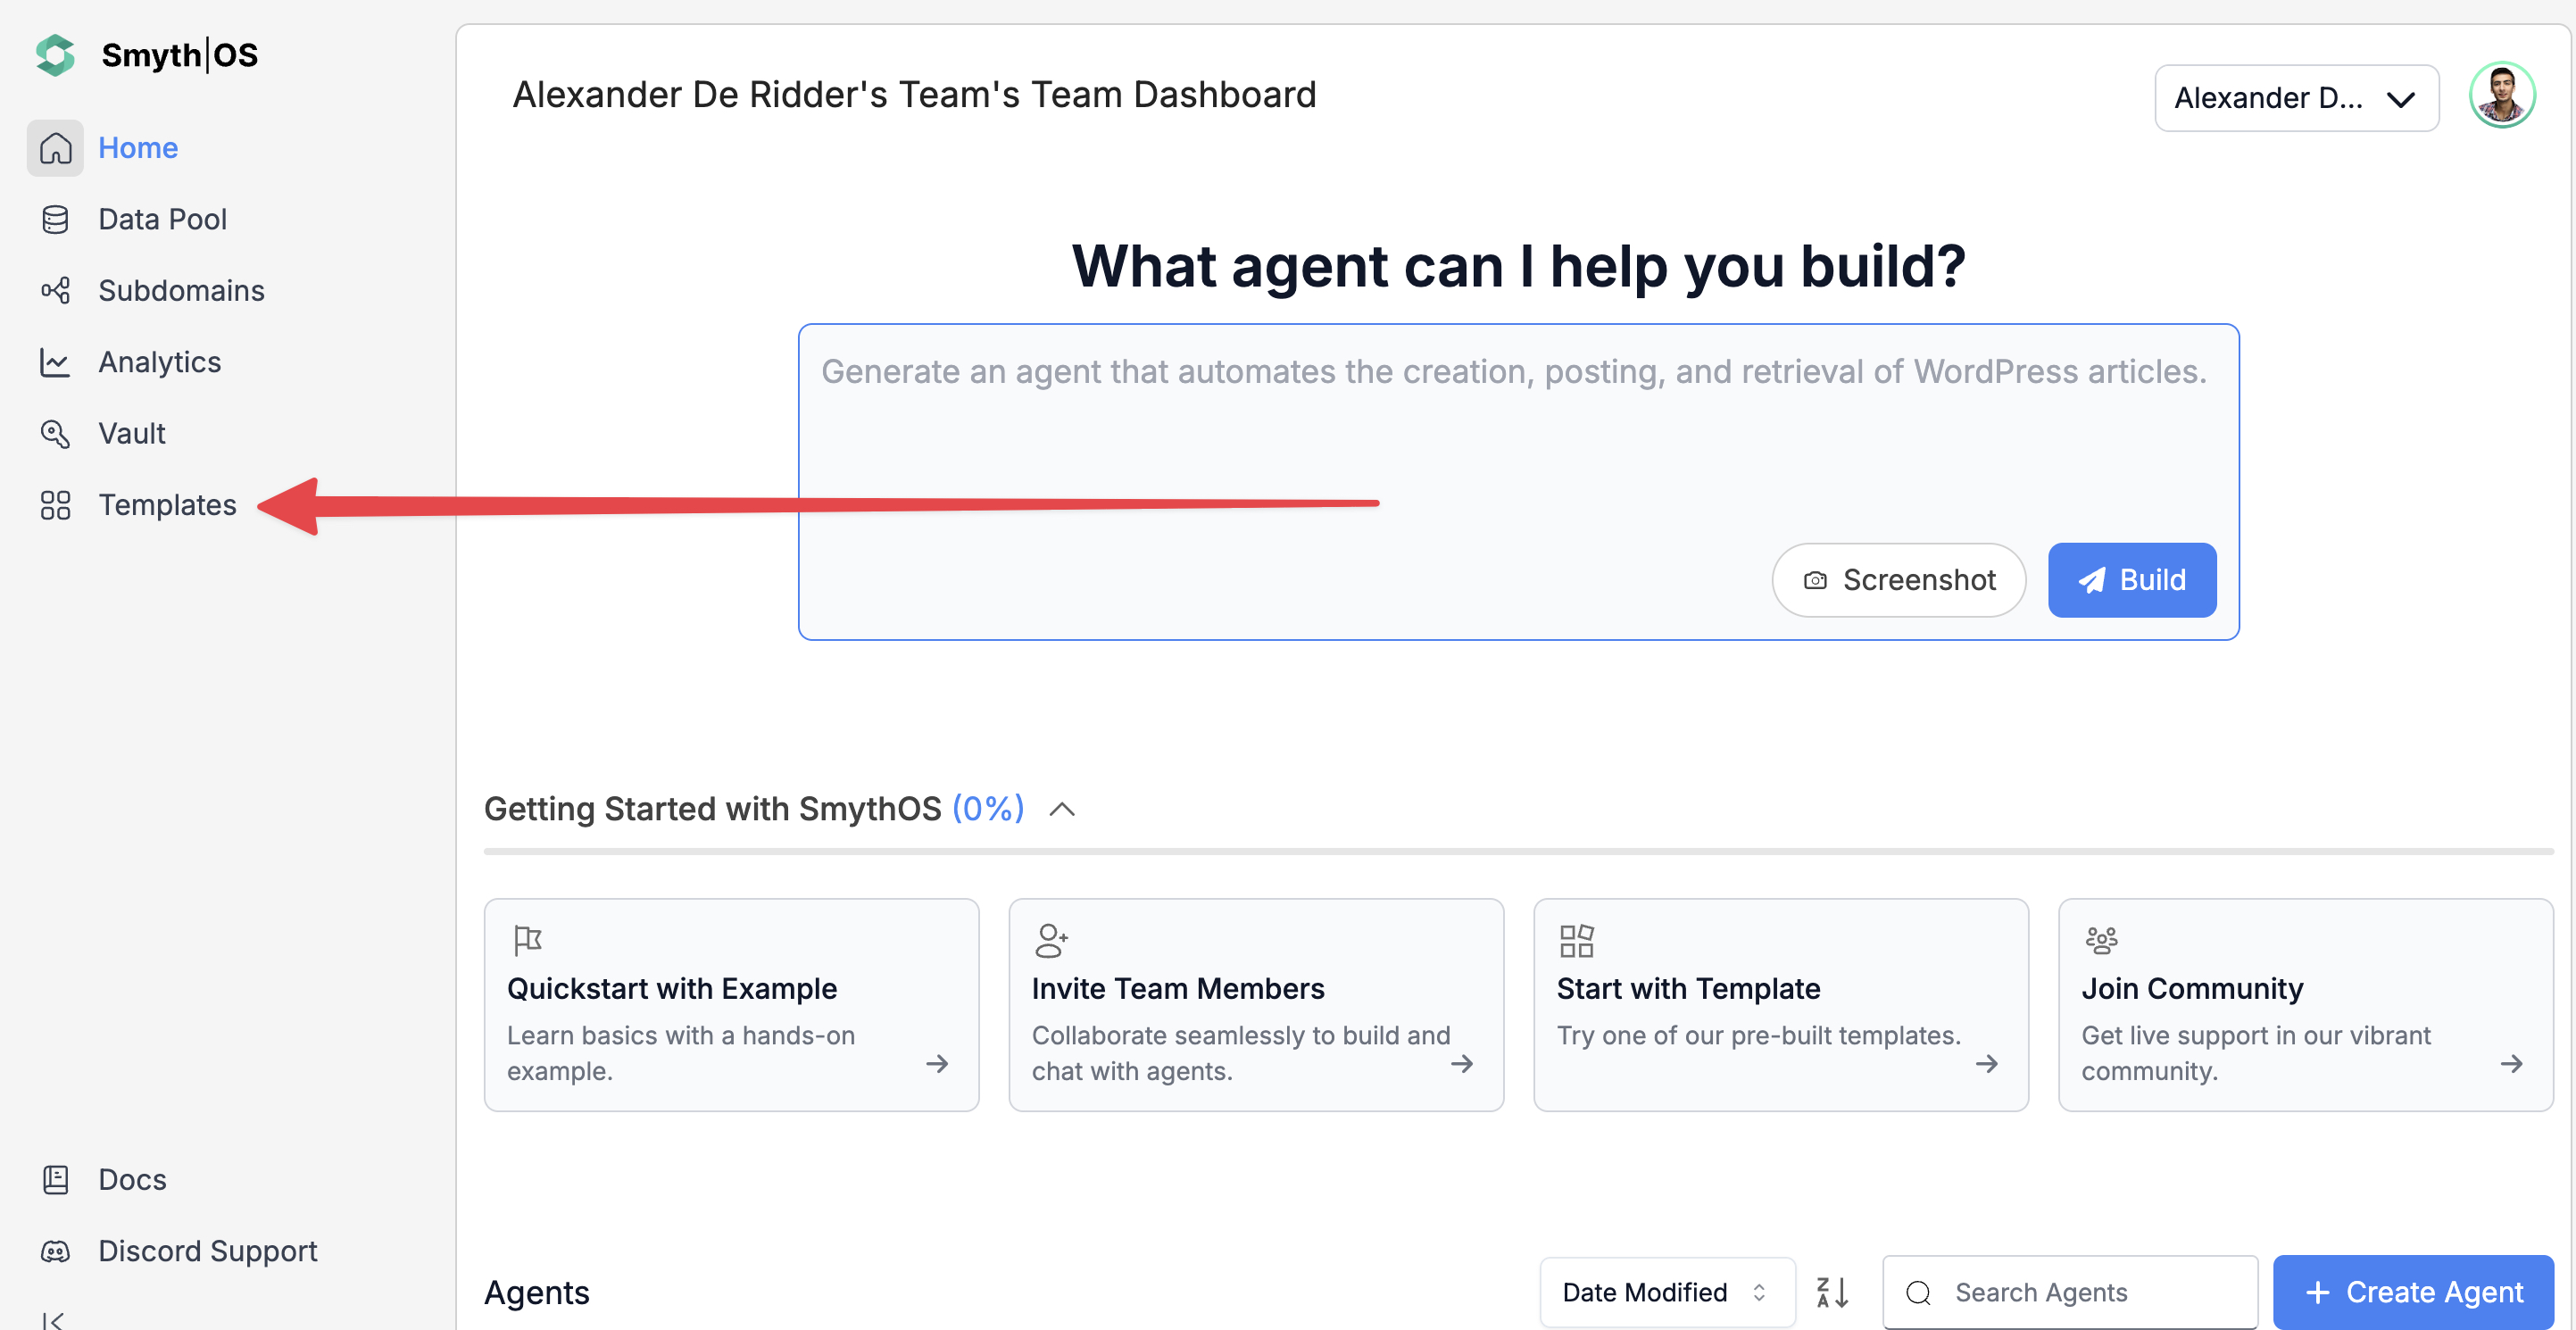
- Go to the Templates section in the sidebar
- Find the GitHub Content Manager Agent and click Remix
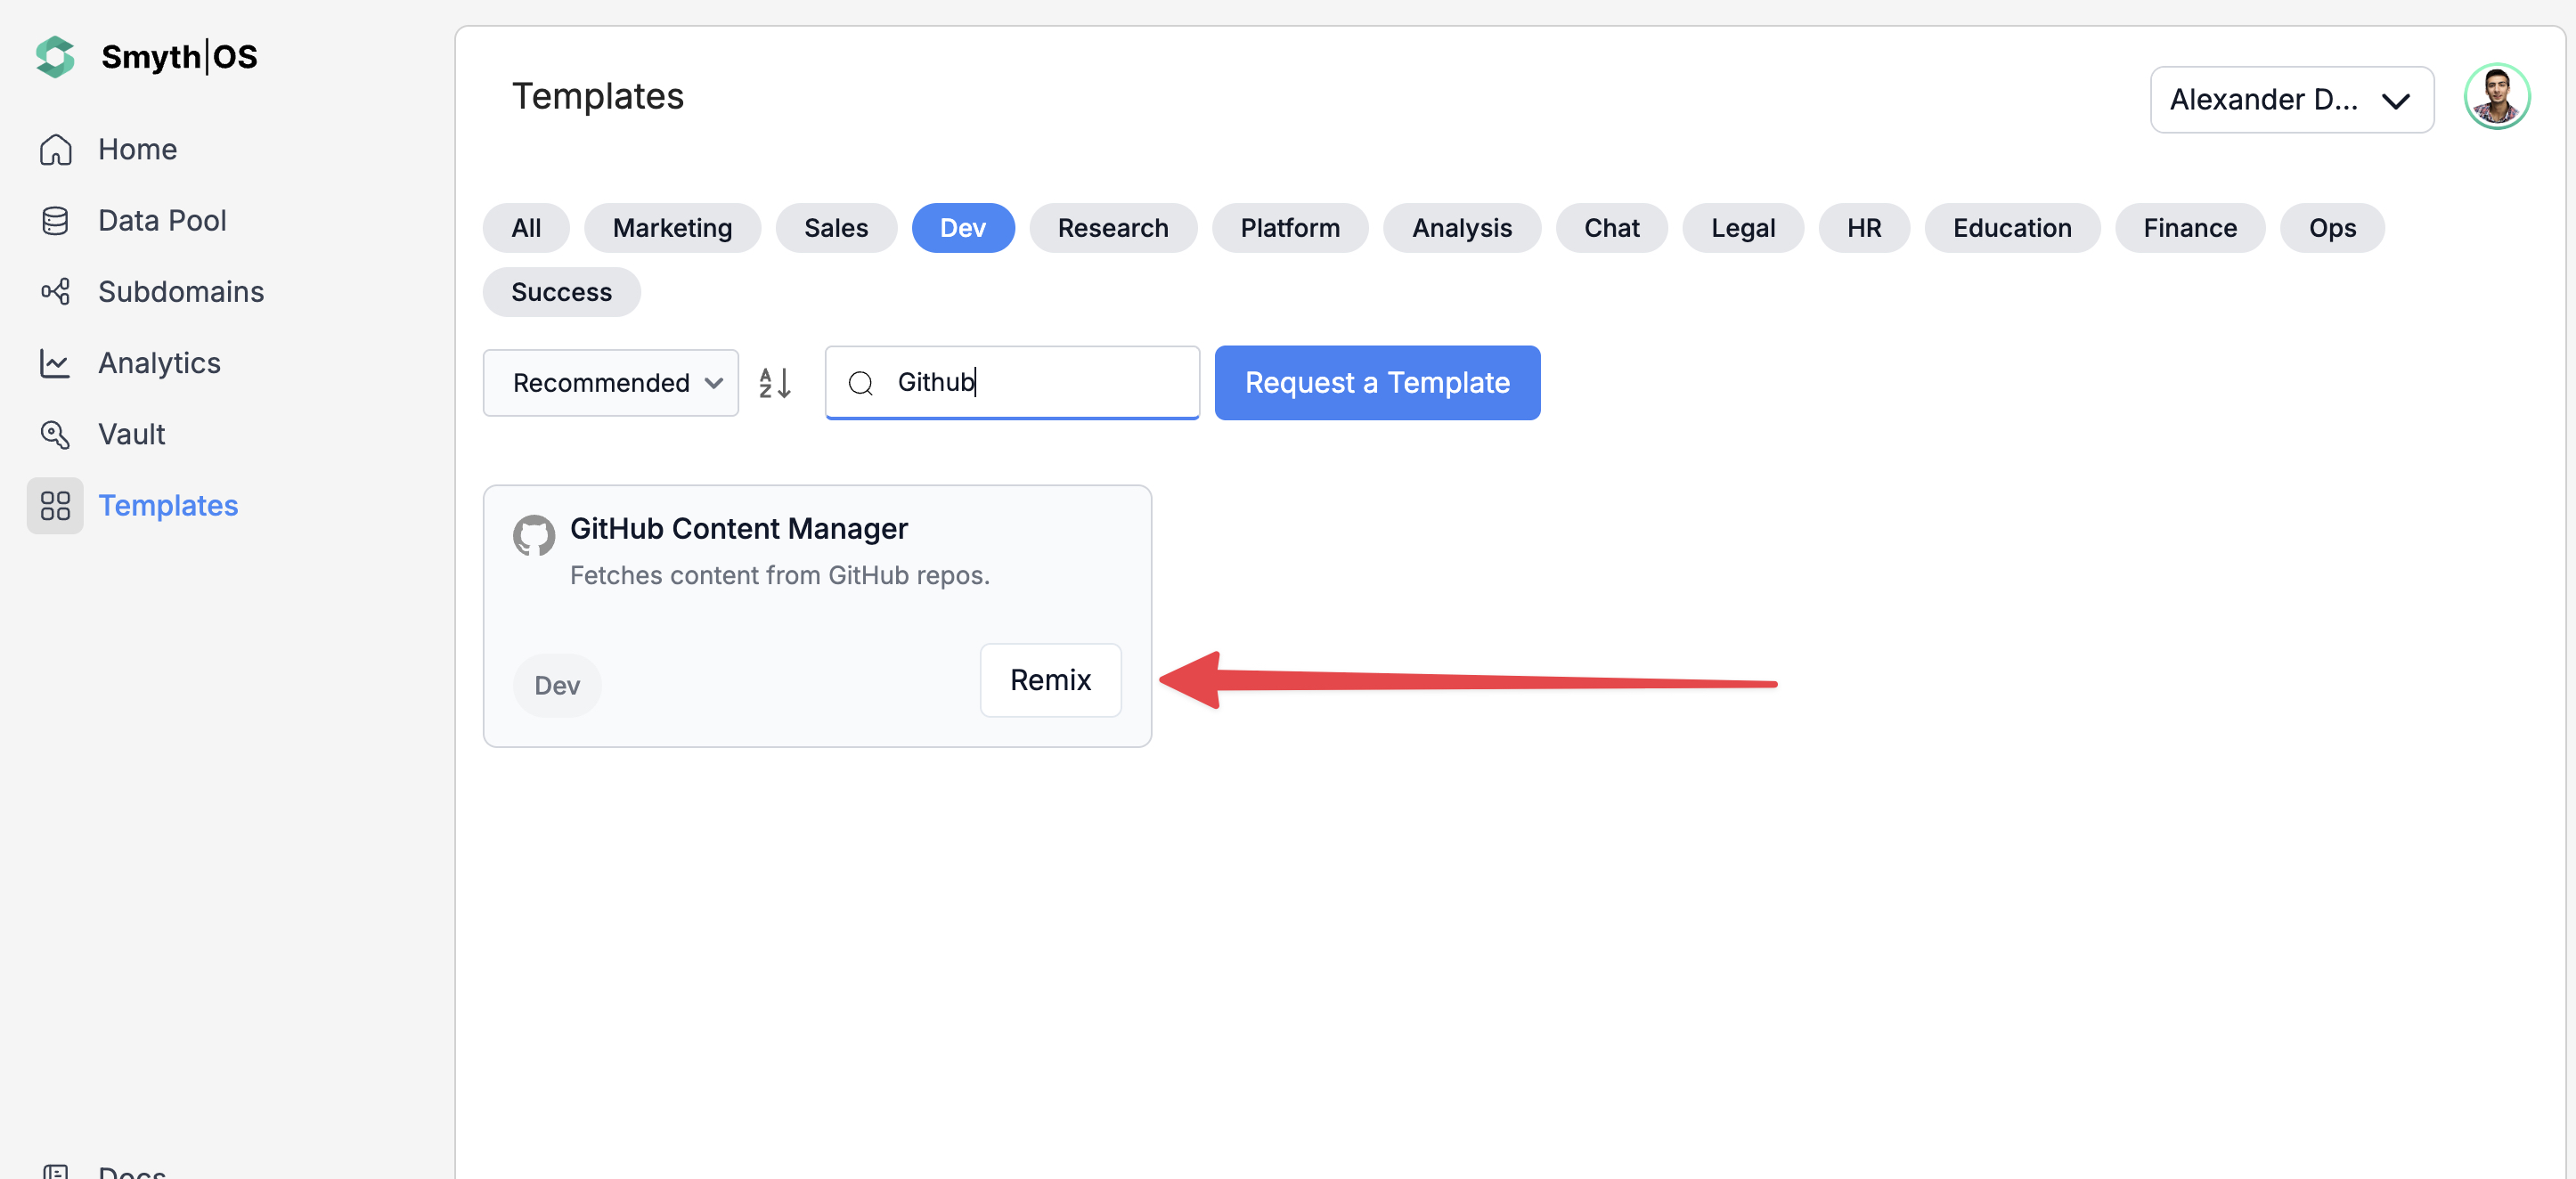
- The full workflow will open in Agent Studio
Step 2: Set Up Credentials (GitHub Access Token)
The agent requires a GitHub Personal Access Token to interact with your repositories.
Generate GitHub Access Token
- Navigate to https://github.com.
- In the upper-right corner of the page, click your profile photo, then click Settings.

- In the left sidebar, scroll down and click Developer settings.
- In the sidebar, click Personal access tokens then click Generate New Token (classic).

- Add a descriptive note to your token, set the expiration, and then checkmark the
reposcope (required for read/write access).

- Click the Generate Token button and copy the token immediately, as you will not be able to see it again.
Connect Token to Agent
- Store the copied token securely in your SmythOS Vault.
- In Agent Studio, click the gear icon on the GitHub integration components and select your stored token from the Vault for each component to save the configuration.
Step 3: Run the Agent
You can test the agent via the conversational interface or the Form Preview.
Testing a File Creation (Form Preview)
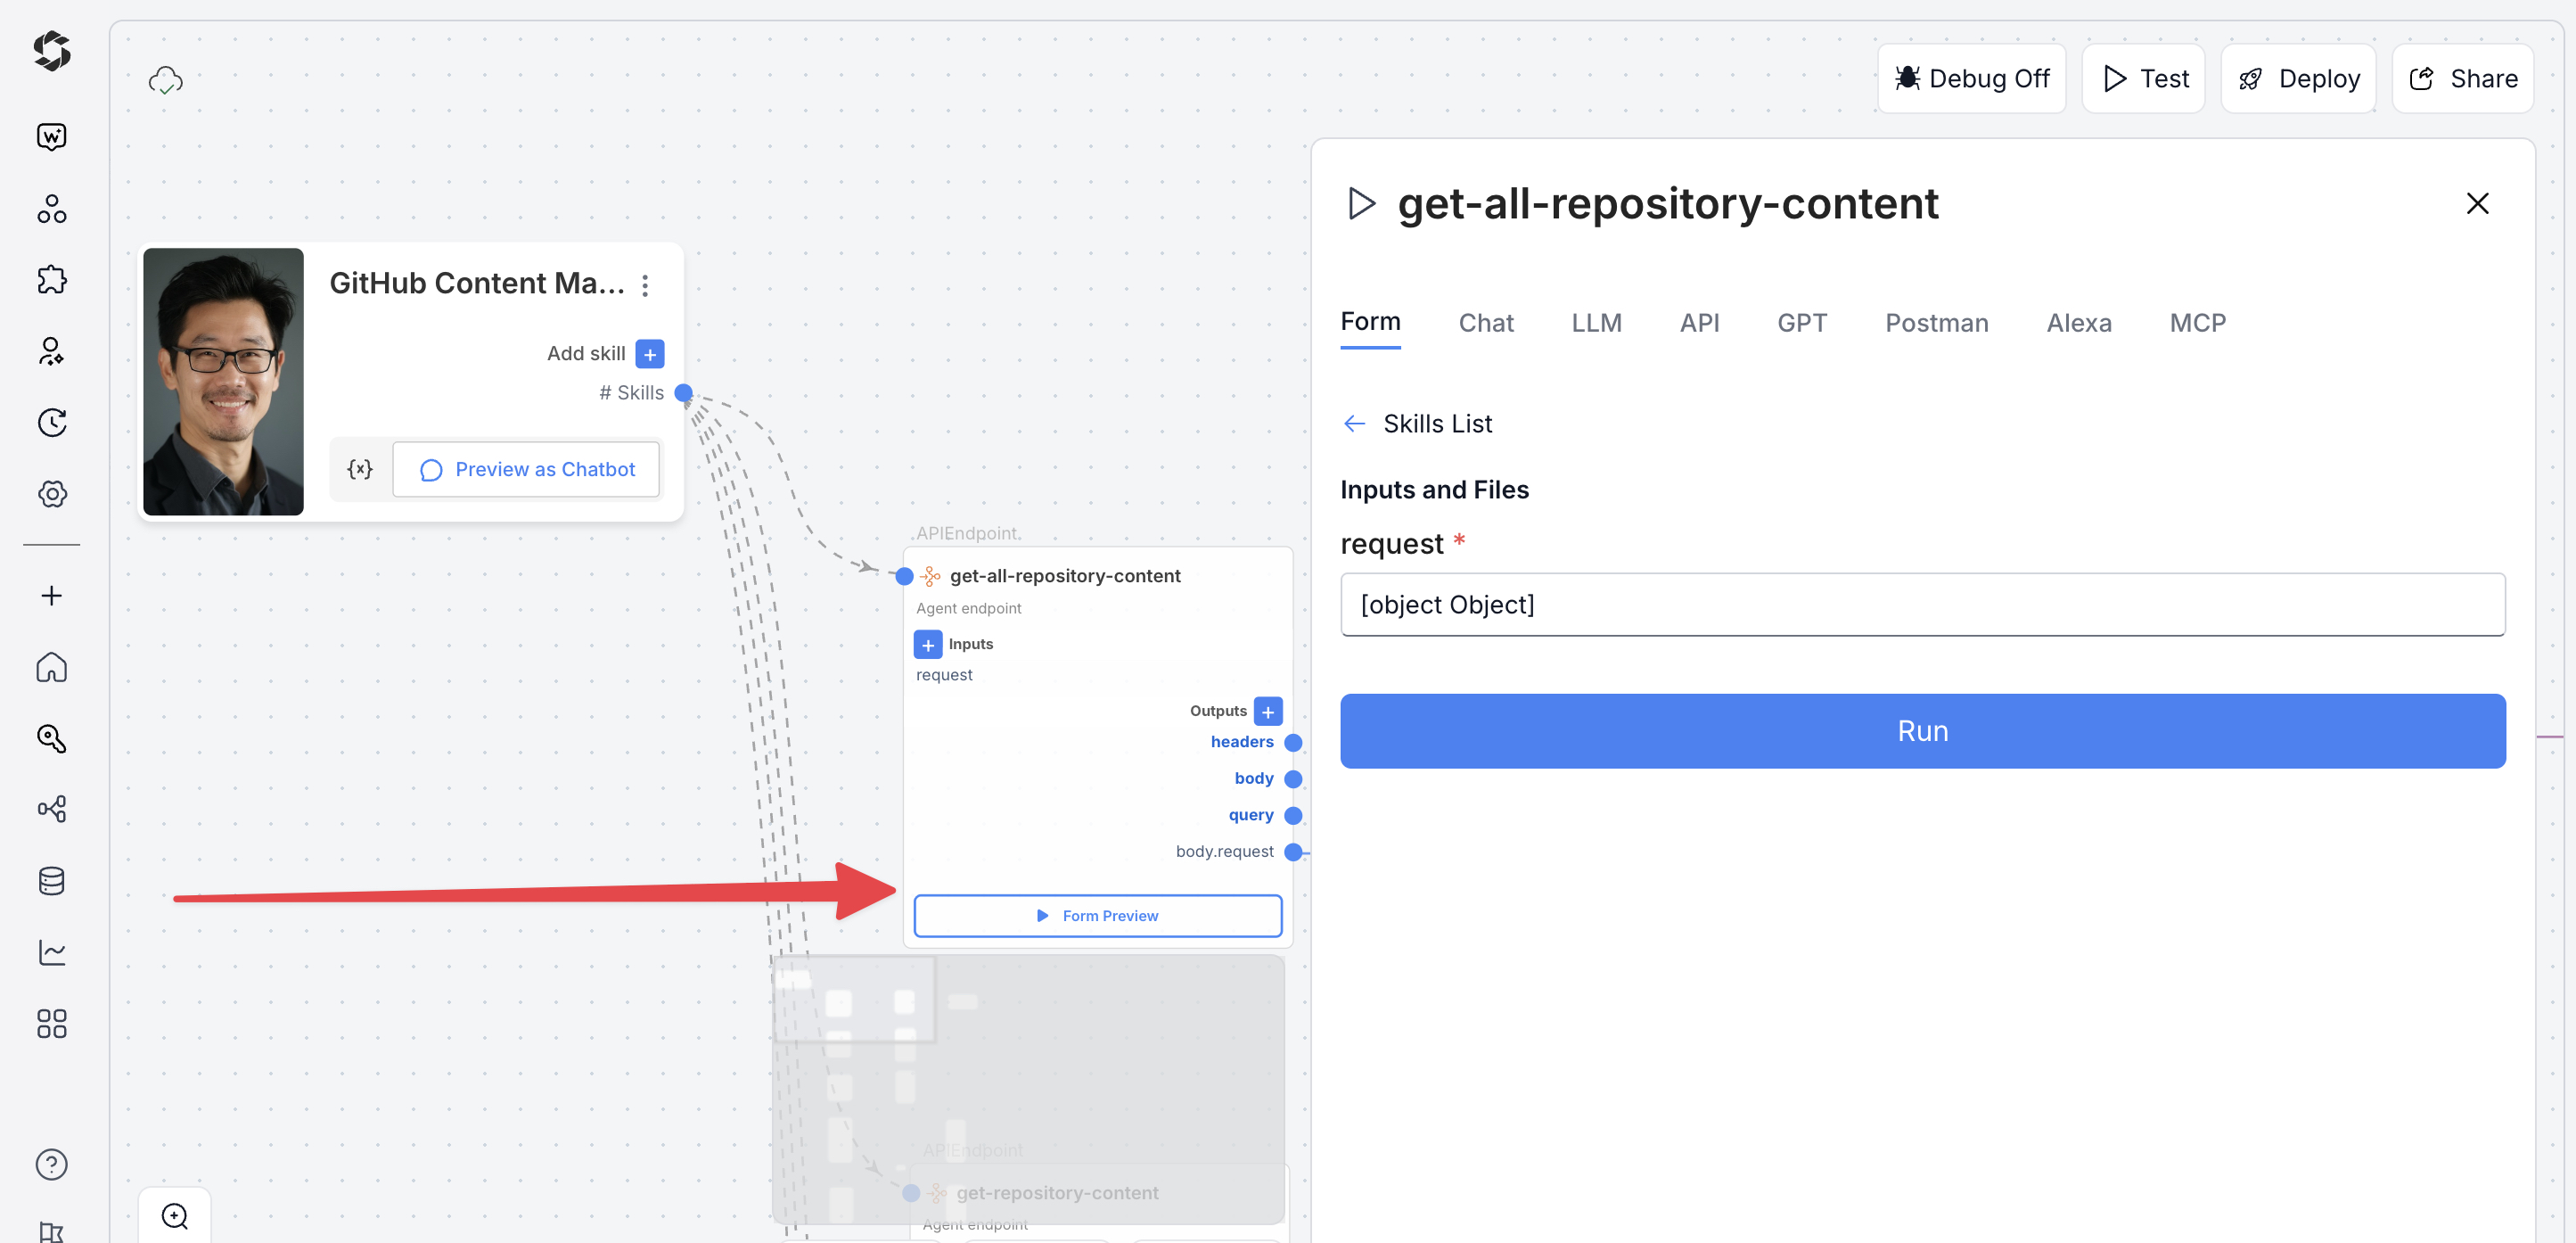
- Click Test (top-right) and switch to Form Preview.
- Fill in the required inputs for creating a new file (e.g.,
Action: Create File,Repo Owner,Repo Name,File Path, andContent (Base64)). - Click Run to execute the file creation and commit.
Testing via Chatbot
- Click the ChatBot icon and provide a prompt for file creation or update using the required parameters. For example:
- Update the file content in SmythOS-GitHub-Manager: File content: dXBkYXRlIHN1Y2Nlc3NmdWw=, Path: text11.txt, Commit message: agent message, Name: janice, Email: [email protected]
Deploying the Agent
Step 1: Start Deployment
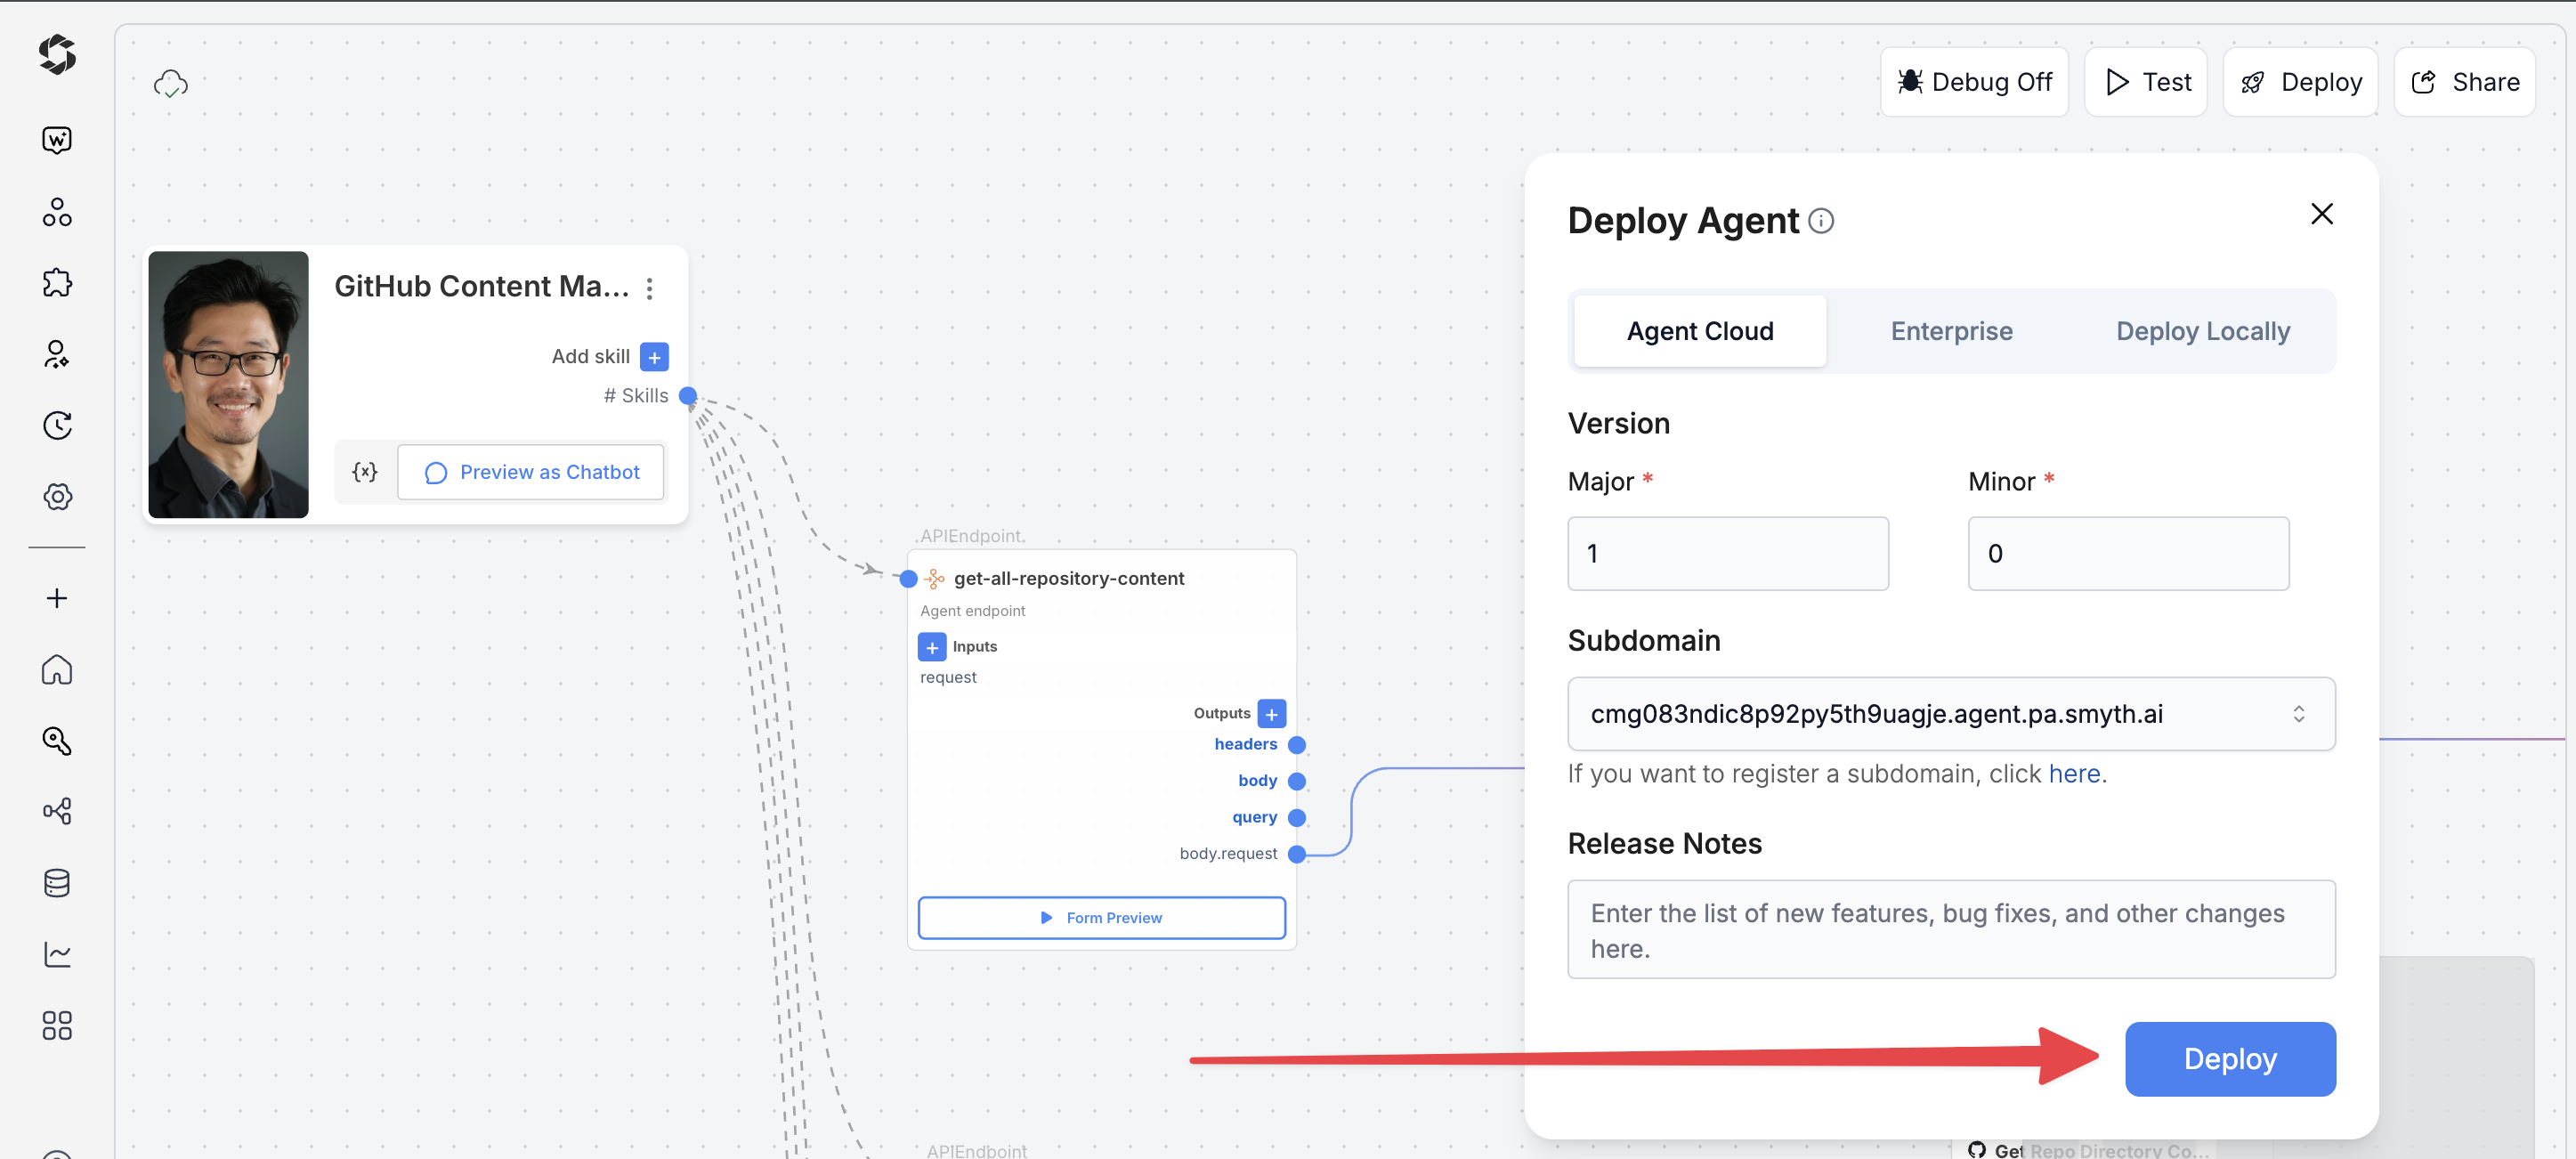
- Click Deploy (top-right corner of Agent Studio)
- Pick your environment:
- Agent Cloud (default, fully managed)
- Enterprise (self-managed, secure)
- Local Runtime (for development and offline use)
Step 2: Choose Your Deployment Type
Pick how users will interact with your agent.
- Custom GPT – Add instructions, behaviors, or tools
- Chatbot – Deploy a conversational agent that can interact with users via chat interfaces.
- LLM – Connect to large language models with API keys for flexible integrations.
- API – Use API endpoints to programmatically call your agent from applications or services.
- MCP – Use Model Context Protocol for structured workflows.
- Alexa – Launch as a voice assistant skill.
You can find detailed guides to them by reading the Deploy Your Agent As... page.
Customization Tips
- Automated Base64 Handling – Add a
Codecomponent to automatically convert text inputs to Base64 before calling the GitHub Create/Update file actions, making the agent easier to use. - Error Reporting – Implement custom error handling to notify users via email or Slack if a commit fails due to authentication or file path issues.
- Branch Management – Modify the workflow to accept an optional
branchinput, allowing the agent to commit changes to a feature branch instead of the default branch. - External Triggers – Integrate a Schedule or Webhook component to trigger content updates automatically (e.g., nightly sync of documentation).
- Security – Use a dedicated, limited-scope token for different actions (e.g., read-only token for content retrieval) to enhance security.