Deploy as a Voice Agent
Give your agent a voice. SmythOS allows you to deploy your agent as a voice-enabled assistant in two primary ways: as an embeddable chat widget for your website, or as the backend for a custom Amazon Alexa Skill.
Embed a Voice Chat on Your Website
This option adds a voice-enabled chat widget to your website, allowing users to talk to your agent directly from their browser.
1. Find Your Code Snippet
- In your agent, navigate to the Deploy tab.
- In the Embed section, find the Voice option and click Get Endpoints.
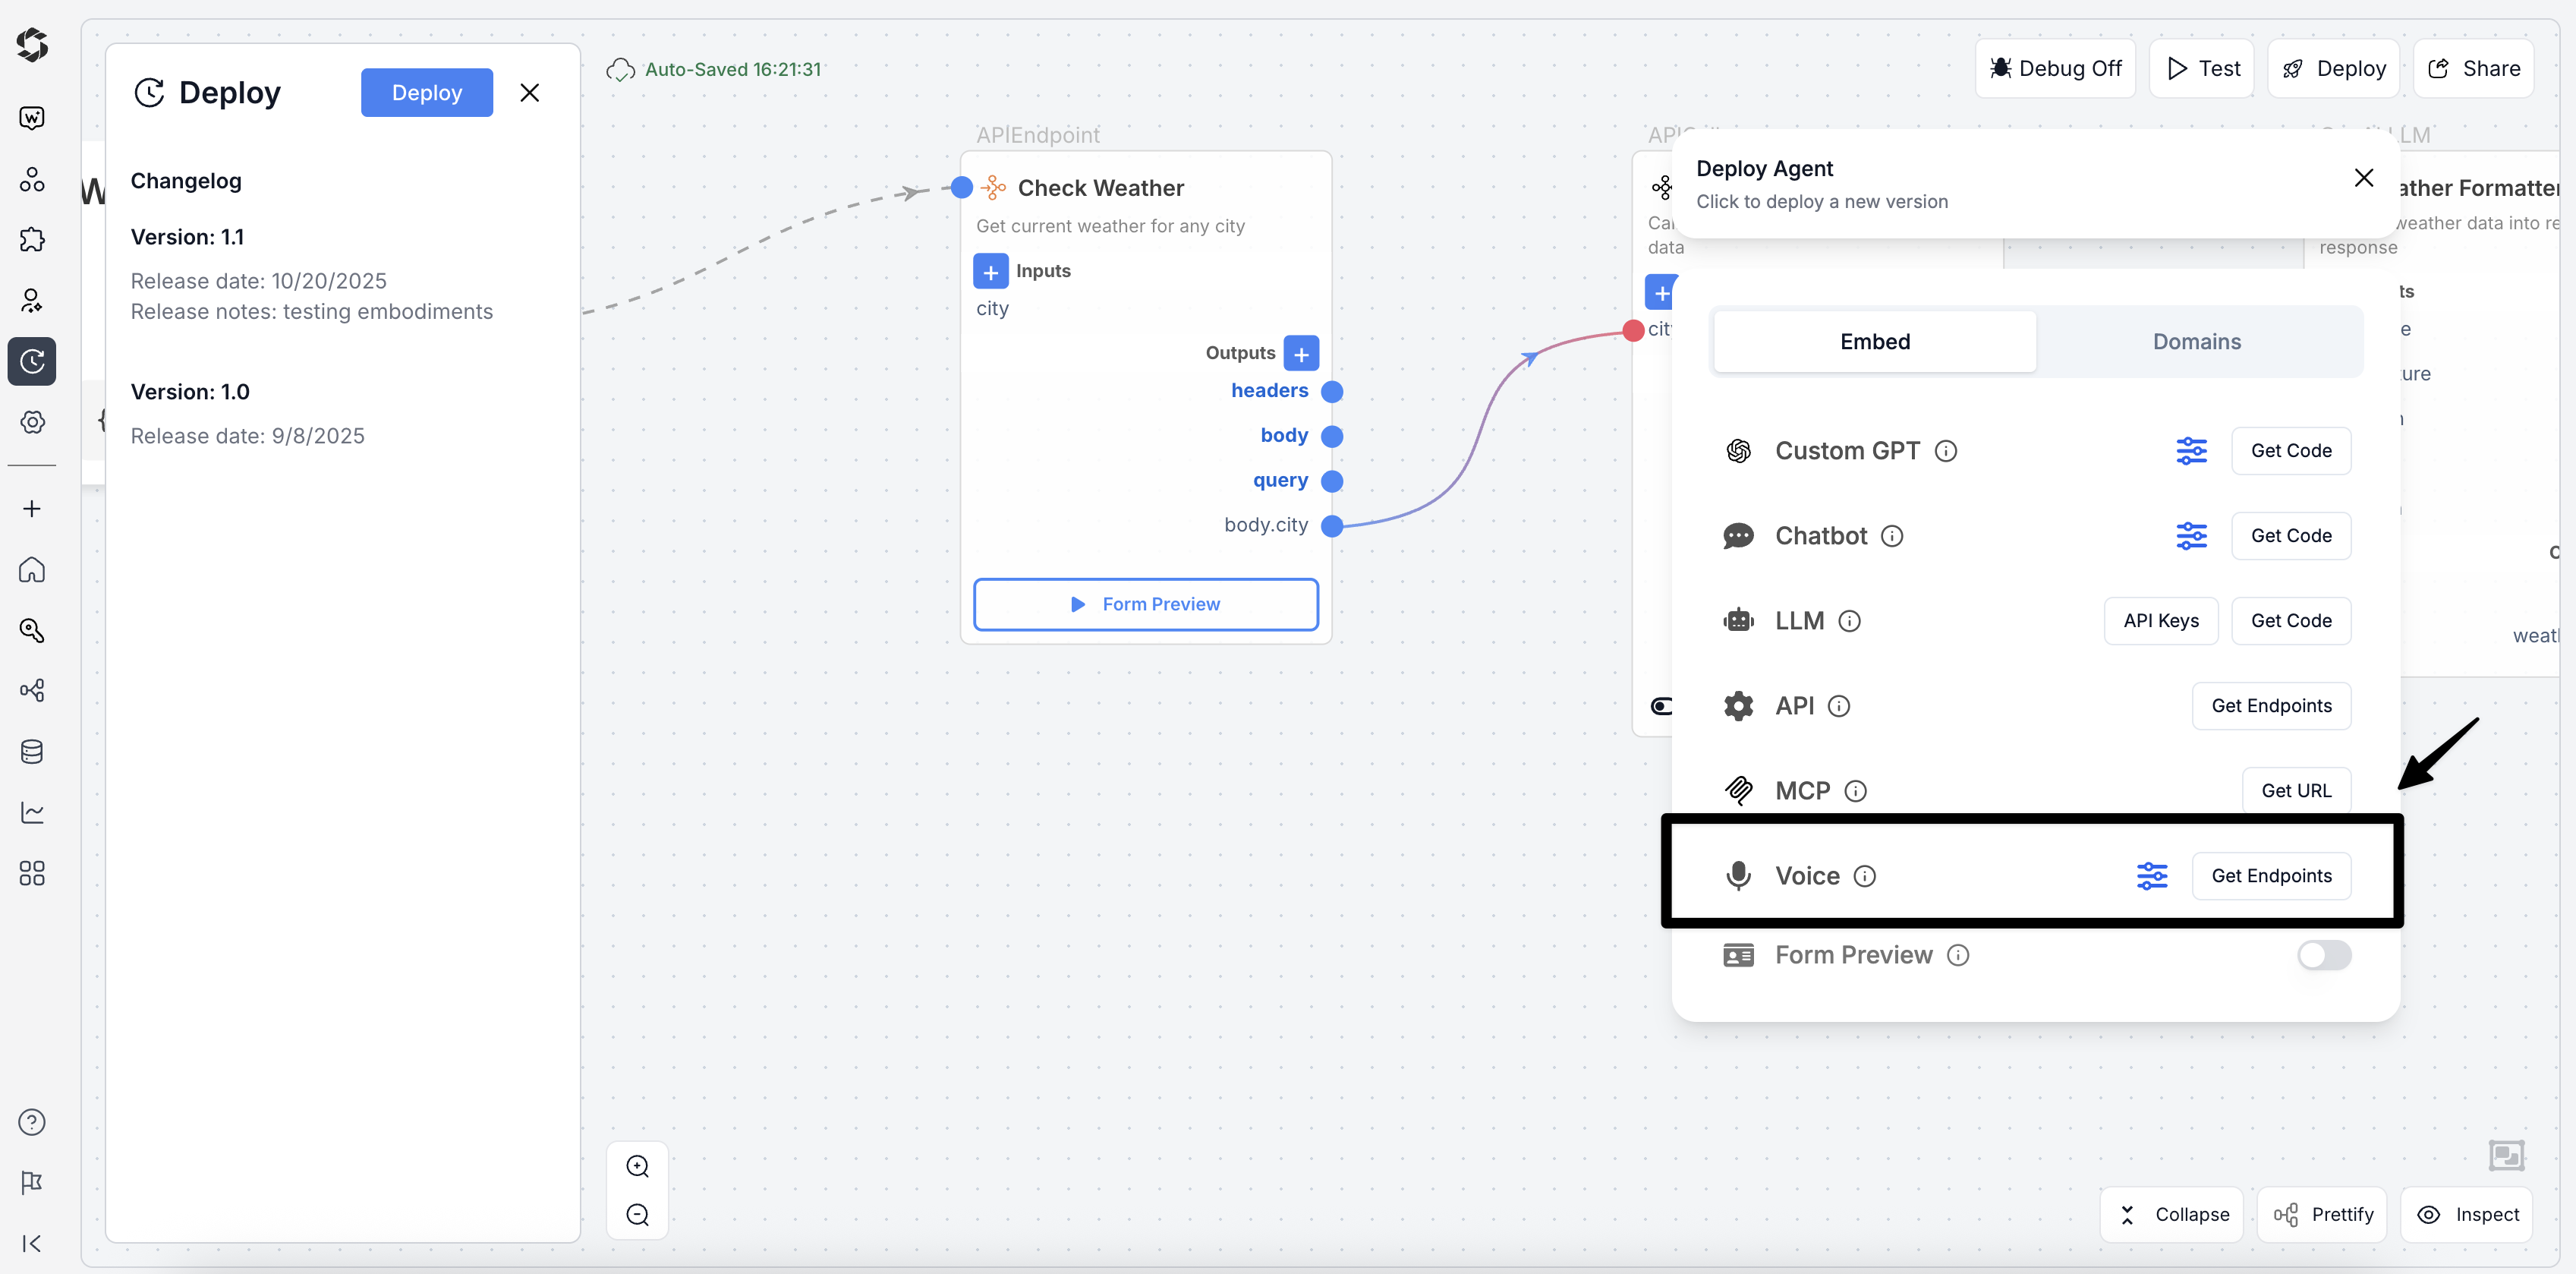
Click 'Get Endpoints' on the Voice option in the Embed section.
- In the "Voice and Alexa Integration" modal, find the Voice Integration section and copy the Code Snippet.
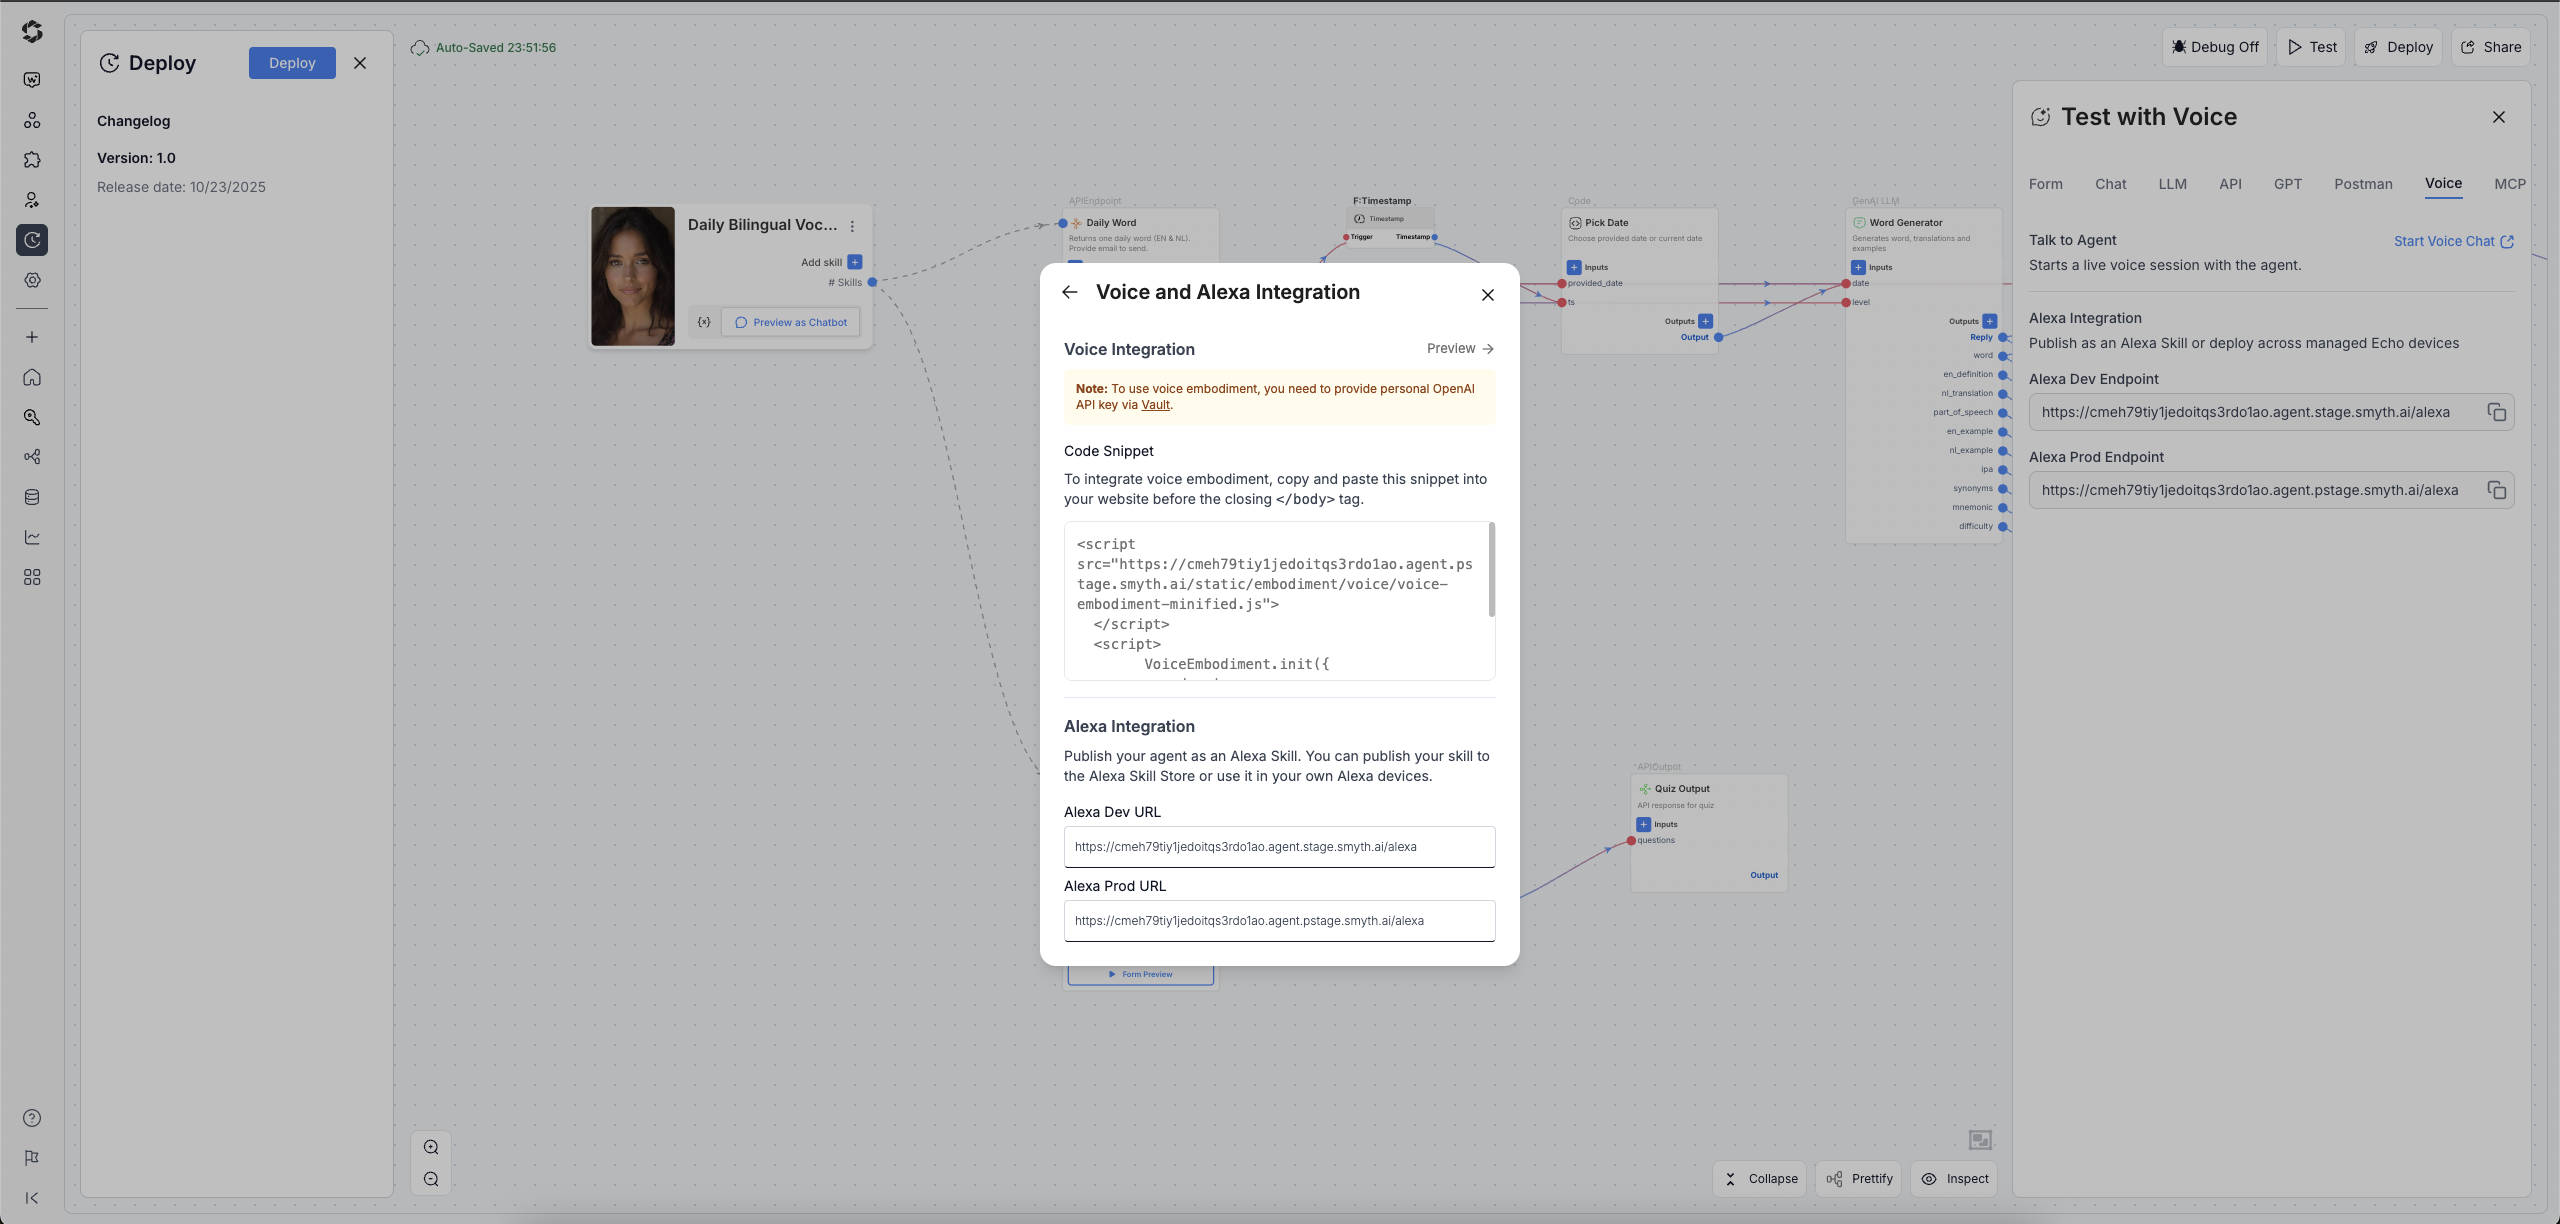
Copy the Code Snippet from the Voice Integration section.
2. Add the Code to Your Website
Paste the snippet you copied just before the closing </body> tag in your website's HTML file.
The snippet will look similar to this:
<script
  src="https://<your-id>.smyth.ai/voice.agent.js"
  id="smythos-voice-embed"
  data-voice-embed-id="https://<your-agent-id>/voiceEmbedment.init?cid=..."
>
</script>
<script>
  voiceEmbedment.init()
</script>
3. How it Looks
Once embedded, a microphone icon will appear on your site. When activated, the voice interface provides clear visual feedback and controls for the user.

The voice chat interface showing active listening/speaking status with microphone controls.
Connect to an Amazon Alexa Skill
This option uses SmythOS to provide the backend HTTPS endpoint for a custom Amazon Alexa Skill.
Step 1 (Development): Get Your Test Endpoint
The fastest way to start developing your Alexa skill is to use the Test panel. This gives you a development endpoint without needing to run a full deployment.
- In your agent, click the Test button in the top-right debug panel.
- Select the Voice tab.
- Copy the Alexa Dev Endpoint. This is the URL you will use for initial setup and testing in the Alexa Developer Console.
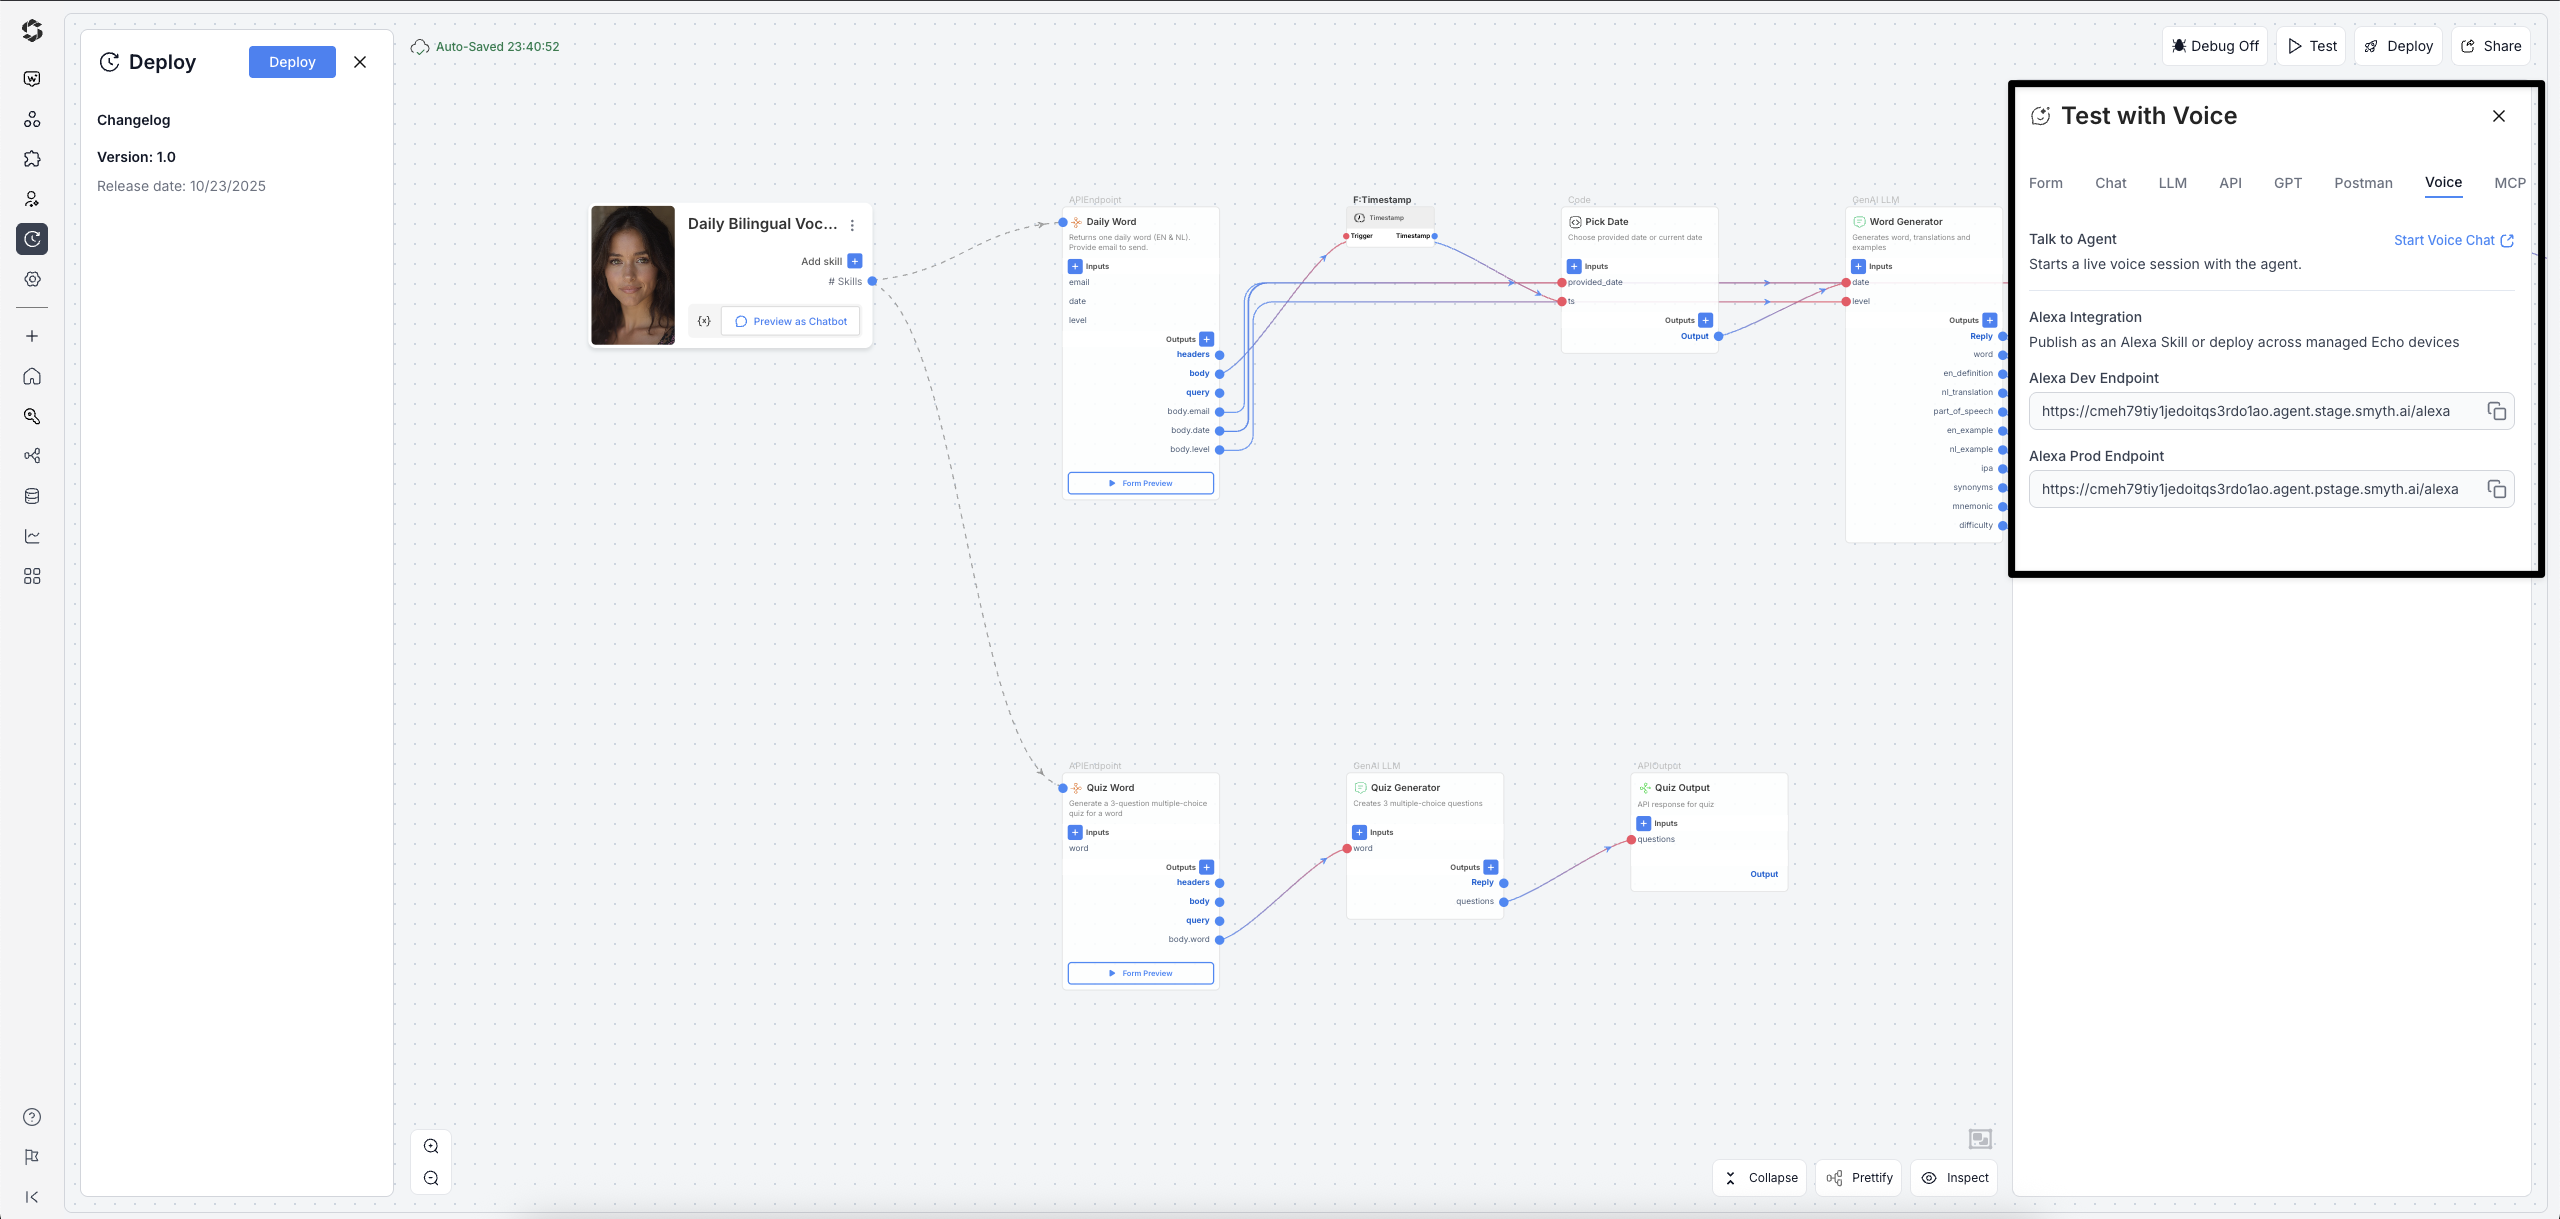
Use the Test panel's Voice tab to get your development endpoint.
Step 2 (Production): Get Your Stable Production Endpoint
Once you have tested your skill and are ready to deploy it, you should switch to the permanent, stable endpoint.
- Gi to the Deploy tab.
- Click Get Endpoints on the Voice option.
- From the "Voice and Alexa Integration" modal, copy the Alexa Prod URL (e.g.,
...agent.pstage.smyth.ai/alexa).
Use the Alexa Prod URL from the Deploy modal for your live skill.
Step 3: Configure Your Skill
Now that you have your endpoint URL (from Step 1 or 2), you are ready to configure your skill.
What’s Next?
Now that you have your voice endpoints, you can:
- Deploy your agent as an Alexa Skill using the endpoint you just copied.
- Explore other deployment types, like a web-based ChatBot.
- Review your agent's Logs to see conversations from your new voice channel.