Deploy as Alexa Skill
Your agent, now voice-enabled. Connect it to Alexa and let users talk to it like a human.
Why Deploy Your Agent to Alexa?
Voice extends your agent’s reach. Alexa integration lets users interact naturally with no screens or keyboards required. It’s ideal for:
- Personal assistants
- FAQ bots
- Home automation agents
- Productivity helpers
All it takes is one endpoint and a little setup.
Prerequisites
Make sure you have the following ready:
- A deployed SmythOS agent
- An Amazon Developer account (sign up here)
Step 1: Get Your SmythOS Alexa Endpoint URL
Your agent's stable Alexa endpoint is available once it's deployed.
- Go to your SmythOS Dashboard and select your agent.
- Navigate to the Deploy tab.
- Under the Embed section, find and copy the Alexa endpoint URL. It will look like this:
Step 2: Create a New Alexa Skill in the Developer Console
- Visit the Alexa Developer Console.
- Click Create Skill.
- Enter a Skill name (e.g., "My SmythOS Agent") and choose a Primary locale (e.g., "English (US)"). Click Next.
- Choose the type of experience: Select Other.
- Choose a model: Select Custom.
- (Optional) You can turn on "Automatically distribute your skill..." if you want your skill to work in all locales with the same language.
- Choose a method to host your skill's backend resources: Select Provision your own. This is required to connect to SmythOS. Click Next.
- Choose a template: Select Start from Scratch. Click Next.
- Review your details and click Create Skill.
It will take a few moments for Amazon to build the voice model.
Step 3: Add Your SmythOS Endpoint as the Skill Handler
- In the left sidebar of the Alexa console, click on Endpoint.
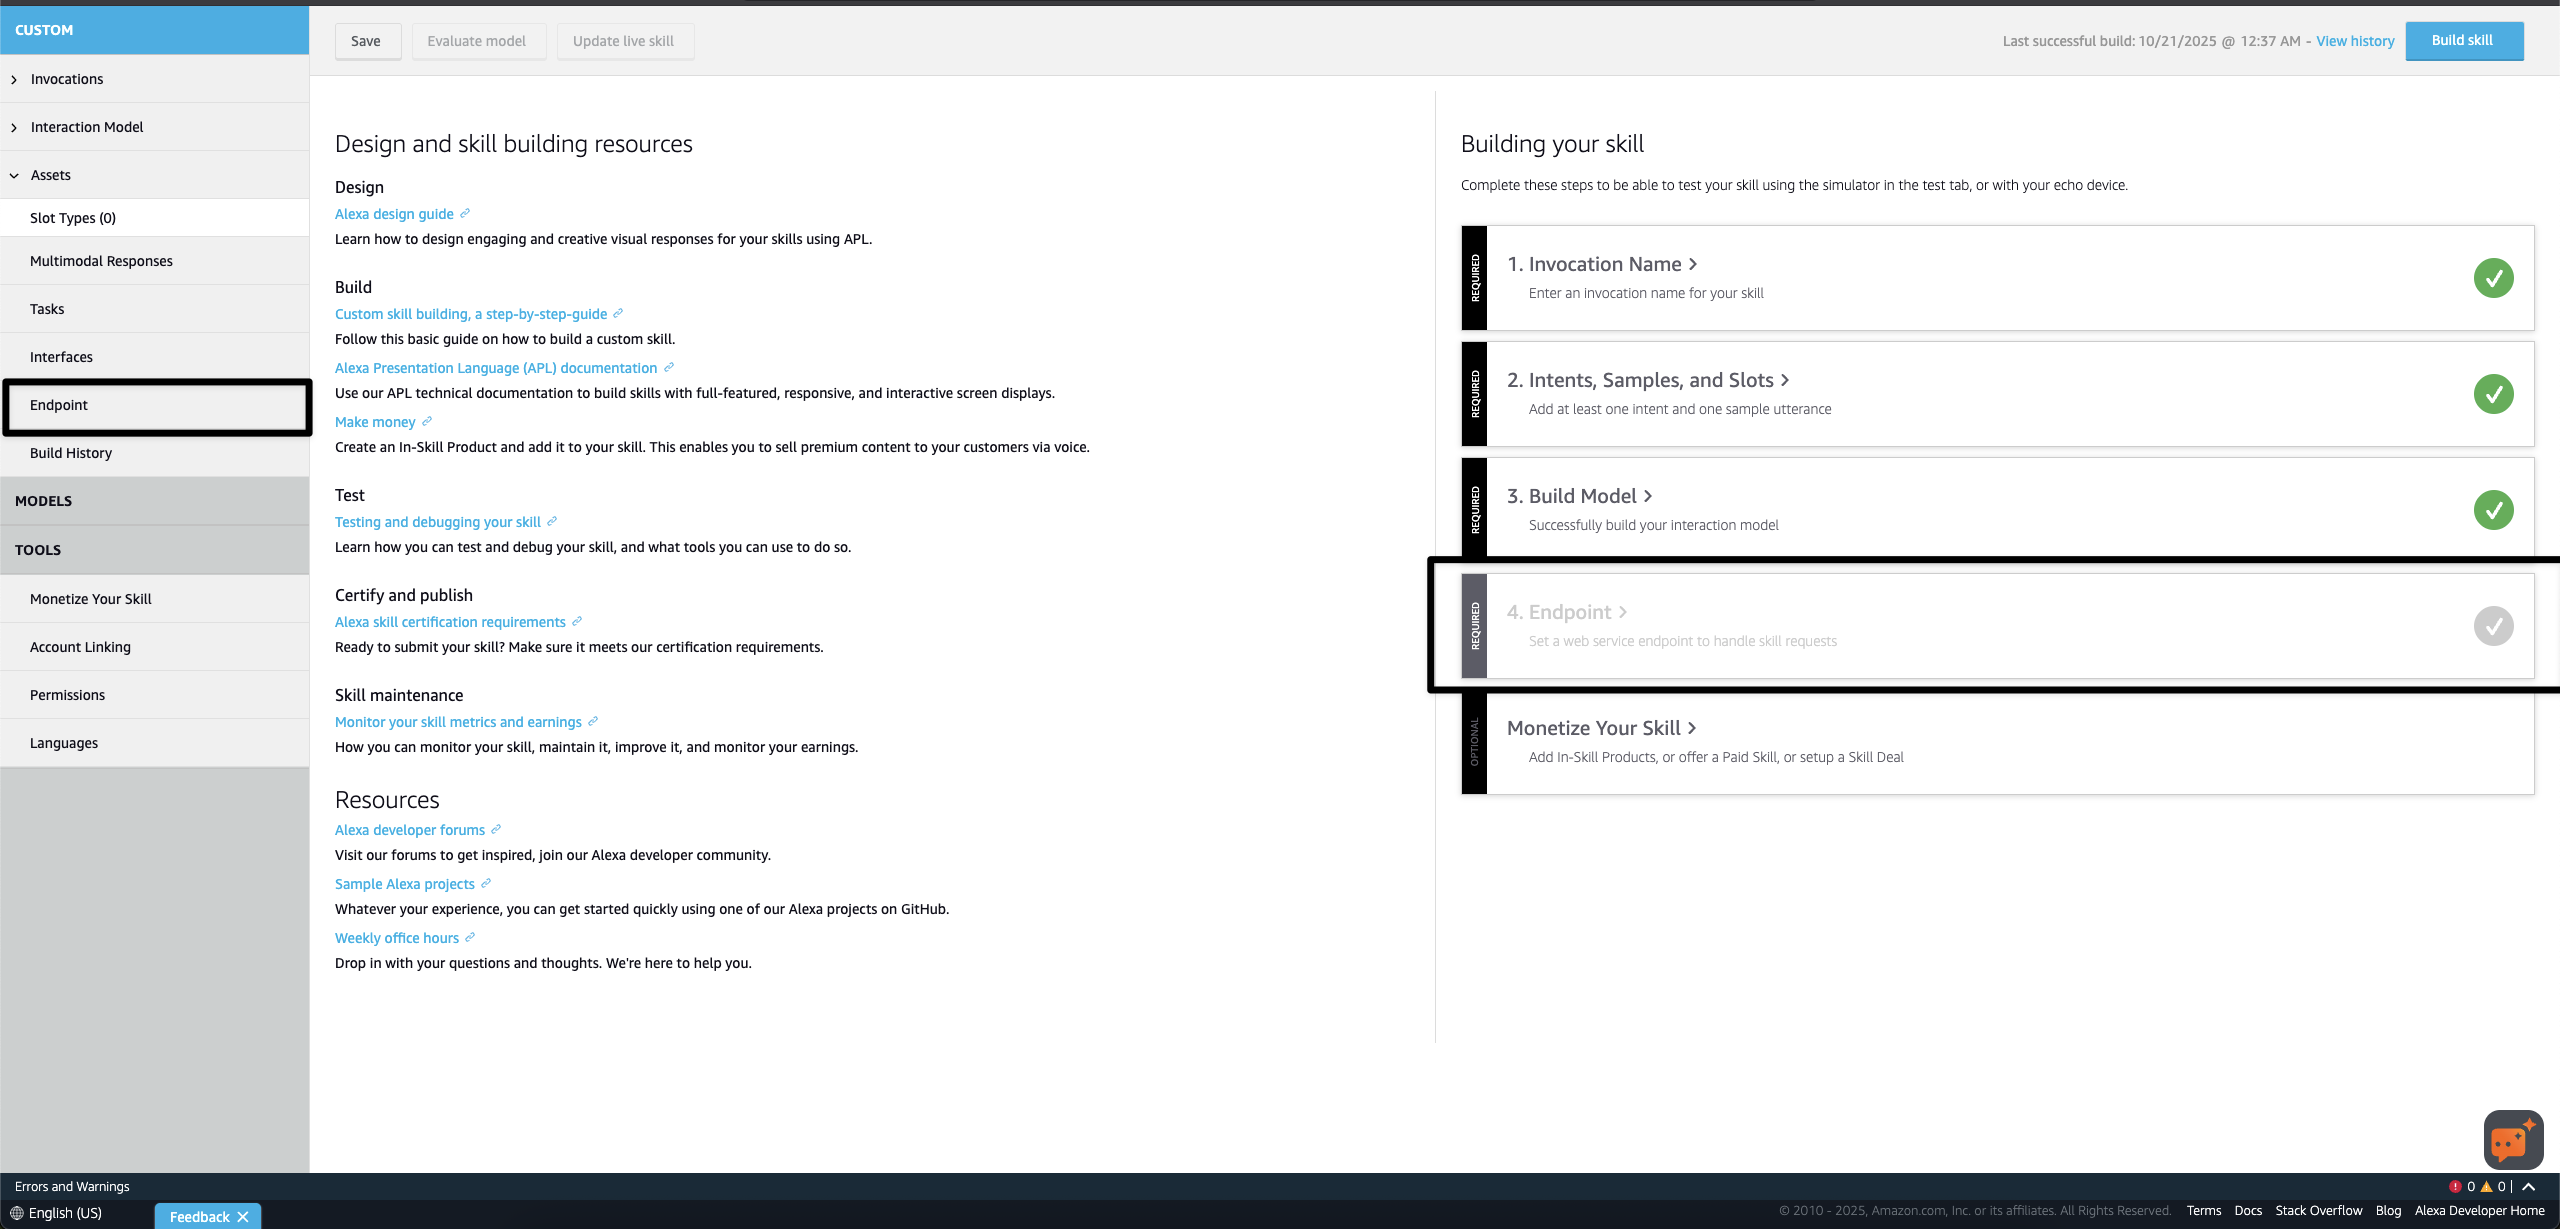
Set the Service Endpoint Type to HTTPS and paste your SmythOS URL in the Default Region.
- Set the Service Endpoint Type to HTTPS.
- Paste your SmythOS Alexa URL (from Step 1) into the Default Region text field. This is a required field.
- From the dropdown menu below, select My development endpoint is a sub-domain of a domain that has a wildcard certificate from a certificate authority.
- Click Save Endpoints at the top of the page.
Step 4: Choose an Invocation Name for Your Skill
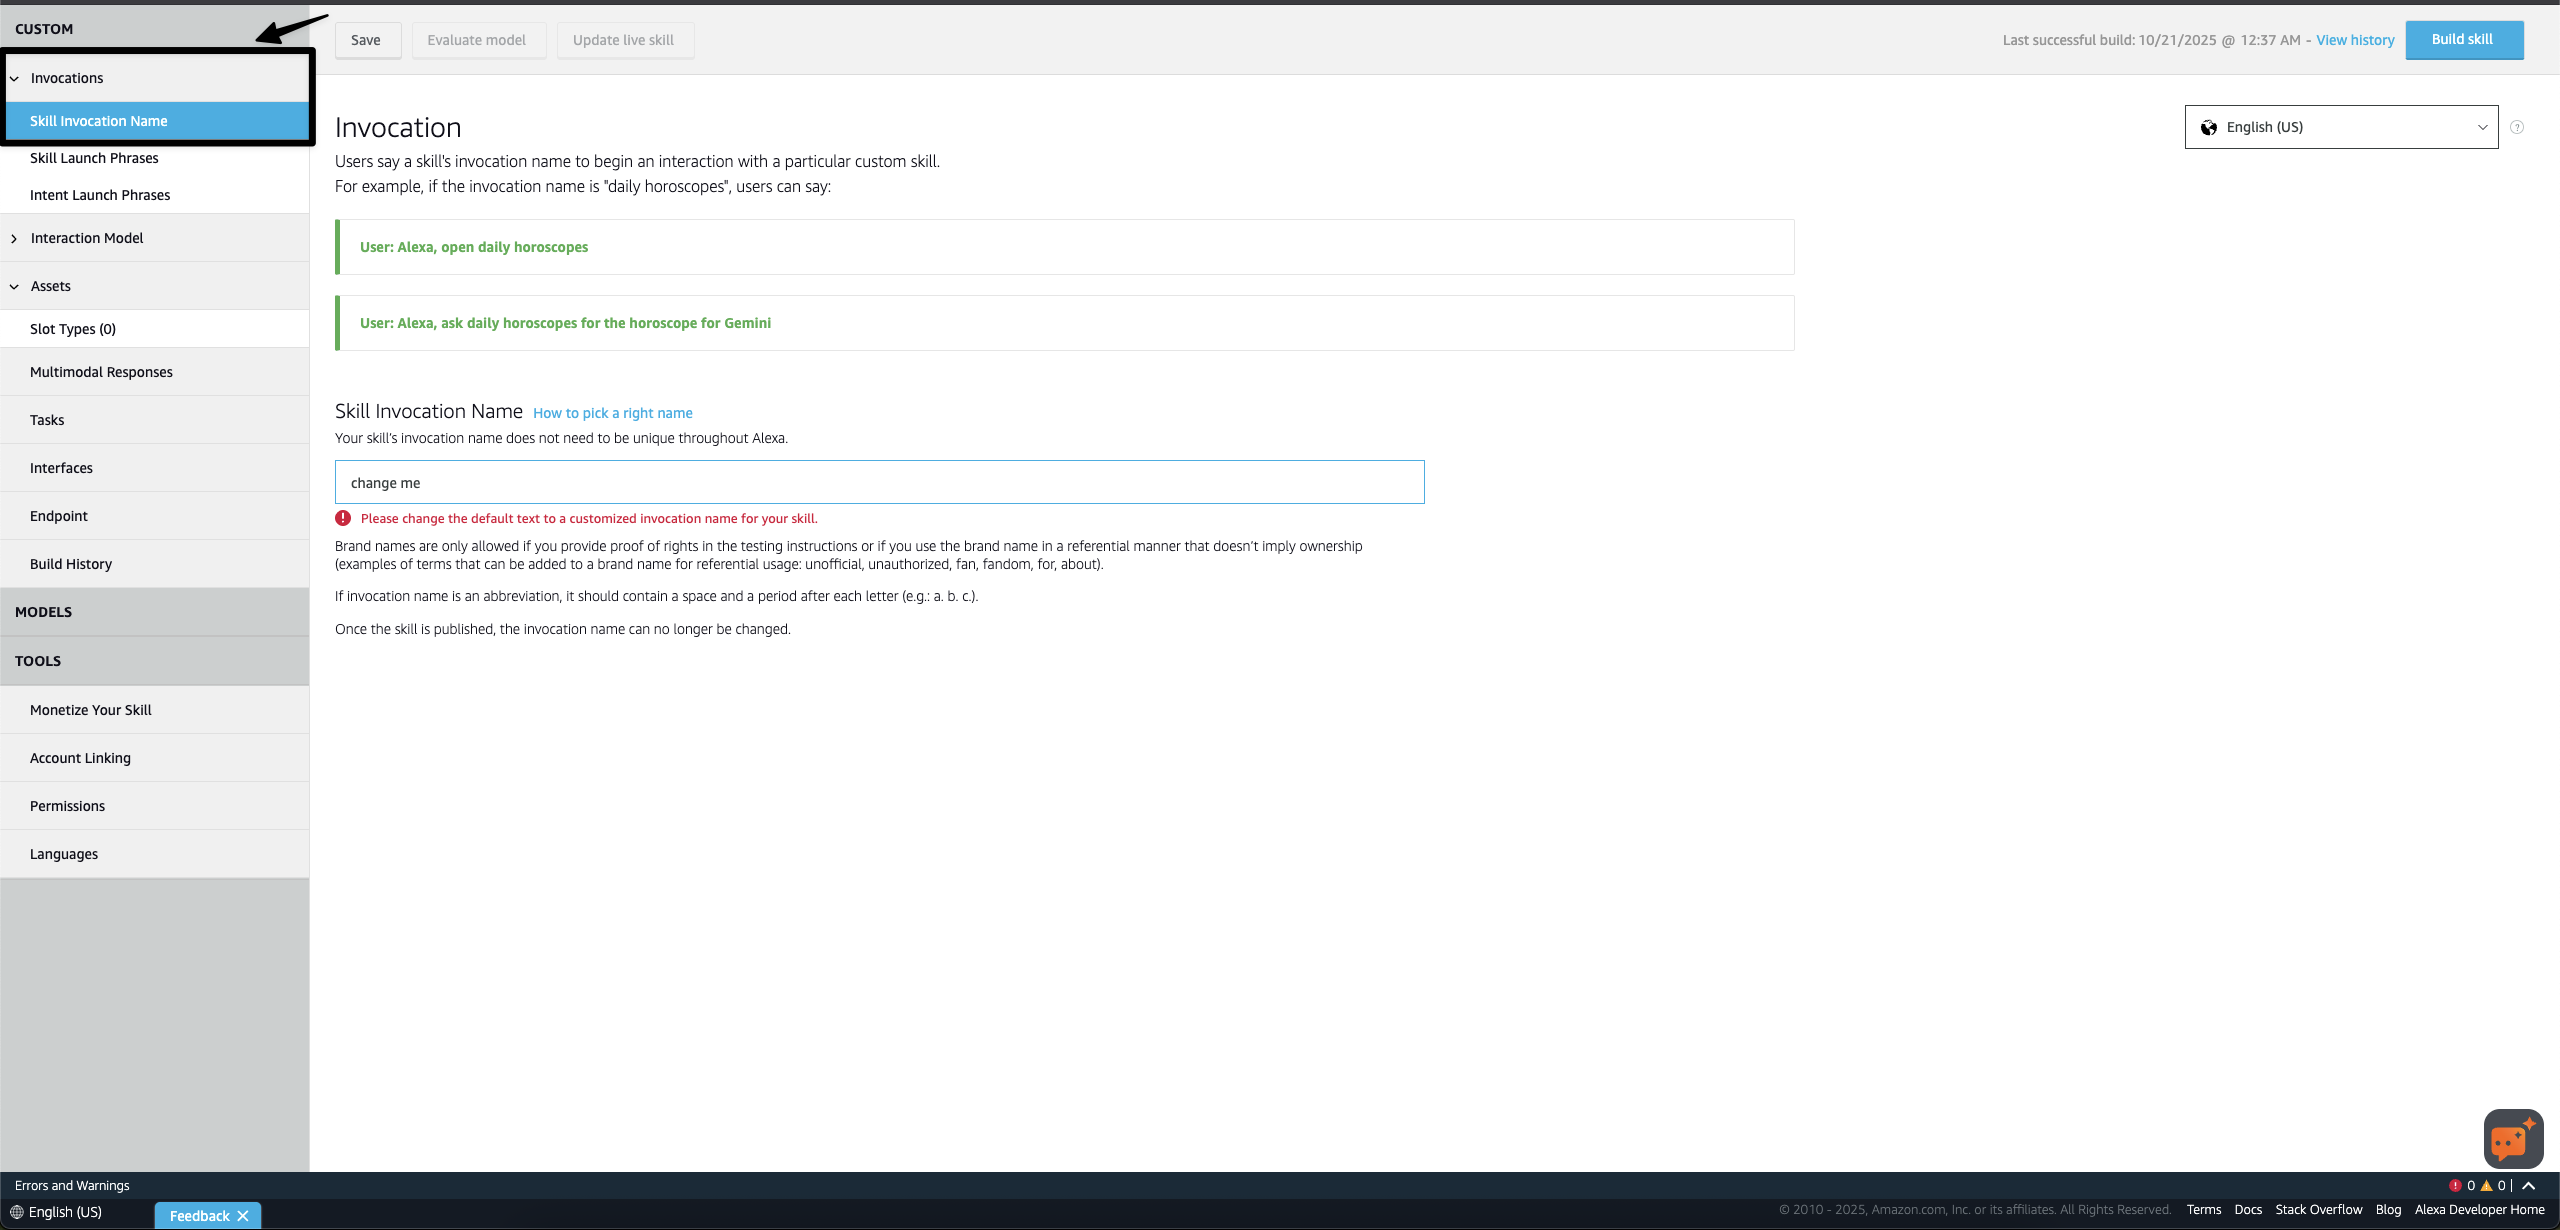
Choose a simple, memorable name for users to launch your skill.
- In the left sidebar, click the Invocation dropdown.
- Select Skill Invocation Name.
- In the Skill Invocation Name field, change "change me" to the phrase users will say to start your skill (e.g., "my agent"). This is how users will "open" your agent.
- Click Save Model.
Step 5: Add a Custom Intent for User Queries
This intent will capture everything the user says after they've opened your skill and send it to your agent.
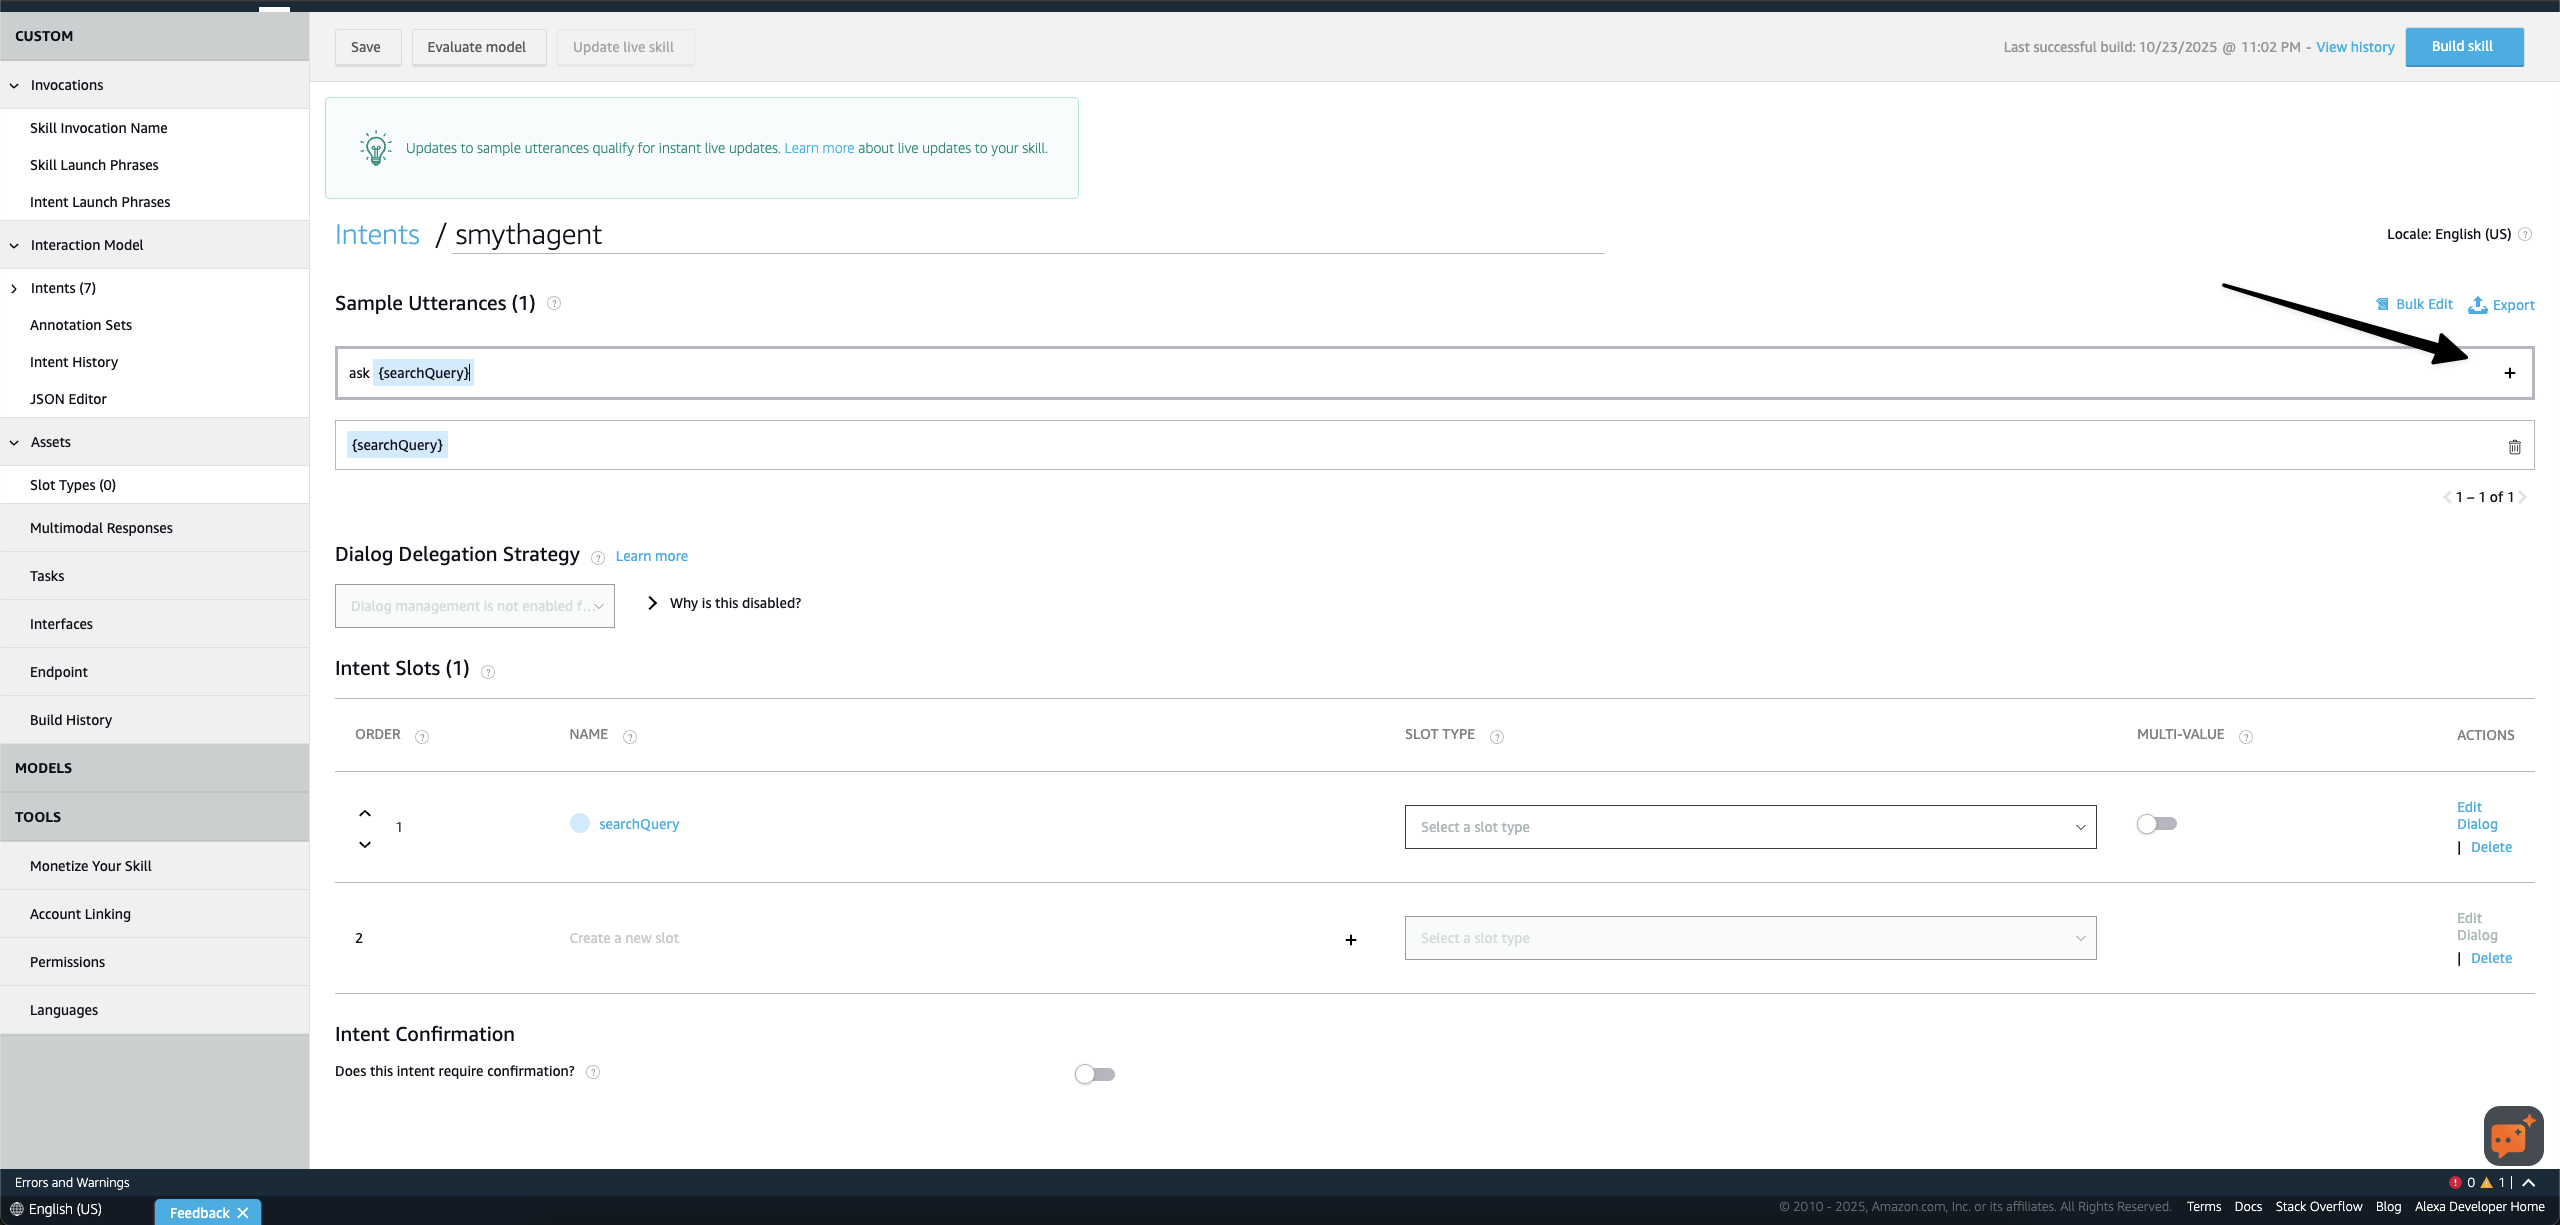
Configure the SmythOSAgentIntent with an AMAZON.SearchQuery slot to capture all user input.
- Navigate to Intents (under the "Invocation" section in the sidebar) and click Add Intent.
- Select Create custom intent.
- Name it
SmythOSAgentIntent. Click Create custom intent. - In the Sample Utterances section, add the following (press the '+' or Enter after each one):
- When you add the first utterance, Alexa will prompt you to create the
{searchQuery}slot. Click Create slot. - In the Intent Slots section below, find
searchQueryand set its Slot Type toAMAZON.SearchQuery. This built-in slot type is designed to capture free-form text. - Click Save Model.
Step 6: Build and Test Your Alexa Skill
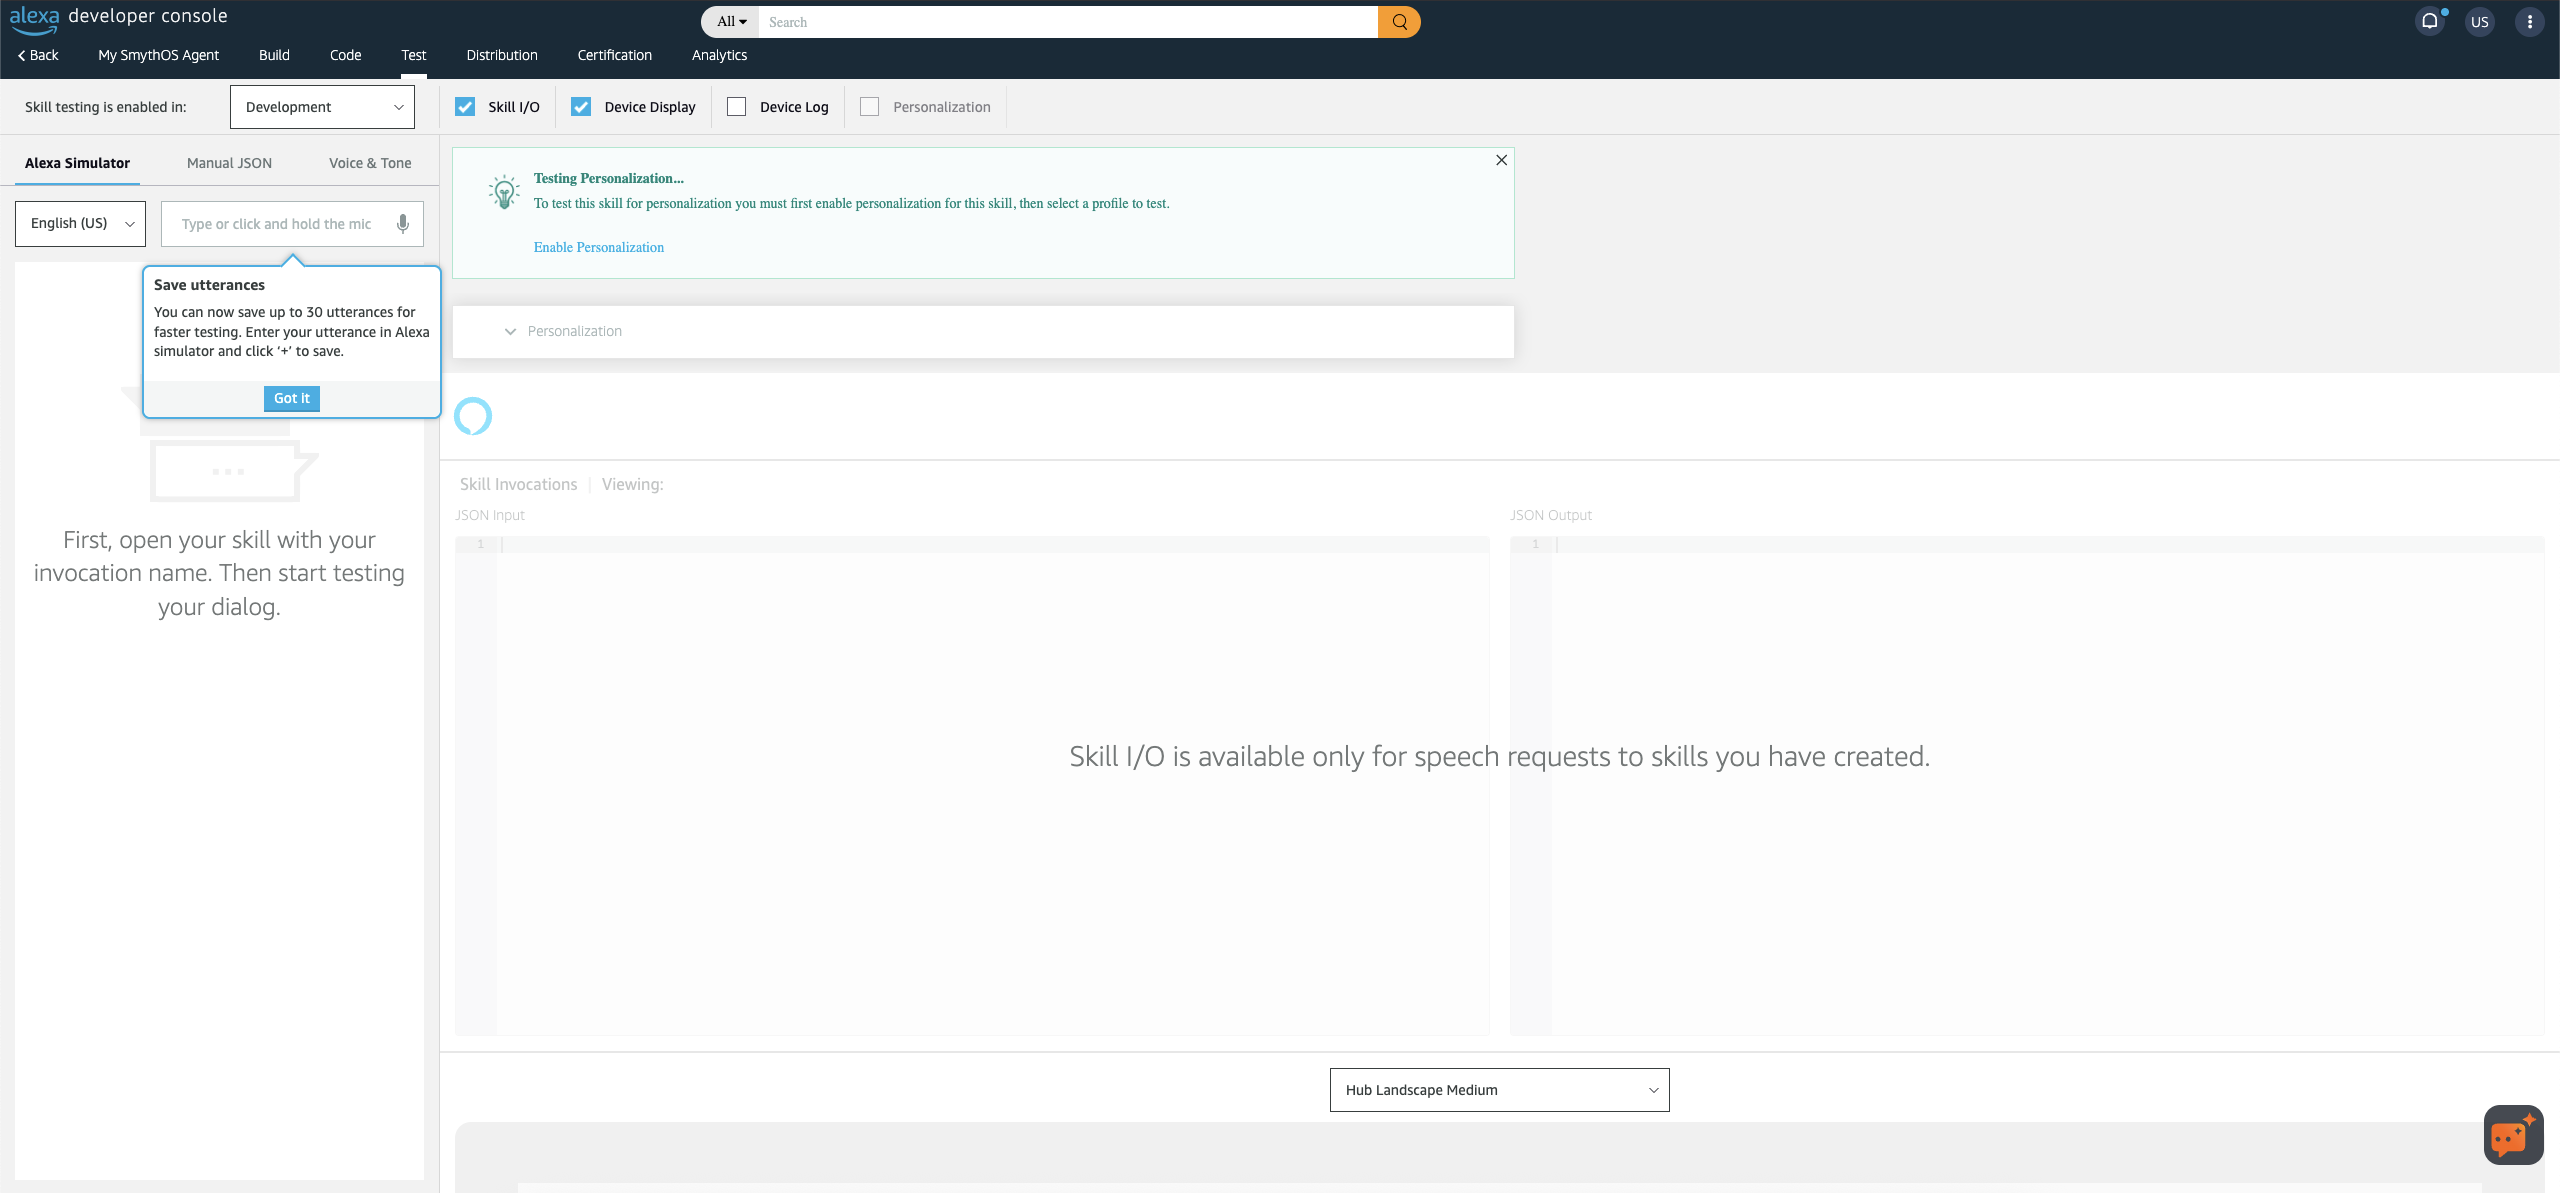
Use the Test tab to simulate speaking to your skill and see the JSON request and response.
- Click Build Model at the top of the page. This may take a minute or two to complete.
- Once the build is finished, open the Test tab at the top of the page.
- Enable testing by selecting Development from the dropdown (it might say "Off" by default).
- Try your invocation in the text box (or use your microphone):
Once the skill is open, you can ask your agent questions directly:
How Your Alexa-Connected Agent Works Behind the Scenes
- The invocation (
open my agent) "opens the channel" to your skill. - Everything you say after that is captured by the
SmythOSAgentIntentand packaged into the{searchQuery}slot. - Alexa sends this query to your SmythOS HTTPS endpoint.
- SmythOS processes the query with your agent's logic and returns a plain text response.
- Alexa reads that response aloud to the user.
Known Limitations and Constraints
- Only public agents without authentication are supported.
- Alexa has limits on the character count and length of spoken responses.
- Visuals, buttons, and complex UI (like cards) are not supported in this basic integration.
- By default, the skill session ends after each interaction.
Optional: Publish Your Alexa Skill to the Public
Want to go public?
- Open the Distribution tab in the Alexa Skills Kit (ASK) developer console.
- Fill in all the required information:
- Skill description and sample phrases
- Icons (108x108 and 512x512)
- Privacy Policy and Terms of Use URLs
- Submit your skill for certification.
What’s Next?
Now that your voice interface is live:
- Track usage and see incoming queries in your agent's Logs.
- Iterate on your agent's logic in SmythOS. You don't need to rebuild the Alexa model unless you change the invocation name or intents.
- Explore other deployment options like MCP or ChatBot.
Your agent just got its voice. What you do with it is up to you.