User Management
SmythOS lets you manage both people and compute. This page covers how to assign the right access through roles and permissions, and how to monitor usage and cost using the Analytics dashboard.
Roles and Permissions
Roles define what a user can see or do across SmythOS. They apply at both the space and organization levels. Use built-in roles or create custom ones in Organization Management.
Assigning Roles
You can assign a role:
- When inviting teammates to a space
- In Team Settings of a space
- From the Roles tab in Organization Management
Default Role Behavior
Unless configured, all new users are assigned the Super Admin role by default. You can change this default in Roles Settings.
Predefined Role Types
| Role | Scope | Best For | Description |
|---|---|---|---|
| Super Admin | Entire org | Founders, execs | Full control over everything |
| Admin | Per space | Team/project leads | Can manage agents and settings in their space |
| Editor | Agents & tools | Developers, builders | Can build and modify agents |
| Viewer | Read-only access | Reviewers, stakeholders | Can only view content |
Permissions Matrix
| Page | Super Admin | Admin | Editor | Viewer |
|---|---|---|---|---|
| Dashboard | ✓ Edit | ✓ Edit | ✓ Edit | ✓ View |
| Agent Settings | ✓ Edit | ✓ Edit | ✓ Edit | ✓ View |
| Agent Builder | ✓ Edit | ✓ Edit | ✓ Edit | ✓ View |
| Templates | ✓ Edit | ✓ Edit | ✓ Edit | ✓ View |
| Domains | ✓ Edit | ✓ Edit | ✓ Edit | ✓ View |
| Data Pool | ✓ Edit | ✓ Edit | ✓ Edit | ✓ View |
| Vault | ✓ Edit | ✓ Edit | ✓ Edit | ✓ View |
| Analytics | ✓ Edit | ✓ Edit | ✓ Edit | ✓ View |
| My Plan | ✓ Edit | ✓ View | ✓ View | ✓ View |
| Team Roles | ✓ Edit | ✓ Edit | ✓ View | ✓ View |
| Team Members | ✓ Edit | ✓ Edit | ✓ View | ✓ View |
Creating and Managing Custom Roles
You can build your own roles:
- Go to Organization Management → Roles tab
- Click Create Role
- Set permissions per category
- (Optional) Enable Manage Team
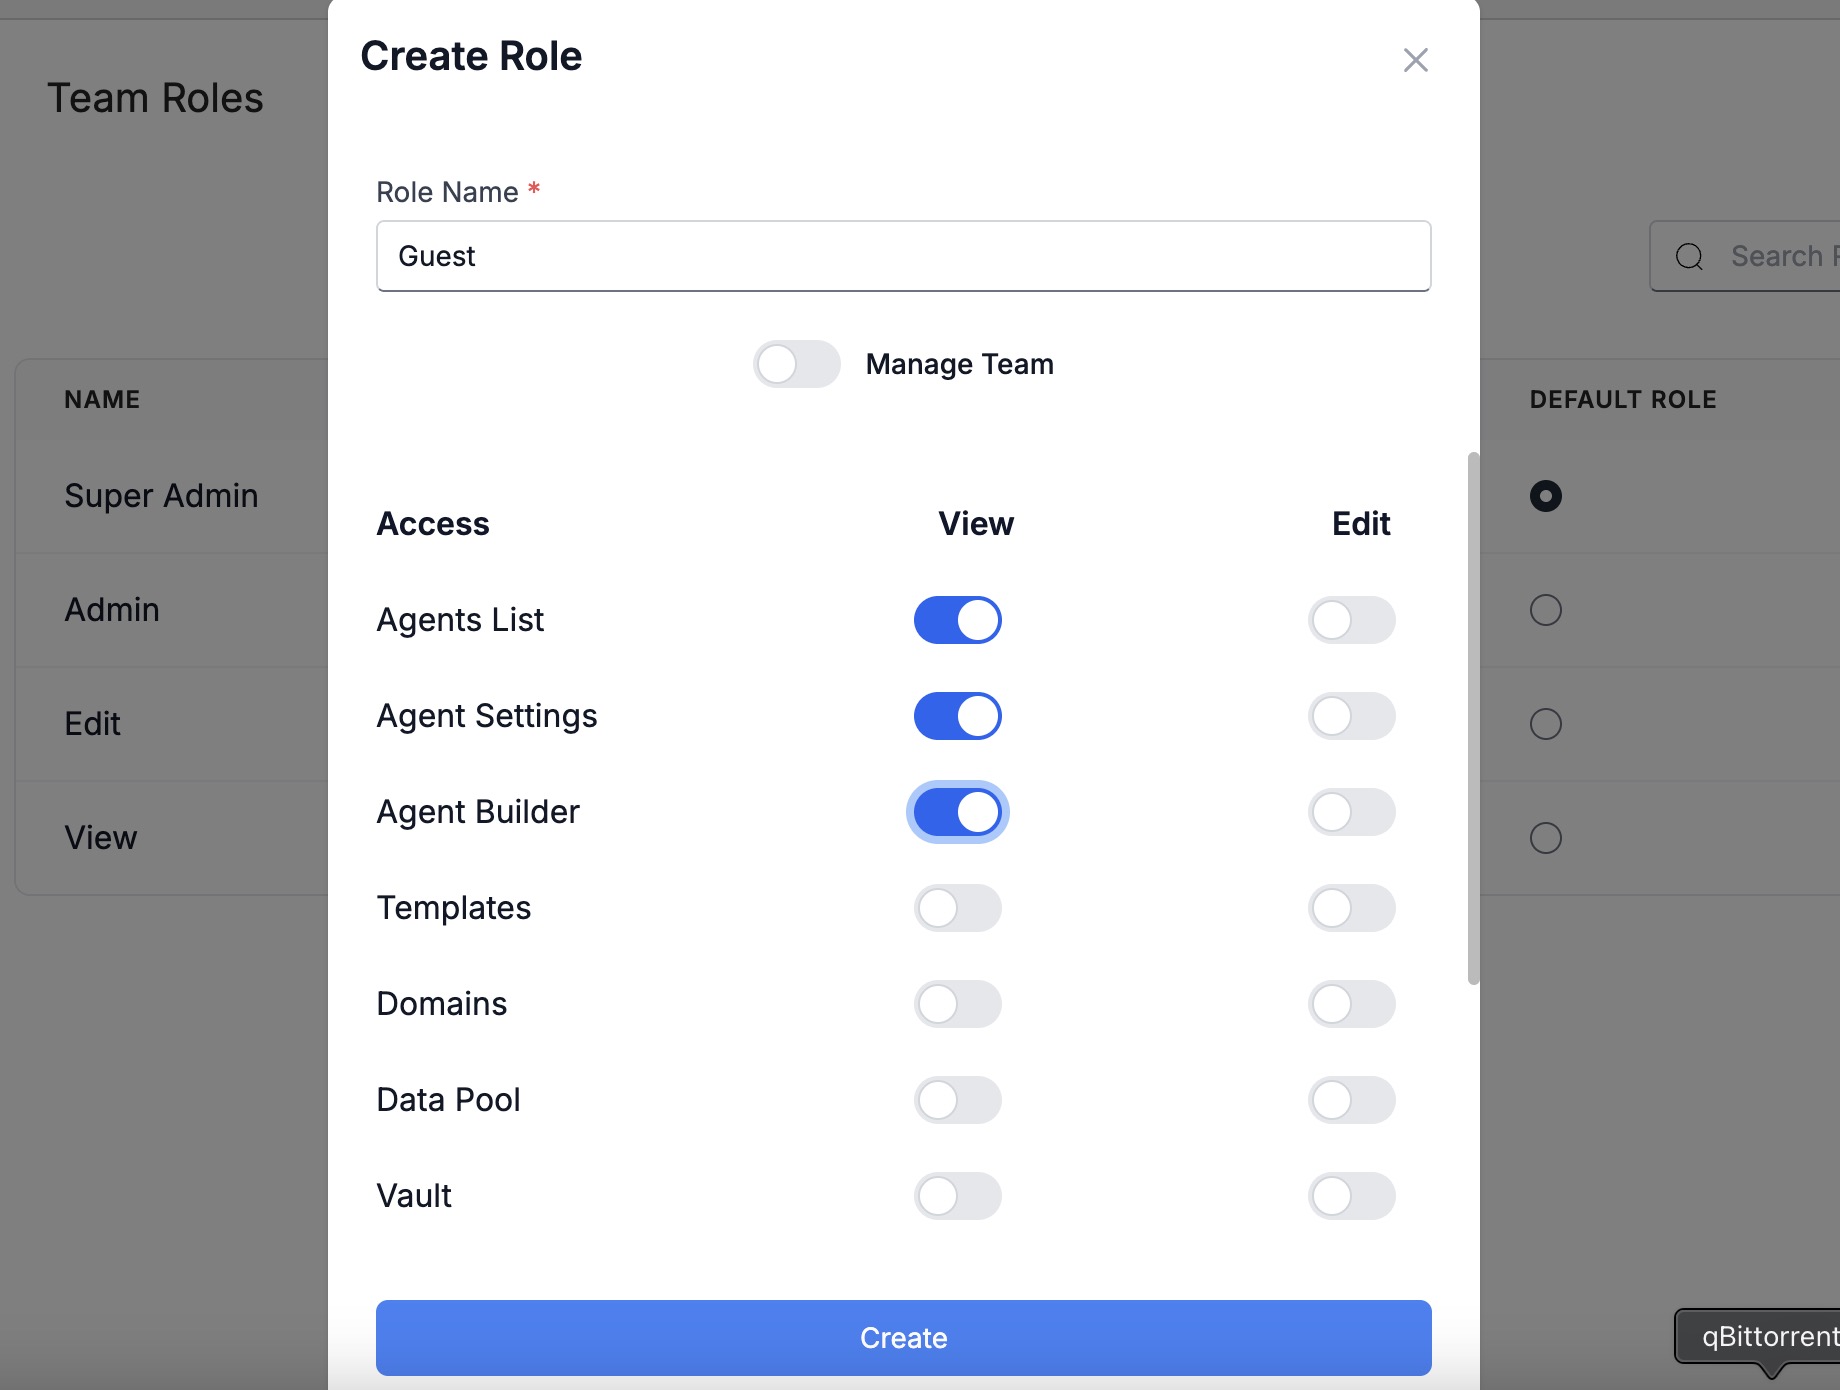
Customize role permissions for specific needs.
To update or delete a role:
- Use the Roles tab
- Select the role
- Click Edit, Set as Default, or Delete
Managing Team Invitations
You can view and manage all pending invites from the User Management screen. This includes tracking invite status, expiration, and taking actions like resending or deleting invites.
Viewing Pending Invites
Navigate to:
- User Management in the sidebar
- Select the Pending Invites tab next to “Team Members”
You’ll see a table showing:
| Column | Description |
|---|---|
| The invited user's email address | |
| Role | Role assigned during the invite (e.g. Super Admin) |
| Sent Date | When the invite was sent |
| Expires | Expiry date of the invite |
| Status | One of: Pending, Expired, or Accepted |
| Actions | Options to Resend or Delete |

Track and manage pending team invites from a single place.
Invite Expiration Behavior
Invites expire automatically after 7 days. If an invite is not accepted before expiration:
- The status changes to
Expired - The user will no longer be able to use the invite link
- You’ll need to resend or delete the invite
Resending or Deleting Invites
Hover over the icons in the Actions column:
| Icon | Action | Tooltip |
|---|---|---|
| 🔁 | Resend Invite | “Resend” |
| 🗑️ | Delete Invite | “Delete” |
Usage & Billing Analytics
The Analytics Dashboard helps you understand how agents consume compute: by task, cost, and performance.
Dashboard Overview
You’ll see:
- Total model usage (USD) for any date range
- Daily usage chart showing compute type breakdown

Spot trends and outliers at a glance.
Filter What Matters
Narrow results using filters at the top of the dashboard:
- Space — focus on one or view all
- Agent — track a specific agent
- Date — analyze by time period

Get context-specific cost and usage data.
Understanding the Usage Chart
Each bar = one day. Colors represent compute types:
| Color | Compute Type |
|---|---|
🟡 #FACC15 | Tasks |
🟢 #22C55E | Weaver |
🟢 #10B981 | LLM |
🔵 #3B82F6 | Tools |
🔴 #EC4899 | Code |
🟣 #8B5CF6 | Image Generation |

Hover to inspect daily usage by compute type.
Exporting Usage Reports
Click Export to download a .csv of usage based on selected filters. Great for monthly reporting or billing.
Optimizing Usage
- Use filters to find high-cost agents
- Investigate spikes in the chart
- Combine with Work Schedules to reduce off-peak runs
- Check Permissions to ensure agents aren't over-accessed
FAQs
How fresh is Analytics data?
It updates in near real-time. Tasks and costs appear moments after they run.
What if usage seems too high?
Use filters to zoom in on agent or space. Check:
- Agent logs
- Schedule triggers
- Volume of tasks
- LLM cost caps in your provider settings
Can I track usage across multiple orgs?
Not yet. Switch organizations to view each one’s data individually.
Can I see exact model pricing?
Yes. Visit Billing Management for full provider-based cost breakdowns.
Who can access Analytics?
Only Super Admins and Editors. Review roles here.